14 Affordable Home Upgrades That Look High-End
The home upgrades that look most expensive are almost never the ones that cost the most. They are the ones where the right decision was made about the right thing — where a modest investment was directed at the specific detail that the eye goes to first, the surface that is seen most frequently, or the functional element whose quality is felt every day.
These decisions require thought rather than expenditure, and the results they produce consistently outperform larger investments made without the same consideration of where visual quality is most directly available for the least amount of money.
The fourteen upgrades below each cost under $200 and most cost considerably less. Every one produces a result that reads as significantly more expensive than its actual cost and every one is achievable in a weekend without professional trades or specialist tools.
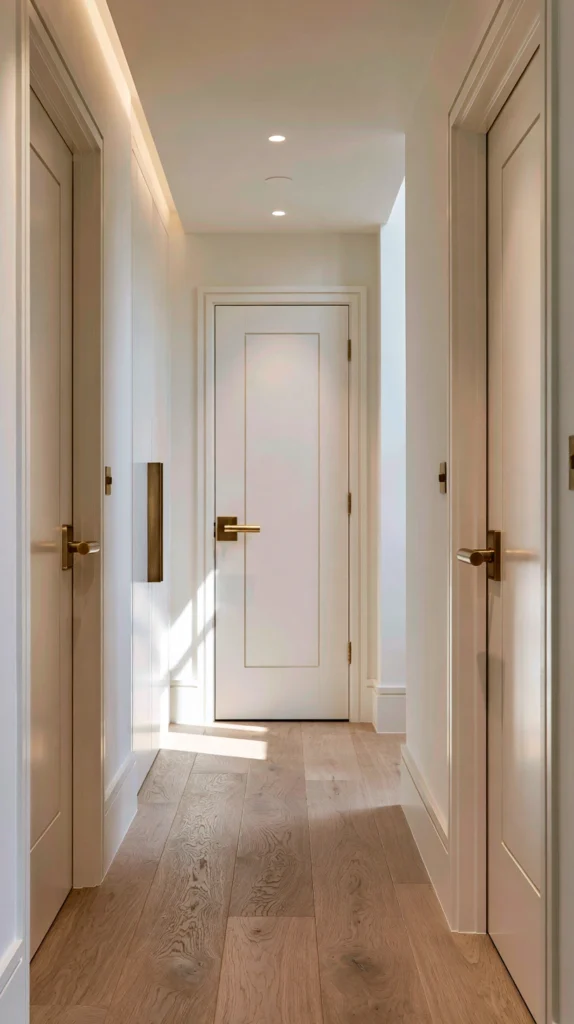
1. Replace Every Internal Door Handle
Budget: $80 – $200 for a full home
Internal door handles are the hardware the hand touches most frequently in any home and the detail that communicates more about a home’s finish quality than any other single element at the same price per unit. Standard builder-grade lever handles in chrome or polished nickel cost $8–$15 each and look exactly as they cost. Quality lever handles in brushed brass, antique bronze, or matte black cost $20–$50 each and communicate the quality of a home that has been finished with genuine attention to detail.
A standard three-bedroom home has twelve to sixteen internal doors at $240–$800 for a complete handle replacement in quality hardware. Replace all handles in a single session for consistency of finish — a home where half the doors have new handles and half have original builder hardware communicates an incomplete upgrade rather than a deliberate choice. The replacement itself takes ten minutes per door with a screwdriver and no specialist skill.
Upgrade tip: Match the door handle finish to every other metal finish in the same room — the light switches, the socket covers, and the lamp bases. A brushed brass door handle in a room with chrome socket covers creates a mismatched hardware palette that reads as assembled without reference to a coherent design intention. A consistent metal finish across all hardware in each room costs no more than a mismatched equivalent and communicates the specific quality of a home where every detail was considered in relation to every other.
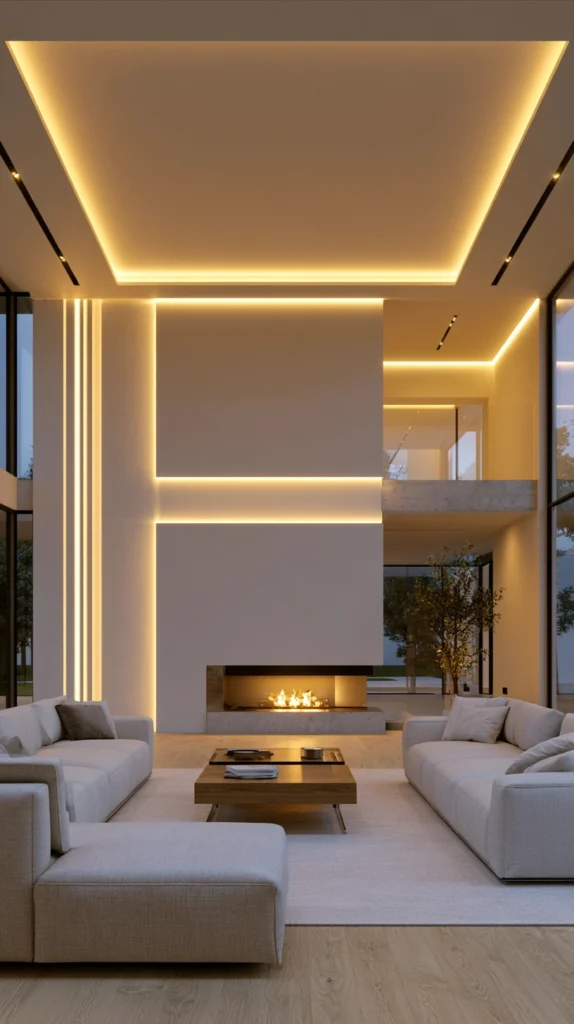
2. Install Dimmer Switches Throughout
Budget: $15 – $30 per switch
A dimmer switch converts every ceiling light in a home from a single flat output to a fully adjustable source capable of producing the right light level for every time of day and every activity. It is the most impactful single electrical upgrade available in any room for its cost — it changes not just the light level but the quality of the space itself, because a room at 30 percent dimmer output has a fundamentally different atmosphere from the same room at full output under identical furniture and decoration.
A standard dimmer switch costs $15–$25 and takes thirty minutes to install by replacing the existing single switch — the wiring connection is identical for most modern switch formats and the installation requires no specialist electrical knowledge beyond basic confidence with household electrics. Install dimmers on every living space ceiling light simultaneously — living room, dining room, bedroom, kitchen — for a full-home upgrade costing $90–$180 that changes the quality of every evening in every room from the first night after installation.
Upgrade tip: Verify that the existing light bulbs in each fitting are dimmable before installing dimmer switches. Standard LED bulbs are frequently not dimmable and will flicker, buzz, or fail entirely when connected to a dimmer circuit. Replace non-dimmable bulbs with specifically dimmable LED equivalents ($3–$8 each) at the same time as the dimmer installation — the combined bulb and dimmer upgrade cost per switch is $18–$33 and produces a room lighting system that works correctly from the first use.
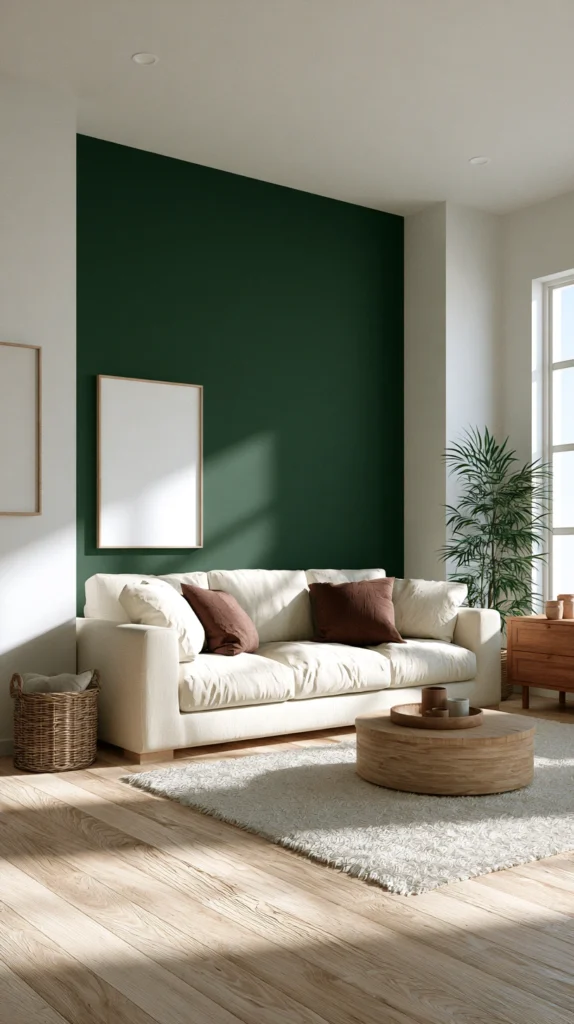
3. Paint One Wall in a Deep, Bold Colour
Budget: $20 – $50
A single boldly coloured feature wall — deep forest green, warm terracotta, navy, or charcoal — immediately transforms the character of any room from a standard painted interior to one that communicates a confident design decision. The bold wall makes the furniture in front of it look more deliberately placed, the art on it more specifically chosen, and the room as a whole more considered in its aesthetic than the same room with four identical neutral walls.
A 2.5 litre tin of quality paint covers a standard 4×2.5 metre wall in two coats and costs $25–$45. A feature wall requires no specialist skill beyond basic painting competence — preparation (filling any holes, sanding, applying primer if the wall is porous) takes one hour and the painting itself takes two to three hours for two complete coats. The total cost including primer and paint is $30–$60 for a room transformation that reads as significantly more expensive than it actually is.
Upgrade tip: Paint the wall behind the main piece of furniture in the room — behind the sofa, behind the bed’s headboard, or behind the dining table — rather than any other wall. The feature wall that serves as a backdrop to the room’s primary furniture creates the most effective composition in the room because the furniture and the wall colour are always seen together and the colour becomes the frame that makes the furniture read as specifically placed rather than simply present in the room.
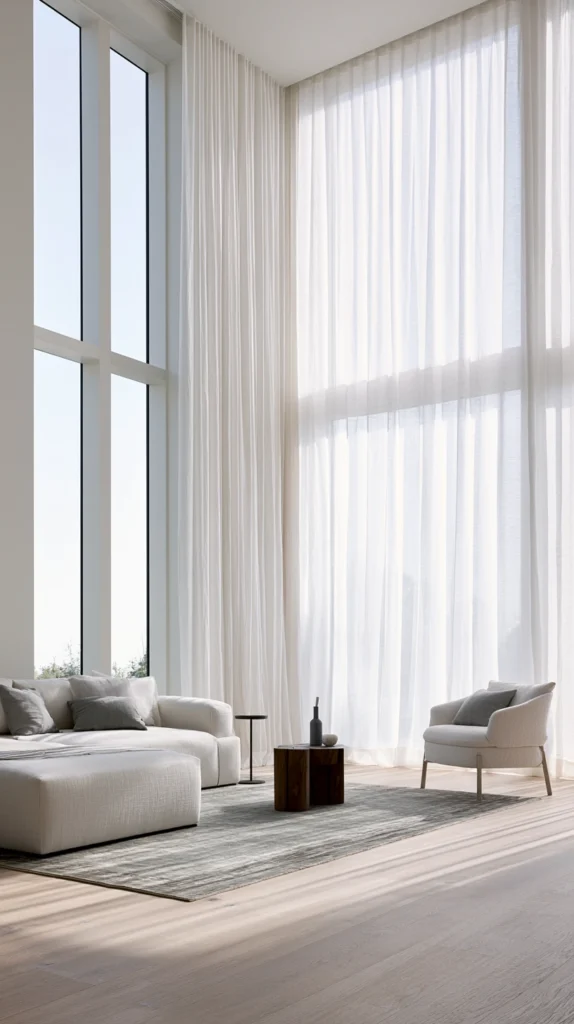
4. Hang Curtains From Ceiling Height
Budget: $30 – $80 per window
The height at which curtain track or pole is fixed — at window frame height or at ceiling height — is the single variable that most determines whether curtains look expensive or merely functional. Ceiling-height curtains make every window appear larger, every ceiling appear higher, and every room appear more generously proportioned than the same curtains hung at window-frame height. The fabric cost is identical. The effect is entirely different.
A ceiling-fixed curtain track costs $15–$40 per window. Moving an existing pole from window-frame height to ceiling height costs only the new pole bracket fixings ($5–$15) and the additional curtain fabric needed to fill the extra drop — typically $20–$60 per panel for quality fabric. This upgrade requires moving existing fixings and rehanging the curtains at the new height — a ninety-minute task that produces a result visible to everyone who enters the room as significantly more expensive and more designed than the original installation.
Upgrade tip: Allow curtains hung at ceiling height to puddle slightly on the floor — 3–5 cm of excess length pooling at the base — rather than trimming precisely to floor level. The slight puddle signals an abundance of fabric that reads as a specific luxury signal in any curtaining context. A precisely floor-length curtain at ceiling height is correct but formal. A slightly puddled curtain at ceiling height is correct and specifically beautiful — and the difference costs nothing beyond the willingness to leave the extra fabric length in place.
5. Update Light Switch and Socket Covers
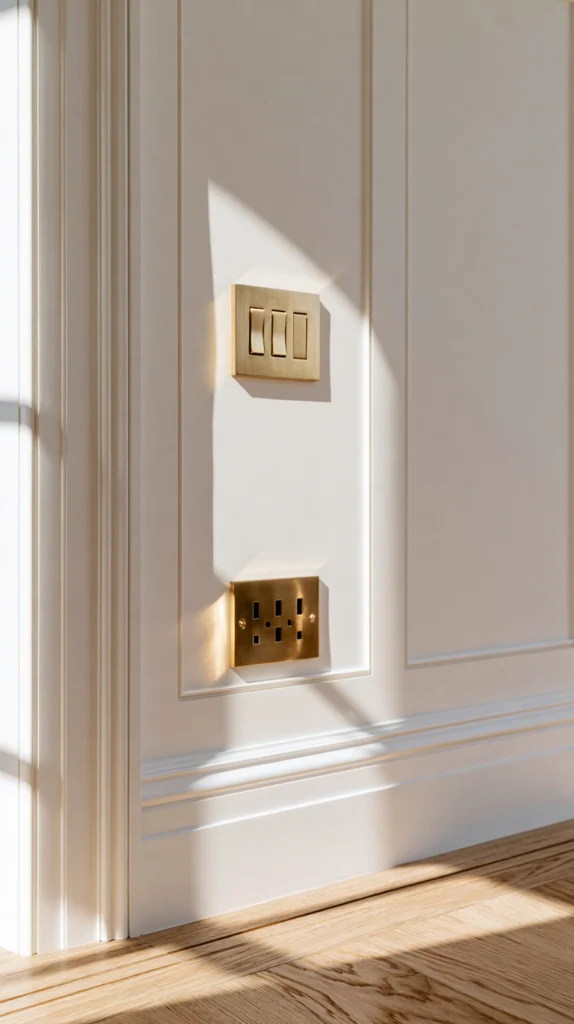
Budget: $60 – $180 for a full room
Standard white plastic socket and switch covers are the most consistently overlooked finish quality detail in any home and the one whose replacement produces the most disproportionate improvement in room quality relative to its cost. Quality socket and switch covers in brushed brass, polished nickel, or matte black cost $15–$40 per plate and are directly interchangeable with standard plates — the replacement requires removing two screws and refitting, with no electrical work beyond the plate swap.
A standard living room with four sockets and two light switches requires six new plates at $90–$240 for a complete room upgrade. The replacement takes thirty minutes in total and leaves a room whose wall surfaces — the most consistently seen surface area in any room — read as finished rather than standard. The quality socket cover is the detail that professionals and experienced design clients notice immediately in any interior photography and that most homeowners overlook entirely when assessing what makes a room look expensive.
Upgrade tip: Replace socket and switch covers with double-height plates wherever possible — double-height plates have a more substantial physical presence than standard plates and communicate quality through their proportional confidence. A double-height brushed brass socket plate costs $25–$45 and occupies the same wall position as a standard plate while reading as a specifically chosen architectural detail rather than a functional fitting installed without aesthetic consideration.
6. Add Architectural Moulding to Walls
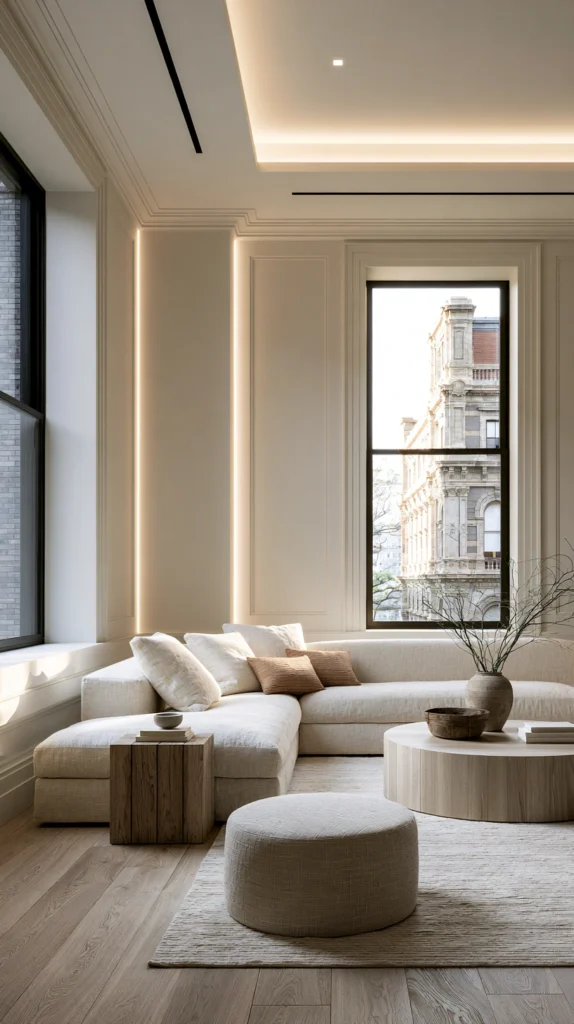
Budget: $30 – $120 per room
Applied wall panelling — MDF battens glued and pinned to the wall surface to create a framed panel effect — is the most accessible and most specifically expensive-looking DIY wall treatment available. A grid of battens at 40–60 cm spacing across the lower half of a wall creates the visual quality of Georgian panelling at a fraction of the cost of genuine moulded plasterwork, and when painted in the same colour as the wall surface it reads as an architectural feature of the building rather than an added decoration.
MDF battens of 18×44 mm profile cost $1–$2 per linear metre from timber merchants. A standard living room wall of 3×1.2 metre panelling height requires approximately 20 linear metres of batten at $20–$40 in materials. Mitre the corners with a hand mitre saw ($15–$30 to hire for a day), glue and pin to the wall with panel adhesive and a nail gun or hammer and finishing nails, fill and sand the joints, and paint in the wall colour. Total project cost: $35–$80 for a wall treatment that adds genuine visual architecture to any room in which it is installed.
Upgrade tip: Paint the wall and all applied battens in the same colour and the same finish — the monochromatic treatment makes the panelling read as a tonal shadow-and-surface composition rather than a decorative addition to the wall. Two colours — battens in one colour and wall in another — reads as applied decoration. One colour — everything in the same tone — reads as architecture. The architectural quality is always the more expensive-looking result at the same total material cost.
7. Install a New Bathroom Mirror With a Quality Frame
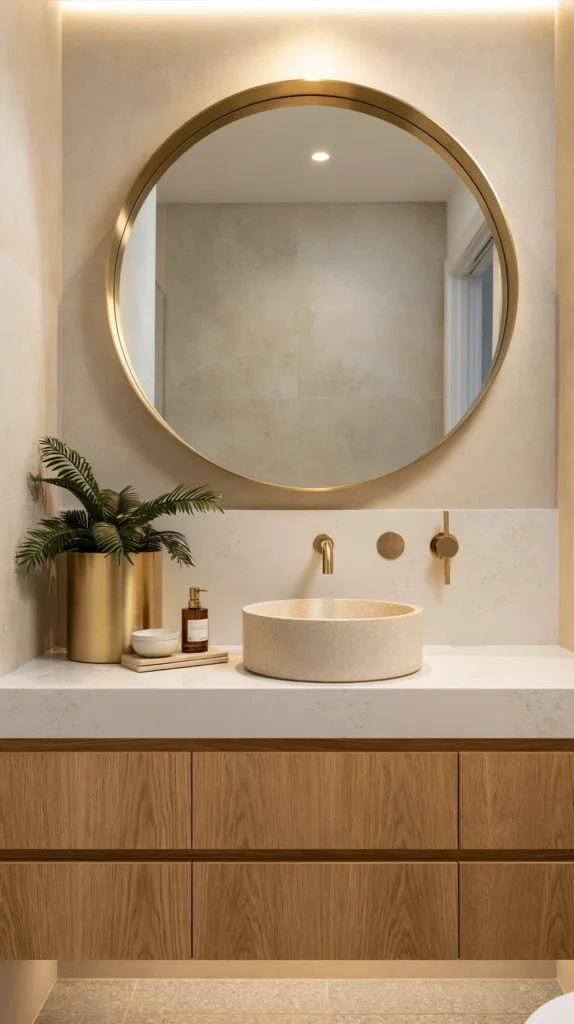
Budget: $40 – $150
A bathroom mirror with a genuinely well-designed frame — in solid timber, brushed brass, rattan, or plaster — replaces the unframed or builder-supplied mirror that reads as a functional fitting rather than a considered design element. The framed mirror transforms the bathroom from a room with functional fixtures into one that has been designed and finished with care, and it produces this transformation at a cost lower than almost any other single bathroom upgrade available.
A round mirror with a rattan frame of 60 cm diameter costs $40–$80. A rectangular mirror with a brushed brass frame of 60×80 cm costs $60–$150. An arch-top mirror with a simple timber frame costs $50–$120. Remove the existing mirror by warming its adhesive mount with a hairdryer before gently levering it from the wall — most builder-supplied bathroom mirrors are adhesive-fixed and release without damage to the tiles behind them. Install the new mirror using appropriate fixings for the mirror weight and the wall material behind the tiles.
Upgrade tip: Match the new bathroom mirror frame material to the existing or planned tap and towel bar finish — the dominant metal or natural material in the bathroom. A rattan mirror in a bathroom with chrome fittings creates a material mismatch that the mirror is not strong enough to carry alone. A brushed brass mirror in a bathroom with brushed brass taps creates a material coherence that makes both elements appear more specifically chosen and more specifically expensive than either does in isolation from the other.
8. Add a Quality Stair Runner
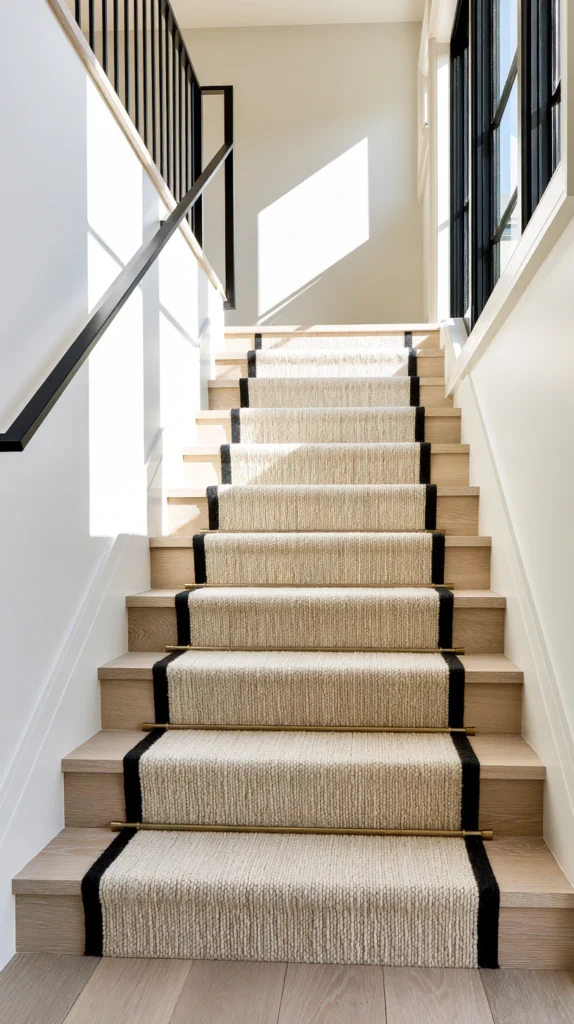
Budget: $100 – $400
A stair runner — a carpet runner fixed down the centre of an existing timber or painted staircase — is the home upgrade that provides the most visual transformation per linear metre of any surface treatment available. A bare timber staircase with a quality wool stair runner reads as significantly more finished, more considered, and more expensive than the same staircase without one, and the runner also addresses the practical concerns of noise, cold, and safety that bare timber stairs consistently present.
A quality wool or wool-blend stair runner in a simple stripe or geometric pattern costs $20–$60 per linear metre. A standard twelve-step staircase with a 25 cm rise requires approximately 5 metres of runner at $100–$300 in carpet. Stair rods in brass or nickel to hold the runner cost $5–$15 per rod. Professional fitting adds $100–$200. A DIY installation using stair rod clips and a staple gun takes a full day for a first attempt and costs $100–$300 in runner and fixings without professional labour.
Upgrade tip: Choose a stair runner in a pattern that reduces in scale at the shorter dimensions — a stripe running along the length of the runner rather than across its width, or a small geometric that reads correctly at the 60–70 cm width of a standard stair runner. A large pattern that is cropped by the runner’s width looks unresolved. A stripe or a small-repeat pattern fills the narrow runner width correctly and looks specifically chosen for the application rather than cut from a wider carpet that was never intended to be seen at stair runner proportions.
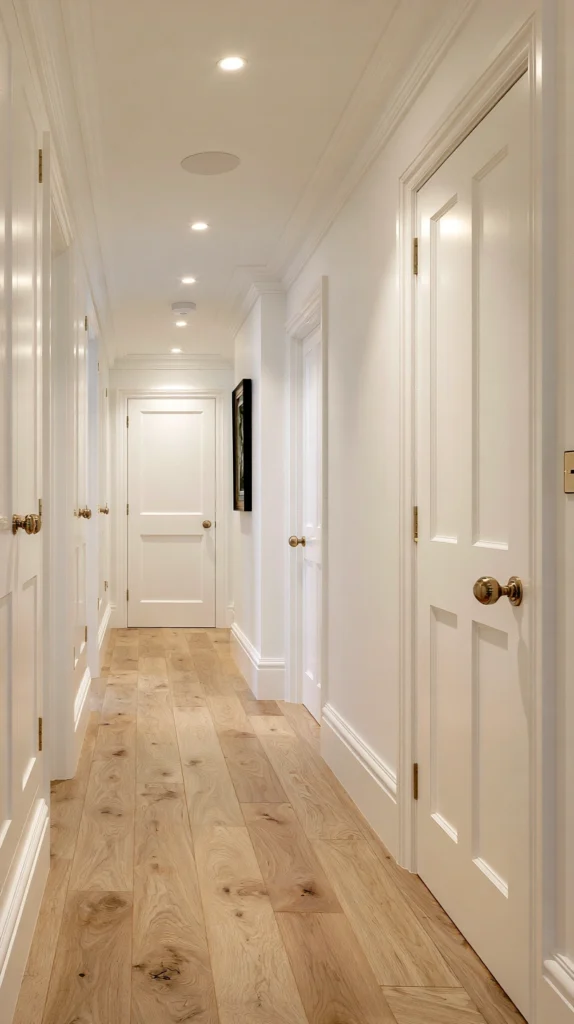
9. Replace Internal Doors With Panel Doors
Budget: $80 – $200 per door
Hollow core flush doors — the standard internal door in most domestic construction since the 1970s — are the most consistently visible quality signal that a home has not been finished to a high standard. Replacing them with solid or solid-core panel doors in a Victorian, Edwardian, or contemporary flat-panel format immediately changes the quality message that every internal transition in the home communicates. Panel doors read as quality. Flush hollow doors read as builder-grade.
A solid timber four-panel door in a Victorian format costs $80–$180 per door. A flat two-panel contemporary door costs $60–$150. A solid-core door — composite construction with a solid feel and sound — costs $80–$200. Door hanging requires a competent DIYer with a plane, a chisel, and a drill, or a carpenter at $80–$150 per door including hardware. Begin with the most visible doors — the front reception room, the main bedroom, the bathroom — before replacing all doors throughout the home.
Upgrade tip: Paint new panel doors in a colour that contrasts with the wall colour rather than matching it — a dark door in a light room, or a light door in a dark room. A contrasting door colour frames each doorway as an architectural element and creates a composition at each opening between rooms. A matching door colour makes the door disappear into the wall surface and wastes the opportunity that a panelled door provides to create a specific design moment at the most frequently passed-through threshold in any domestic interior.
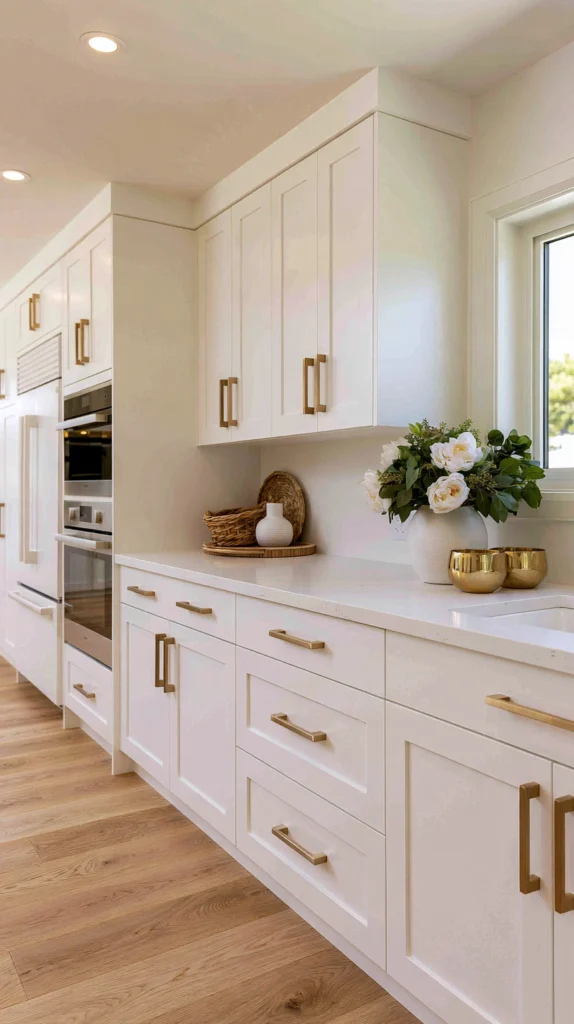
10. Upgrade the Kitchen Cabinet Hardware
Budget: $60 – $200
Replacing kitchen cabinet handles with quality hardware is the most cost-effective kitchen upgrade available — higher return per pound spent than any appliance, worksurface, or full cabinet replacement. New handles change the character of the kitchen immediately and completely while requiring only a screwdriver and thirty minutes of installation time. A kitchen that reads as dated because of its chrome bar handles becomes a kitchen that reads as considered and current with brushed brass cup pulls or matte black T-bar handles in the same time and at a fraction of the cost of any other improvement to the same kitchen.
Brushed brass cup pulls cost $8–$18 each. Matte black bar handles run $6–$15 each. Cast iron knobs cost $4–$10 each. A standard kitchen of fifteen cabinets and ten drawers requires twenty-five handles at $150–$450 total. Replace all hardware in a single session — a kitchen where half the cabinet handles have been replaced and half remain original reads as an incomplete upgrade. The consistency of the hardware across the complete kitchen is what makes the upgrade read as a deliberate design decision rather than a partial improvement.
Upgrade tip: Measure the existing handle hole centres — the distance between the two fixing screw holes — before purchasing replacement handles. Standard kitchen handles are available in 64 mm, 96 mm, 128 mm, and 160 mm hole centre spacings, and replacement handles must match the existing hole centres to fit without drilling new holes. Drilling new holes through cabinet front surfaces requires filling the old holes, which adds painting or touch-up work that the straightforward handle swap was specifically intended to avoid.
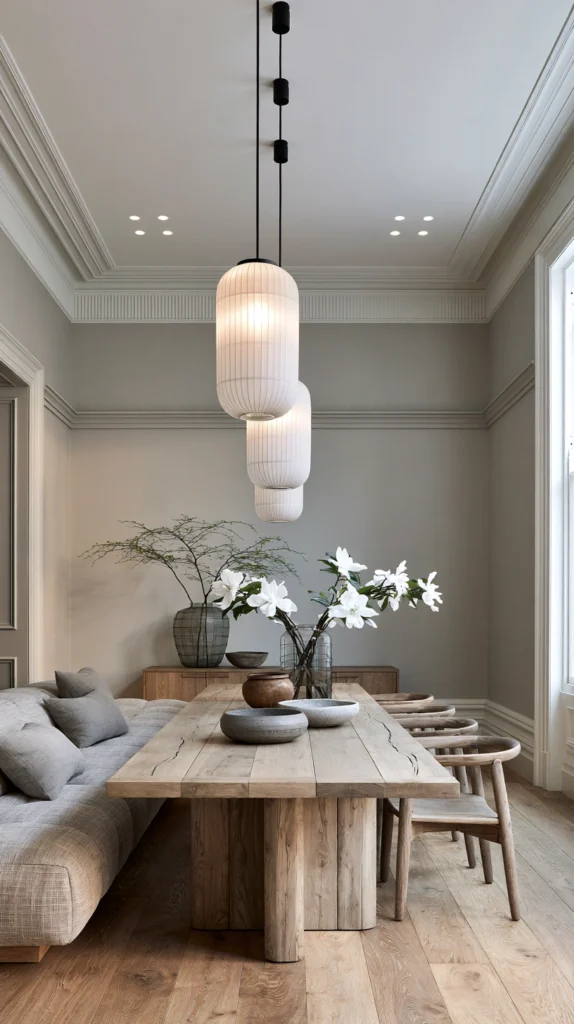
11. Add Cornicing or a Picture Rail
Budget: $40 – $150 per room
Installing coving or a picture rail at the wall-ceiling junction creates the architectural detail that most clearly distinguishes a properly finished room from a basic box with painted surfaces. Coving and picture rails are the equivalent of a hem on a garment — their presence is noticed subconsciously as correct and their absence is noticed as something missing from the room’s finish quality. A room with coving always reads as more finished and more considered than the same room without it regardless of every other decorating decision made within it.
Lightweight polystyrene coving costs $2–$5 per linear metre and applies with a specialist coving adhesive ($8–$15 per tube) in an afternoon of careful installation. A standard living room perimeter of 14 linear metres costs $28–$70 in coving and adhesive. MDF picture rail costs $2–$4 per linear metre plus fixing cost. A room with both coving at the ceiling and a picture rail at 2.1 metres height has the complete period architectural detail that the most admired Victorian and Edwardian interiors possess — available in any room at under $100 in materials.
Upgrade tip: Paint newly installed coving in the ceiling colour rather than in white if the ceiling is a colour other than white. Coving painted the same white as a white ceiling simply completes the ceiling surface — correct but visually undramatic. Coving painted the ceiling colour in a room with coloured walls creates a specifically beautiful detail where the coloured wall meets the white ceiling through a coloured transitional band — a sophisticated and relatively unusual finish that reads as specifically designed rather than standard.
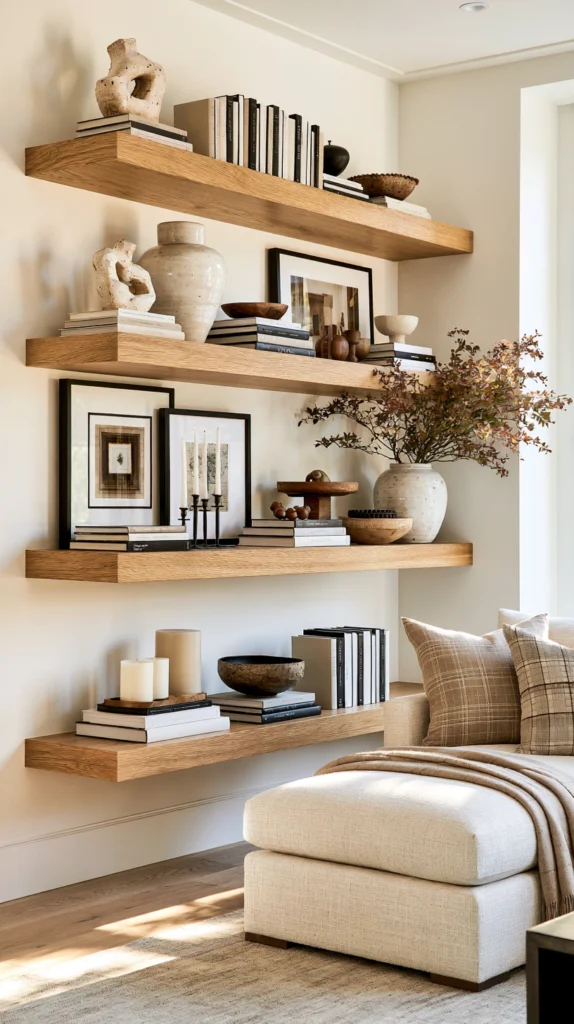
12. Style Every Shelf With Intention
Budget: $0 – $50
The shelves in any home communicate more about the quality and the personality of the interior than any single piece of purchased furniture — they reveal the household’s relationship with books, with objects, with visual organisation, and with the specific quality of attention that a carefully arranged shelf signals. A well-styled shelf in a home of modest furnishings looks more expensive and more designed than a poorly arranged shelf in a home of excellent furniture. The styling costs almost nothing. The quality it communicates is significant.
Apply the following to every bookshelf in the home: remove everything from the shelf, retain only what would be placed back if the shelf were being styled for the first time rather than maintained as it accumulated over time, group books by spine colour rather than by subject or author, alternate vertical book stacks with horizontal stacks topped by one small object, and leave 30–40 percent of each shelf surface as deliberate negative space. The objects that return to the shelf should be genuinely good — interesting in form, material, or meaning — rather than simply present because they were already there.
Upgrade tip: Turn books with particularly strident spine colours — vivid red, bright orange, heavily designed commercial covers — face-inward so only the page edge is visible. The smooth, consistent white or cream of the book’s edge pages reads as clean and neutral from the room’s main viewpoint. The same book displayed spine-out creates a colour interruption in the shelf arrangement that draws attention to the individual book rather than contributing to the overall composition of the shelf as a designed display surface.
13. Add Quality Towels and a Bathmat to the Bathroom
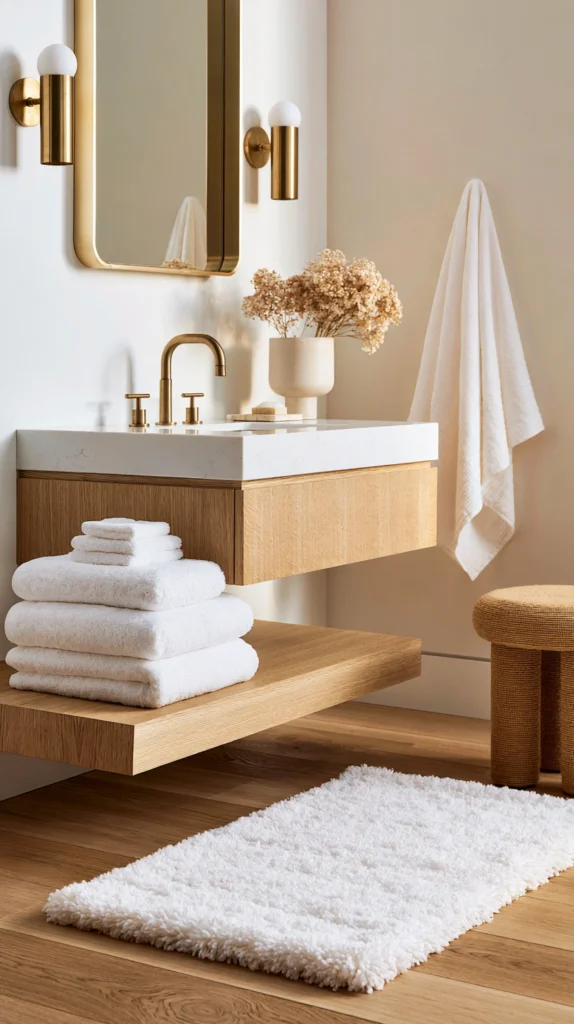
Budget: $60 – $150
The bathroom is the room whose quality is most directly experienced through touch — the towel used after every shower, the bathmat underfoot every morning — and where the quality of the textiles communicates the household’s standard of domestic care more immediately than any surface, fitting, or decorative element in the same room. A bathroom with thin, pilling, faded towels reads as a room that has not been thought about regardless of how well everything around them is designed and maintained.
A pair of quality 700gsm Turkish cotton bath towels costs $25–$60 each. A matching hand towel costs $15–$30. A good quality cotton bathmat costs $20–$50. Replace all bathroom textiles simultaneously rather than individually — a bathroom where some towels are new and some are old reads as inconsistently maintained rather than deliberately upgraded. Choose white or warm cream exclusively — white towels launder to a higher standard than coloured ones and maintain a hotel-quality appearance through significantly more wash cycles before replacement is required.
Upgrade tip: Wash new towels twice before first use without fabric softener. Fabric softener coats the cotton fibres of new towels and reduces their absorbency — the paradoxical result of trying to make towels softer is towels that feel good but do not dry effectively. Two washes without softener allow the cotton fibres to open fully, which produces towels that are both softer and more absorbent than the same towels washed with softener from the first use — and which maintain both qualities for significantly longer through subsequent washes.
14. Add Fresh Flowers to a Key Room Weekly
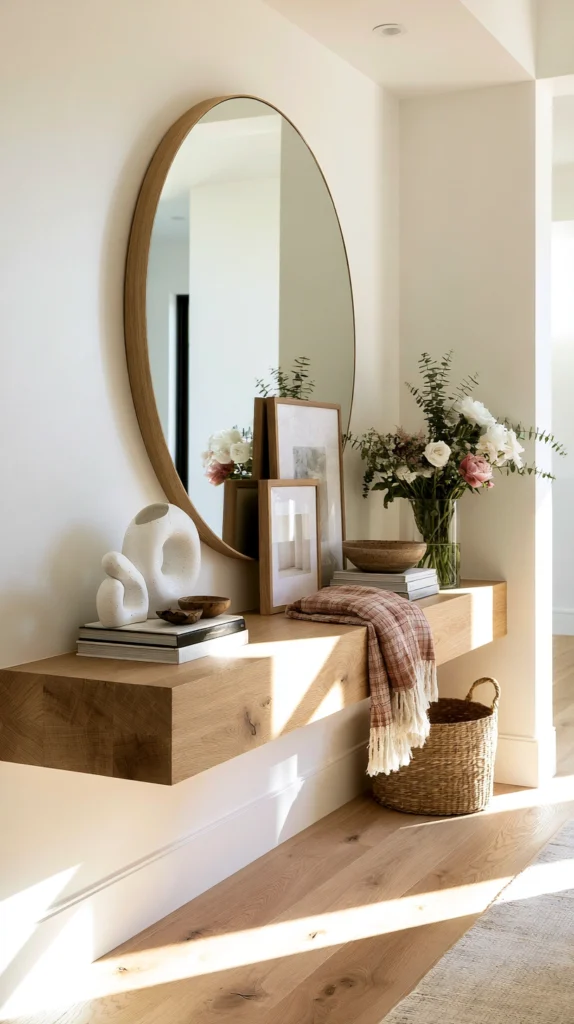
Budget: $5 – $15 per week
A weekly fresh flower stem or small bunch in one specific position in the home — the kitchen table, the entry console, the bathroom windowsill — creates a quality of habitation and care that no permanent decoration provides. Fresh flowers communicate that the home is actively maintained and enjoyed rather than simply occupied, and they change the room’s atmosphere in a specific and immediately noticeable way from the day they arrive to the day they are replaced. No single weekly expenditure of $5–$15 produces a comparable return in the quality of the home experience they provide.
A single stem of a quality flower — a garden rose, a stem of peonies, a branch of blossom — placed in a simple bud vase costs $3–$8 and lasts five to ten days. A small bunch of seasonal flowers costs $5–$15 and provides the same five to ten day display at a larger scale. The consistency of a weekly fresh flower habit — replacing last week’s display with a new one on the same day each week — creates the rhythm of a maintained and loved home that is visible to anyone who visits and experienced by everyone who lives within it through every day that the flowers are fresh and present.
Upgrade tip: Cut stems at a 45-degree angle and change the water every two days to maximise the vase life of any cut flower. A 45-degree cut provides the largest possible surface area for water uptake. Fresh water every two days prevents the bacterial growth that blocks the stem’s water uptake ability and causes flowers to wilt days before they would otherwise reach the end of their natural vase life. These two practices together extend the display period of most cut flowers by three to four additional days beyond their untreated vase life.
The home upgrades that look most expensive are always the ones that address the surfaces and details that are seen and touched most frequently — the door handle used thirty times a day, the bathroom mirror seen every morning, the curtain visible from every seated position in the room, the towel used after every shower.
These are the details whose quality is felt and registered most often and whose improvement communicates the most directly and the most persistently that this home has been thought about and cared for. They are also consistently the least expensive improvements available relative to the frequency and the directness with which their quality is experienced.
Choose one detail from this list — the one whose current quality most consistently and most specifically undermines the overall impression of your home — and improve it this weekend. Then choose the next one. The home that improves one specific, well-chosen detail at a time always arrives at a higher overall quality faster and more efficiently than the one that attempts comprehensive renovation without the same clarity of priority.