14 Clever Small Kitchen Organization Ideas
A small kitchen is not organised differently from a large one in principle — only in the degree of consequence when each principle is applied or ignored. In a large kitchen a poorly organised drawer is an inconvenience.
In a small kitchen the same drawer, repeated across five or six poorly organised equivalents, makes the kitchen effectively non-functional for the family that depends on it daily.
Small kitchen organisation is not about aesthetics — it is about the specific discipline of finding the right place for every object and returning every object to its right place after each use. When that discipline is applied consistently, a small kitchen performs at the level of a kitchen twice its size.
The fourteen ideas below are the specific organisational interventions that most directly improve a small kitchen’s function and usability — each one grounded in the practical reality of a working kitchen rather than in the aspirational aesthetics of a kitchen staged for photography.
1. Vertical Dividers for Baking Trays and Boards
Budget: $15 – $50
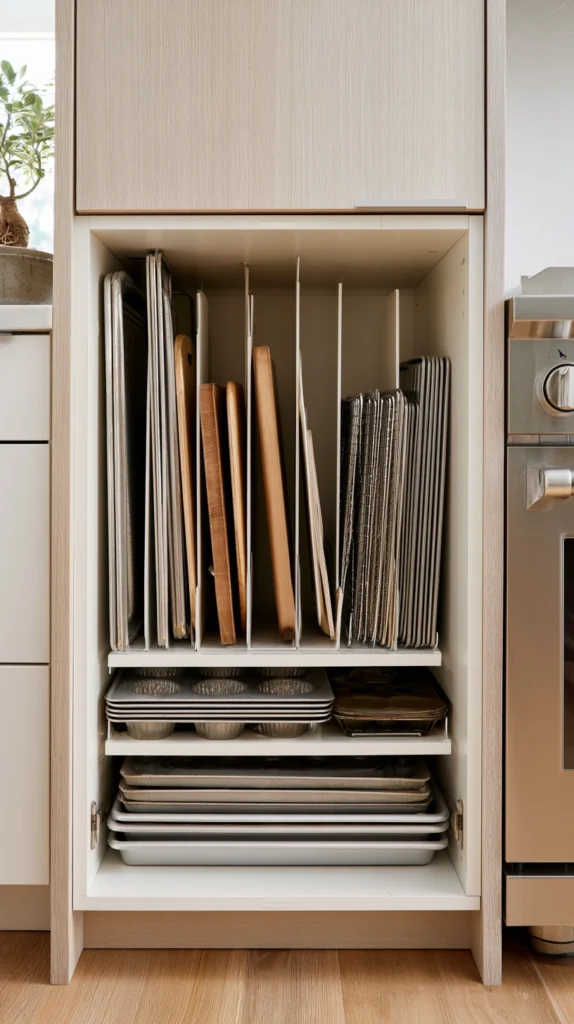
Baking trays, roasting tins, chopping boards, and cooling racks stored horizontally in a cabinet require the removal of every item above the required piece to access the one at the bottom — making the whole category effectively inaccessible in daily use and encouraging the habit of always using whatever is on top rather than the most appropriate piece for each task. Vertical dividers convert the same cabinet space into individually accessible slots where each piece is retrieved and returned without disturbing any other.
A metal wire vertical divider set for kitchen cabinets costs $15–$30. A custom timber version in an existing cabinet costs $20–$50 in materials. Install in the cabinet directly beside or below the oven — the most frequently needed location for baking trays in any kitchen. The vertical storage approach converts a cabinet that was practically inaccessible into one where every piece is retrieved in under three seconds — the most immediate and most measurably functional single kitchen organisation improvement available at any budget level.
Organisation tip: Label the front edge of each vertical slot with a simple tape label describing what belongs in it — SHEET TRAYS, MUFFIN TINS, CUTTING BOARDS. The label makes returning items to the correct slot a mindless habit rather than a decision, which is the organisational quality most likely to be maintained through a busy kitchen week rather than abandoned within days of the system’s installation. Organisation systems without labels are rediscovered and used. Organisation systems with labels are maintained as habits.
2. A Pull-Out Bin Cabinet
Budget: $50 – $200
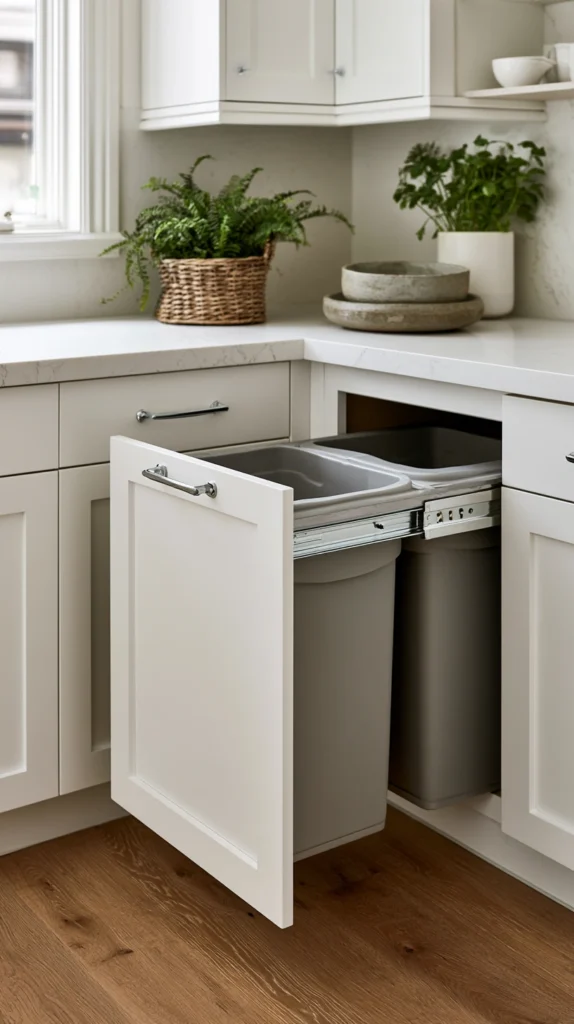
A pull-out bin system — a cabinet fitted with a sliding frame that holds two bins (one for general waste, one for recycling) — removes the bin from the kitchen floor and the bin bag from the under-sink mess and places waste management within a cabinet at waist height, out of sight when the door is closed, and immediately accessible for the disposal movements that happen dozens of times daily in any working kitchen. The single change of moving the bin from the floor to a pull-out cabinet improves the kitchen’s appearance, its hygiene, and its functional flow simultaneously.
A retrofit pull-out bin frame for a standard 45 cm wide base cabinet costs $50–$120. A freestanding pull-out bin trolley costs $40–$100 and requires no cabinet modification. The pull-out frame installs inside an existing cabinet using four screws and takes thirty minutes with a screwdriver. Choose a frame rated for the combined weight of two full bins — approximately 8–12 kg — rather than a lighter-rated version that may sag under full load and prevent smooth operation of the sliding mechanism after the first few weeks of daily use.
Organisation tip: Place the recycling bin closest to the cabinet door opening and the general waste bin deeper in the cabinet. Recycling bins are opened more frequently than general waste in most households (cans, bottles, and packaging are recycled before contents are consumed) and the accessible front position suits the higher-frequency use. The arrangement also keeps the messier general waste bin slightly further from direct contact during the most common disposal movements at the cabinet opening.
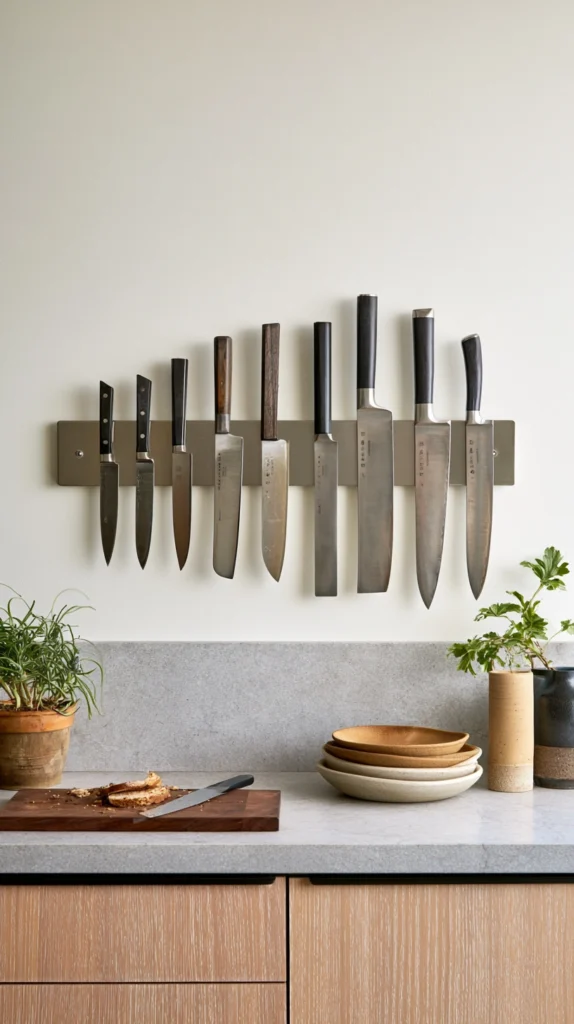
3. A Magnetic Knife Strip on the Wall
Budget: $15 – $50
A magnetic knife strip mounted on the wall above the preparation area removes the knife block from the worksurface and moves the complete knife storage function to a wall position that consumes no counter space whatsoever. In a small kitchen where every centimetre of worksurface is valuable, the knife block’s footprint — typically 20×20 cm — is a significant sacrifice of preparation area. The wall-mounted strip provides the same knife storage capacity in zero worksurface area and displays the knives at a height that makes them identifiable and accessible in a single movement from the preparation position below.
A 45 cm stainless steel magnetic knife strip costs $15–$35. A timber version runs $25–$50. Install at a height of 120–150 cm from the floor — above child reach height but within comfortable adult arm reach from the preparation position beside it. The strip accommodates six to ten knives depending on blade width. Wipe the strip monthly with a damp cloth to prevent the accumulation of metallic dust and food residue that the magnetic surface attracts over regular daily use.
Organisation tip: Arrange knives on the magnetic strip in order of size from left to right — small paring knife to largest chef’s knife — so the visual order of the strip communicates which knife occupies which position and an absent knife is immediately identifiable by the gap in the size sequence. The size order also provides a natural logic for returning each knife to the correct position after washing — the correct slot for each knife is simply the position where it fits between the knife one size smaller and the knife one size larger.
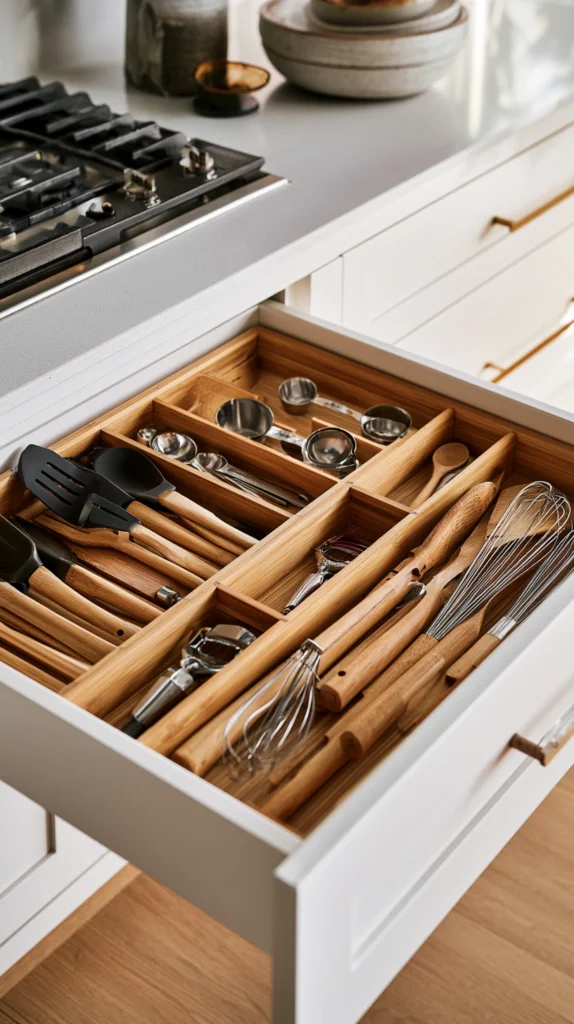
4. Drawer Dividers Throughout Every Drawer
Budget: $10 – $40 per drawer
Every kitchen drawer without dividers is a drawer that will eventually become a jumbled collection of objects thrown in without order — the bamboo skewers mixed with the spatulas, the tin opener beside the cheese grater, the cable from the hand blender tangled around the potato peeler. Drawer dividers separate the categories, maintain the separation, and convert the same drawer from a chaotic excavation zone into an organised system where every object is visible, identifiable, and retrievable in one movement.
Adjustable bamboo drawer dividers that fit any drawer width and depth cost $10–$25 per drawer. A complete set of five drawer dividers for a small kitchen’s full drawer allocation costs $50–$125. Install in every kitchen drawer simultaneously rather than one at a time — the organisational discipline of categorised dividers in every drawer requires consistent application to change the kitchen’s functional quality rather than partial improvement in the two or three drawers that got dividers first. The full installation takes one afternoon and needs no tools.
Organisation tip: Edit the drawer contents before installing dividers rather than simply dividing whatever is currently in each drawer into the new sections. The installation moment is the correct time to remove items that do not belong in the kitchen, items that are broken or have missing parts, and items that are duplicated beyond any reasonable household need. A drawer organised around its edited, appropriate contents rather than around whatever accumulated in it over the previous years functions significantly better than one that simply imposes order on an unedited collection.
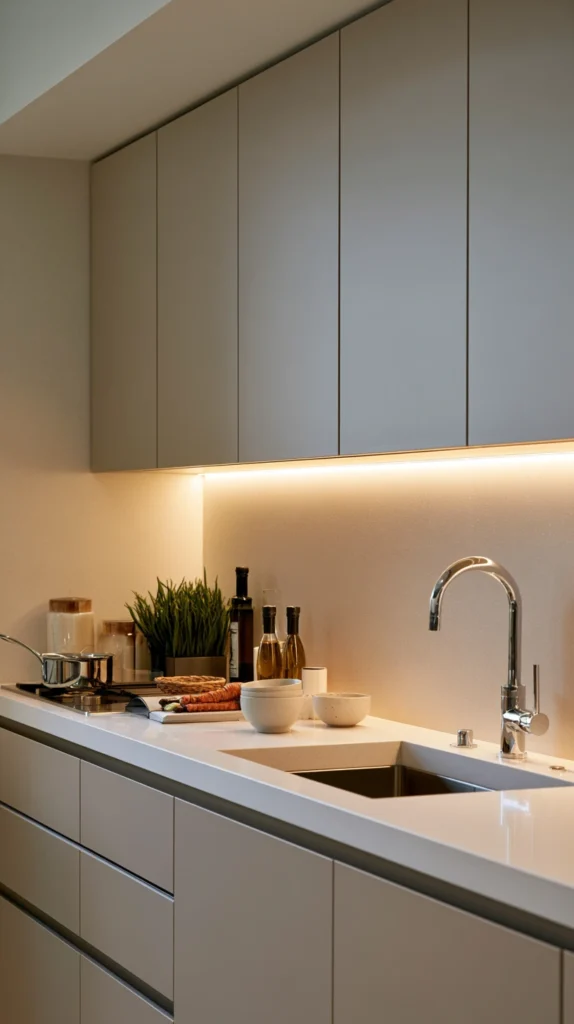
5. Under-Cabinet Lighting
Budget: $20 – $100
Under-cabinet lighting — LED strip lights fitted to the underside of wall cabinets to illuminate the worksurface below — directly addresses the most common practical limitation of small kitchens: inadequate task lighting at the preparation surface caused by the overhead cabinet’s shadow. A worksurface in shadow requires more effort, more time, and more concentration for any preparation task — and more errors are made on an inadequately lit surface than on a well-lit equivalent. Under-cabinet lighting converts the small kitchen’s most shadowed working surface into its most effectively lit one.
An adhesive LED strip under-cabinet light costs $15–$30 per section. A hardwired LED under-cabinet fitting costs $20–$50 per section plus installation. A complete small kitchen of 3 metres of wall cabinet coverage costs $45–$150 in LED strip lighting. Use warm white 2700K — the same colour temperature used in kitchen pendant fittings throughout — so that the under-cabinet light contributes to the kitchen’s warm atmosphere rather than introducing a cooler, clinical light that conflicts with the ambient warmth of the other light sources in the same kitchen space.
Organisation tip: Install a motion sensor switch rather than a manual switch for under-cabinet kitchen lighting — the lights activate when hands approach the worksurface and switch off automatically when the preparation area is vacated. The hands-free activation eliminates the friction of switching the task light on and off with wet or food-covered hands and makes the under-cabinet lighting an automatic feature of the preparation zone rather than an additional switch to remember before beginning each task.
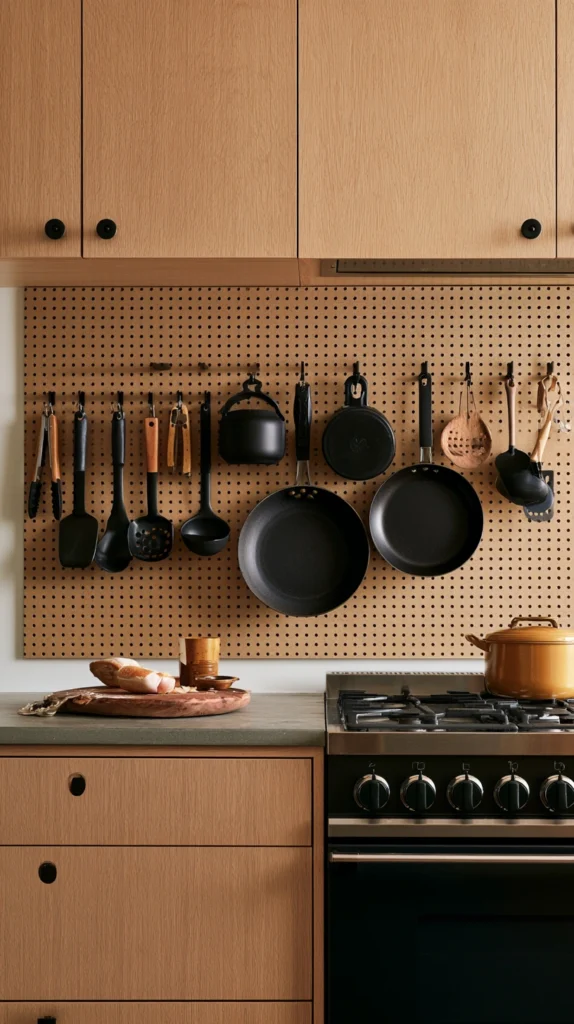
6. A Pegboard Beside the Cooker
Budget: $20 – $80
A pegboard panel mounted on the kitchen wall beside the cooker — with hooks for pots, pans, ladles, tongs, and spatulas — moves the most-used cooking equipment from cabinet storage to visible wall storage at the height and position where it is most needed. Every tool hangs within arm’s reach of the cooker without requiring the opening of any cabinet door, the search of any drawer, or the retrieval of equipment from behind or beneath other equipment that was not needed for the current task.
A 60×90 cm kitchen pegboard panel in MDF or powder-coated steel costs $20–$60. A set of kitchen-specific hooks in various sizes for the board costs $10–$25. Mount on the wall between the cooker and the nearest base cabinet — the position that provides the most direct access from the cooking position without requiring any lateral movement away from the hob during active cooking. Paint the pegboard to match the kitchen wall colour for the most visually integrated appearance, or leave in a contrasting colour as a deliberate kitchen feature wall element.
Organisation tip: Hang only the equipment used at least weekly on the pegboard and store occasional-use items in a cabinet behind closed doors. A pegboard displaying every pot, pan, and utensil the kitchen contains reads as cluttered and creates the visual noise that the small kitchen’s organisation system is designed to eliminate from the worksurface. A pegboard displaying only the weekly-use items reads as a curated functional display — organised, deliberate, and genuinely useful from the cooking position rather than simply visible from it.
7. Decanted Dry Goods in Matching Jars
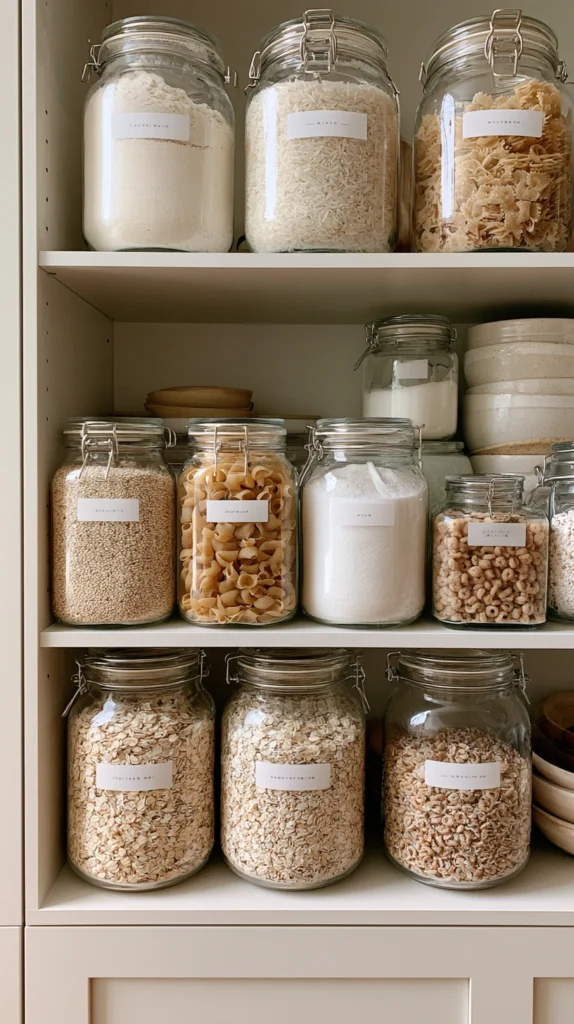
Budget: $30 – $100
Decanting dry goods — flour, pasta, rice, oats, sugar, lentils, and cereals — from their original packaging into matching glass or ceramic airtight jars and storing them on a shelf or in a cabinet creates the most immediate visual transformation available for a small kitchen’s storage zones. The original packaging of ten different dry goods varieties in ten different sizes, colours, and materials creates visual chaos on any shelf. The same ten items in ten matching jars creates a specific and beautiful order that reduces the kitchen’s visual noise while also improving the usability of the storage area.
A set of six matching glass storage jars costs $25–$60. A set of twelve runs $40–$100. Label each jar with a simple handwritten chalk label or a printed adhesive label — the label that identifies the jar’s contents without opening it makes the storage system genuinely functional rather than an aesthetically pleasing mystery. Store on a dedicated shelf or in one cabinet section visible from the food preparation area — so the contents of the storage system are identifiable from the preparation position without the opening of cabinet doors.
Organisation tip: Check the jar content levels weekly and top up from the reserve packaging before any jar reaches less than one-third full. Running out of a dry good mid-recipe because the jar was not monitored and the reserve supply was exhausted is the specific frustration that the decanting system creates if its maintenance routine is not established. The visual transparency of glass jars makes content monitoring effortless — the declining level is visible at a glance — which is the system’s primary practical advantage over the opaque original packaging that conceals contents until the bag is picked up and shaken.
8. Tension Rods to Create Vertical Sections in Cabinets
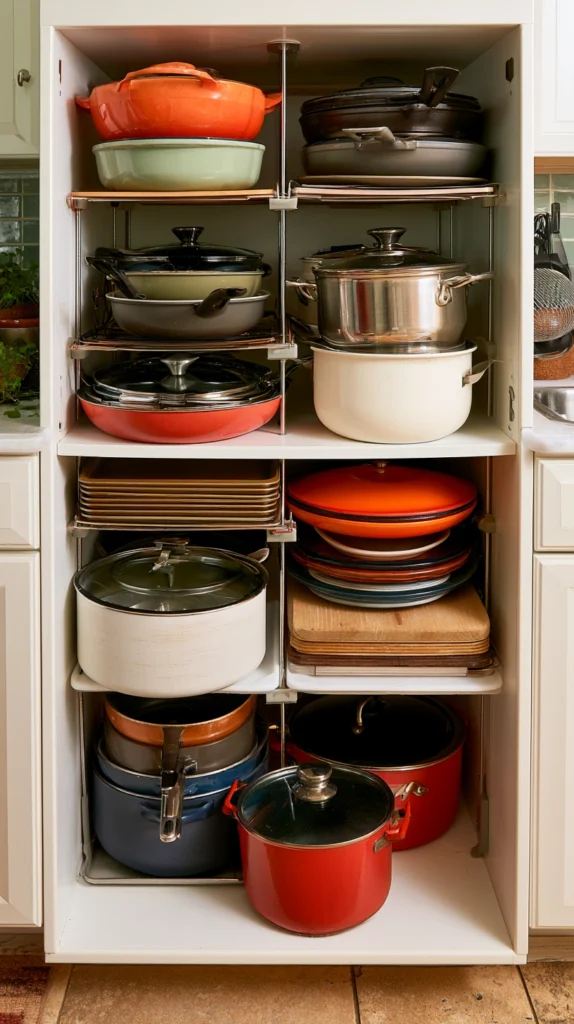
Budget: $3 – $15 per rod
Tension rods — spring-loaded rods that can be positioned anywhere between two cabinet walls — installed vertically inside deep base cabinets create dividing sections that keep pot lids upright, separate baking sheets, and organise pan sizes without any drilling, any permanent installation, or any modification to the cabinet structure. They are the most accessible and most immediately removable organisation tool available for any rented kitchen where permanent alterations cannot be made.
A single tension rod costs $3–$8. Three rods installed vertically in a 45 cm base cabinet create four sections for pot lids of different sizes at a total cost of $9–$24. The rods can be repositioned in seconds to accommodate changing cabinet contents — moved closer together when more small lids need separate sections, or wider apart when fewer but larger lids are stored in the same cabinet. The tension rod’s flexibility is its specific advantage over fixed dividers in a kitchen where the storage requirements change with the seasonal cooking programme.
Organisation tip: Install tension rods at the front of deep base cabinets rather than evenly across the full cabinet depth. A tension rod at the front third of the cabinet depth prevents the items stored in the sections behind it from being pushed to the back of the cabinet during access — the most common cabinet organisation failure mode in deep base cabinets where the rear section is effectively invisible and inaccessible from a standing position at the cabinet door.
9. A Wall-Mounted Spice Rack
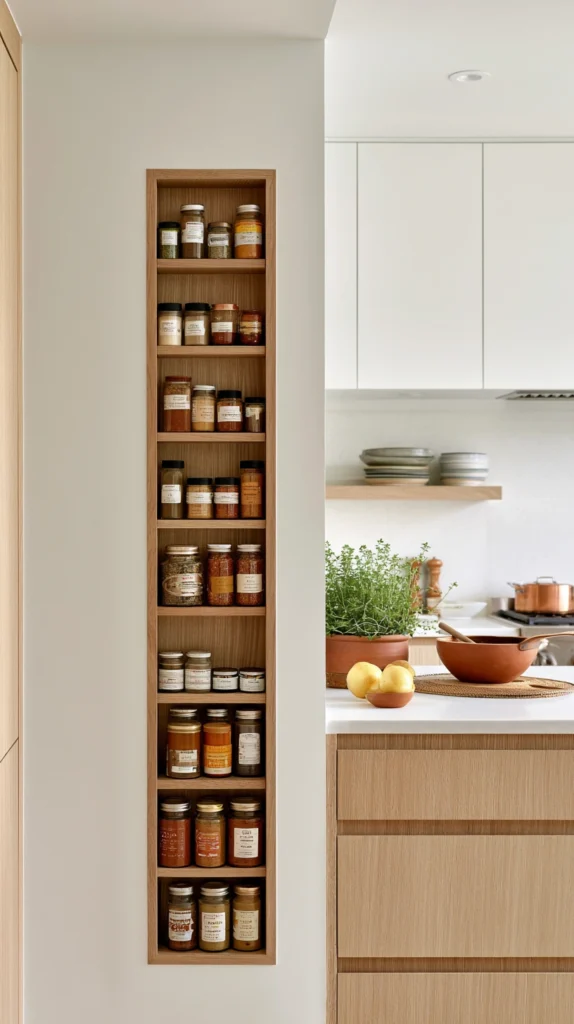
Budget: $15 – $60
Spices stored in a base or wall cabinet — behind closed doors, stacked in rows — are inaccessible during active cooking because finding the required spice requires pulling out the front row to see the back row and returning every spice bottle to its correct position after each use. A wall-mounted spice rack beside the cooker or on the back of a cabinet door makes every spice visible simultaneously from the cooking position, reduces the retrieval time from thirty seconds to three, and makes the cooking process faster and more enjoyable.
A wall-mounted timber spice rack of 45×30 cm holds fifteen to twenty spice jars at $15–$40. A tiered wall-mounted rack of 60×45 cm holds twenty-five to thirty jars at $25–$60. A magnetic spice tin system for a metal back wall costs $30–$80 for a starter set. Mount the rack within arm’s reach of the cooker — the reach from the cooking position is the functional requirement that determines the correct installation height. A rack mounted too high or positioned too far from the hob requires the cook to move away from the active hob to retrieve a spice, which is the operational failure the proximity-mounted rack is specifically designed to eliminate.
Organisation tip: Alphabetise the spices within the rack rather than grouping them by cuisine, by frequency of use, or by any other organising principle. Alphabetical order is the one system that can be maintained consistently by all household members regardless of their individual cooking knowledge — the position of any spice in an alphabetical rack can be found by any member of the household without needing to know whether turmeric is typically grouped with Indian spices or with yellow spices or with the Tuesday-night spices. Consistent maintenance by all users is the quality that determines whether a spice organisation system lasts for years or collapses into disorder within weeks.
10. Stacking Shelves Inside Cabinets
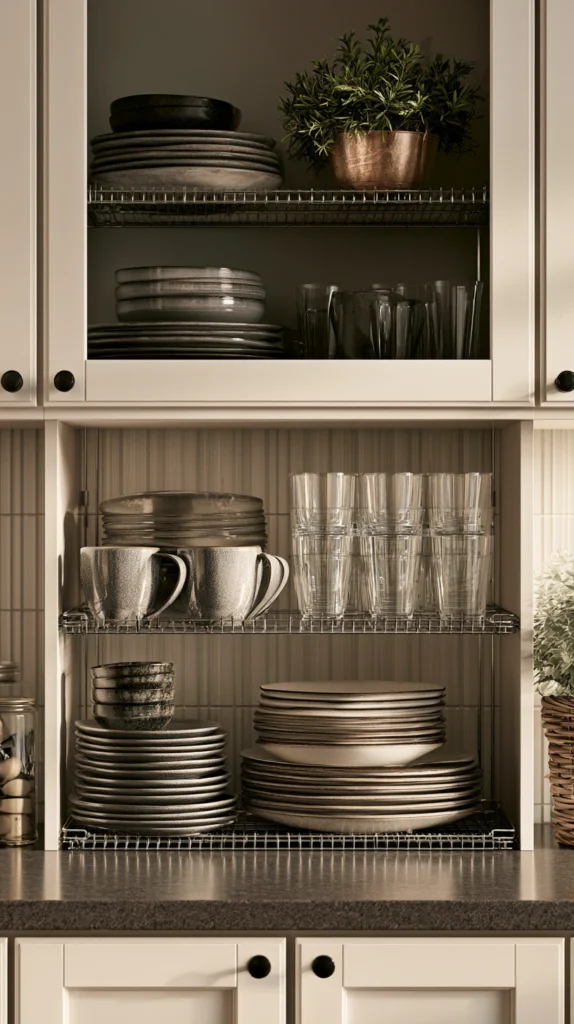
Budget: $10 – $40
Cabinet stacking shelves — small raised platforms that create a second level within an existing shelf space — double the effective storage capacity of any base or wall cabinet that has enough vertical space between its existing shelves to accommodate a second layer of items. A cabinet shelf with 30 cm between levels — the standard spacing in most kitchen cabinets — can typically accommodate a stacking shelf of 10–12 cm height that creates a second storage level without reducing the accessibility of either the items on the original shelf or those placed on the raised platform above them.
A wire stacking shelf of 30×25 cm costs $8–$20. A set of three for a complete cabinet conversion costs $24–$60. The stacking shelf suits any cabinet where items are stored in a single layer that leaves significant unused vertical space above them — a cabinet of plates, of small bowls, of spice jars, or of glasses is typically using only 60–70 percent of its available vertical height, and a stacking shelf recovers the unused upper section as additional functional storage without any permanent modification to the cabinet structure.
Organisation tip: Use the space under the stacking shelf for the items accessed most frequently and the surface of the stacking shelf for items accessed less frequently — the lower position is the more accessible one because it requires no lifting to place or retrieve. A stacking shelf loaded with daily-use items on top and less-used items below requires lifting the stacking shelf’s contents to access the lower items — defeating the purpose of the second level by making the lower level less accessible than a simple flat shelf without the stacking platform would have been.
11. A Drawer for Pots and Lids Together
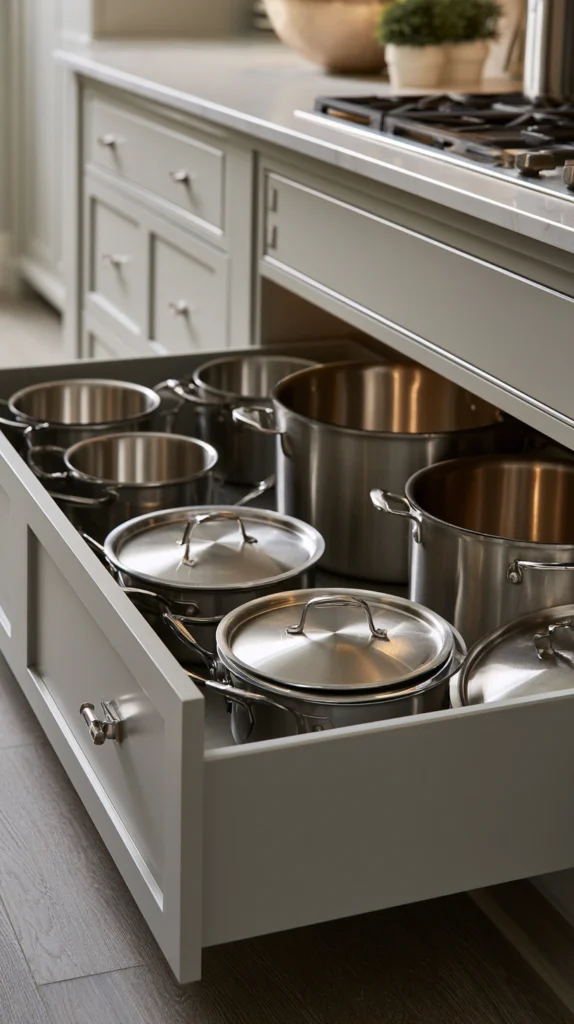
Budget: $0
Storing pots and their lids in the same drawer — the lid resting on the pot inside the drawer with a slight tilt to allow the drawer to close over the lid’s handle — eliminates the universal kitchen organisation failure of pots in one cabinet and lids in another. When pots and lids are separated, the most common daily kitchen frustration is the search for the correct lid for the selected pot across different storage locations. When stored together, the correct lid is always in the same drawer as its pot and requires only the selection of one rather than the sequential selection of two from different locations.
The cost of this organisation change is zero — it requires only the rearrangement of existing pots and lids into the same drawers or cabinets rather than the addition of any new storage equipment. The primary challenge is the vertical height required to store a pot with its lid inside a drawer — typically 15–20 cm plus the lid handle clearance. If the existing drawer height does not accommodate the combined pot and lid height, store the pots standing upright in a base cabinet with the lids stored vertically in a tension rod section within the same cabinet rather than on a different shelf.
Organisation tip: Store only the pots used weekly together with their lids — the daily cooking pots whose frequent use makes same-location storage most valuable. Less frequently used pots, special occasion roasting tins, and overflow items that are used monthly or less can be stored in less accessible positions without the daily friction that separate pot and lid storage creates for the most-used pieces. The pot-and-lid-together principle is most valuable for the three to five pots that are used in every cooking week.
12. A Narrow Rolling Cart for Extra Counter Space
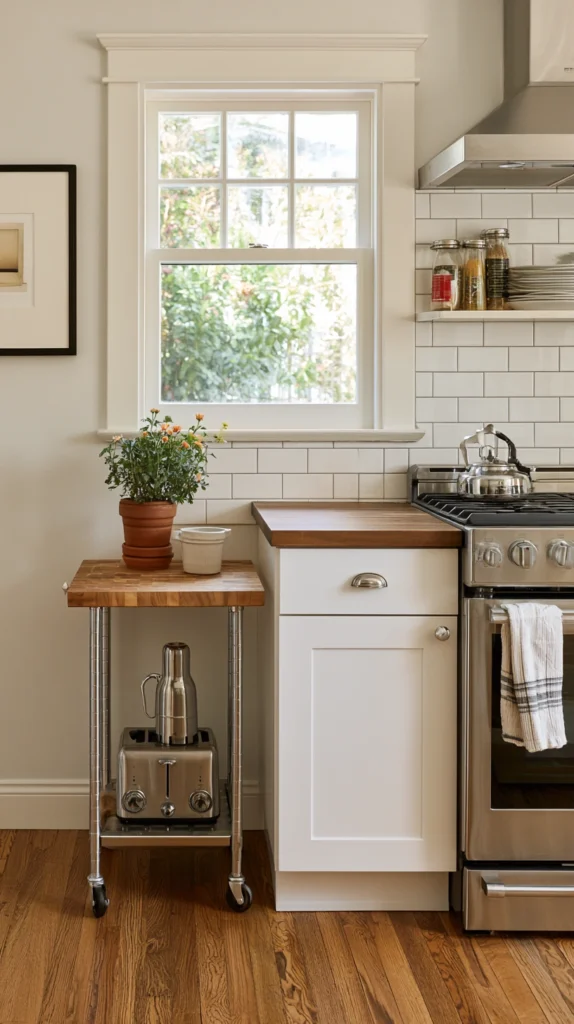
Budget: $40 – $150
A narrow rolling cart — 30–40 cm wide and 80–90 cm tall — positioned beside the existing worksurface creates additional preparation space that can be rolled to the most convenient position for each task and pushed back beside the counter or into a gap between the cabinet and the wall when not in use. In a small kitchen where the existing worksurface area is the primary functional constraint, the rolling cart is the most flexible and most space-efficient worksurface extension available without any structural installation.
A timber-top rolling cart of 30 cm width costs $40–$80. A stainless steel version runs $60–$150. A cart with a drawer below the work surface and a shelf below the drawer costs $60–$120 and adds the storage capacity of a small drawer unit to the additional worksurface it provides. The rolling cart’s mobility — the specific quality that makes it most valuable in a small kitchen — is maintained only if the cart’s usual parked position is never obstructed by other items placed beside or around it. A cart that cannot be moved does not function as a mobile space; it functions as a fixed obstacle with a better justification for its presence than a fixed equivalent would have.
Organisation tip: Store the small kitchen appliances used least frequently on the rolling cart’s shelf rather than on the worksurface — the toaster that is used weekly but not daily, the blender used occasionally, the food processor used monthly. The cart shelf keeps these appliances within the kitchen but off the primary worksurface, where their presence reduces the available preparation area throughout the week regardless of how infrequently they are actually used. Rolling the cart to the preparation zone when the appliance is needed, then returning it to its parked position afterward, maintains the worksurface’s full available preparation area throughout the day.
13. Hooks on Every Available Cabinet Side
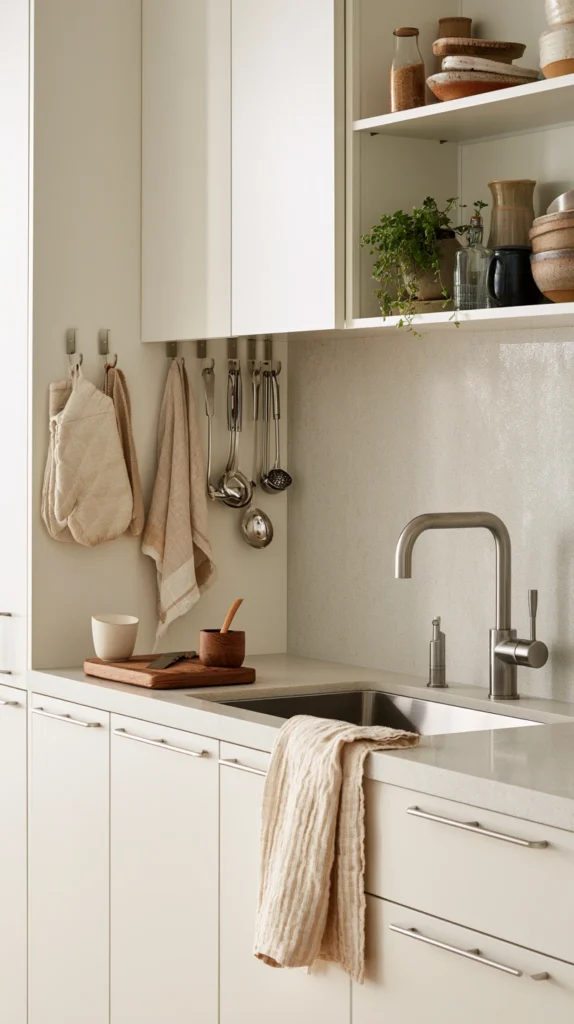
Budget: $5 – $20
The sides of kitchen cabinets — both the exterior side faces of the end cabinets and the interior side walls of cabinet doors — represent storage surfaces that most small kitchens never use. Simple adhesive hooks applied to these surfaces accommodate measuring spoons, oven gloves, pan lids, small utensils, and any other lightweight kitchen equipment that benefits from hanging storage at the position where it is most frequently needed. In a small kitchen where every surface is occupied, the cabinet sides provide additional storage positions at zero floor and counter cost.
Adhesive stainless steel hooks rated for kitchen use cost $1–$3 each. A set of ten hooks costs $8–$20 and provides storage for ten individual items on surfaces that currently contribute nothing to the kitchen’s storage capacity. The adhesive mounting requires a clean, grease-free cabinet surface — wipe with a degreasing cleaner and allow to dry completely before applying the adhesive hook backing for the rated hold weight to be reliably achieved. Hooks applied to greasy or dusty cabinet surfaces fail within weeks of installation regardless of the adhesive’s stated load rating.
Organisation tip: Apply the most valuable hooks to the inside of cabinet doors in the cabinet immediately beside the most-used preparation zone rather than throughout the kitchen uniformly. A hook on the inside of the cabinet door directly beside the cooker that holds the most-used wooden spoon — accessible with one hand movement and visible every time the cabinet opens — provides more practical value than five hooks in locations further from the primary cooking zone that require movement away from the hob to access.
14. The One-In One-Out Rule for the Whole Kitchen
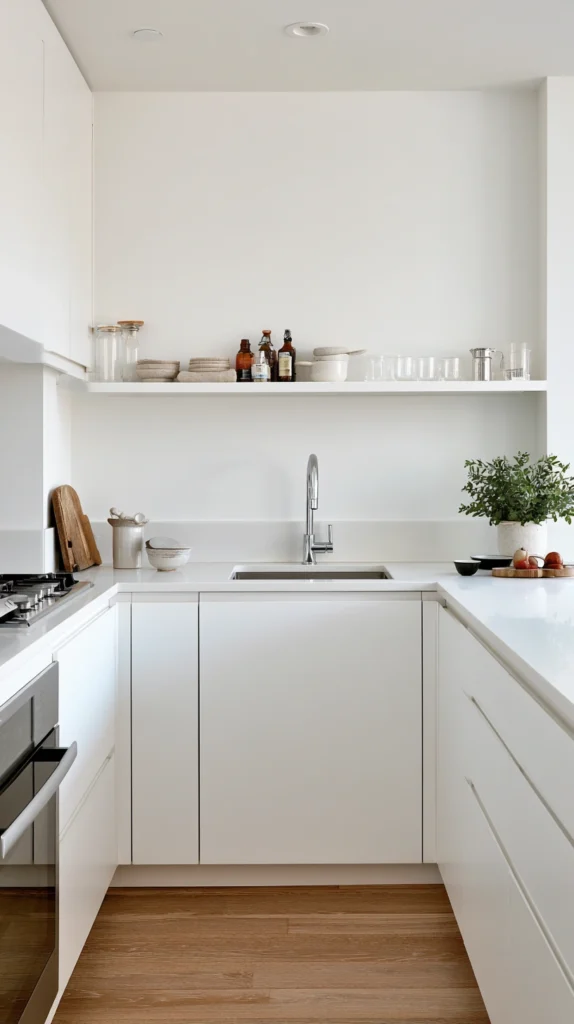
Budget: $0
The most powerful small kitchen organisation idea costs nothing and requires no hardware, no installation, and no storage products of any kind. The one-in one-out rule — for every new kitchen item that enters the kitchen, one existing item must leave — prevents the organisational entropy that returns any small kitchen to its original overcrowded state within months of any improvement project no matter how comprehensive the initial organisation effort was. Without a maintenance rule, organisation is a one-time intervention. With it, organisation is a continuously maintained state.
Apply the rule consistently at the moment of every new kitchen purchase — a new pan means an old pan is donated, a new gadget means an existing unused gadget is removed, a new set of bowls means the mismatched surplus is released to a charity shop. The rule is most effective when applied at the moment of purchase rather than retrospectively after the new item has found a storage position in the already full kitchen. The decision to remove an existing item before adding a new one is always easier before the new item is in the kitchen than after it has been placed in the one available gap its arrival created.
Organisation tip: Do a full kitchen audit every six months — removing every item from every cabinet and drawer, assessing what is genuinely used and what has accumulated without earning its place, and returning only the used items in an organised arrangement.
The six-monthly audit prevents the gradual accumulation of unused items that fills the kitchen between the less frequent annual clearouts that most households manage. Items identified as unused in two consecutive six-monthly audits are items that will never be used — the second identification is the signal to remove them permanently rather than to return them to the cabinet for a further six months of unused storage.
The small kitchen that is genuinely well organised is always the result of two things applied consistently: the right storage solution in the right position, and the daily habit of returning every item to its right position after each use. The storage solutions can be installed in a weekend.
The daily habit takes longer to establish but delivers the larger part of the functional benefit — because the best-organised kitchen in the world returns to dysfunction within two weeks if no one maintains the system. Organisation is the hardware. Habit is the software. Both are required.
Begin with the worksurface — it is the most visible and most functionally important surface in any small kitchen. Clear it completely and return only the items used daily. Every item returned to the worksurface that is used less than daily is consuming the preparation space that is the small kitchen’s most limiting resource.
Start from a clear counter and build the organisation system outward from the standard of a clear preparation surface. Everything else in this list becomes easier and more effective once that one standard is established and maintained.