How to Style a Fireplace Mantel for Autumn
My mantel used to get the exact same treatment every October: a few pumpkins lined up in a row and a garland draped across the top.
It looked fine from across the room, but the moment anyone actually walked up to it, the whole thing read as flat and obviously store-bought.
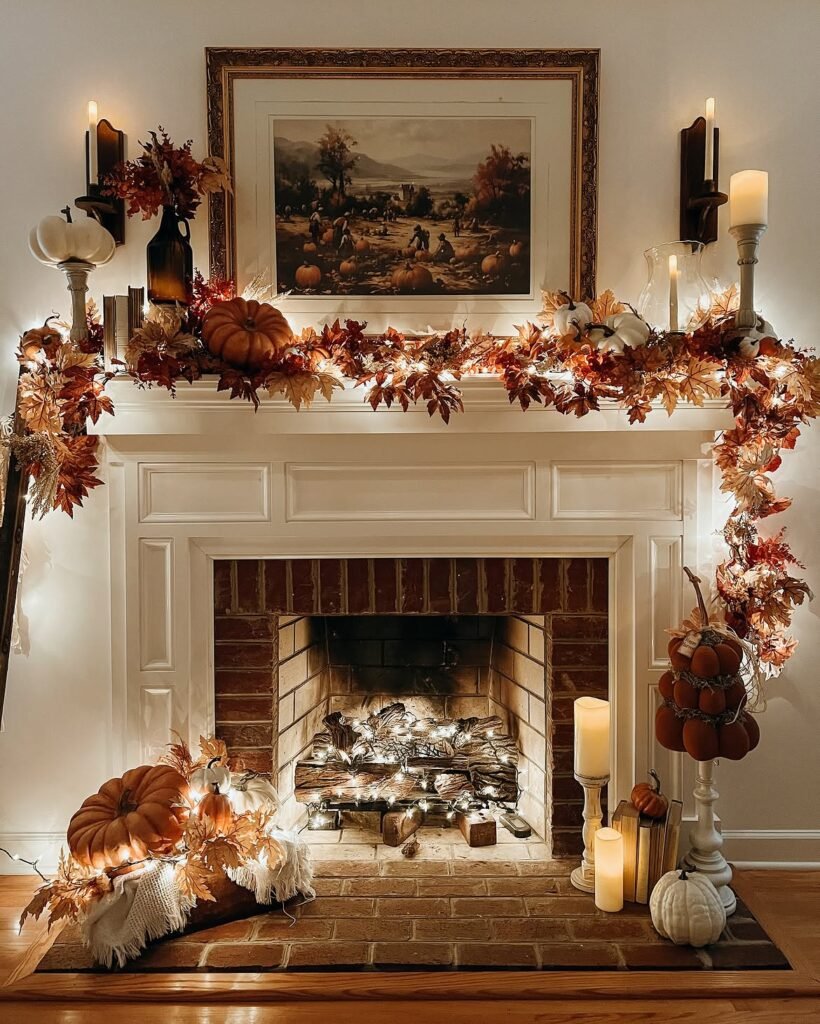
I finally took a weekend to actually study how professional stylists layer a mantel instead of just decorating it, and the difference wasn’t more decorations. It was better structure underneath what I was already using.
Once I understood the actual process, the same pumpkins and garland I’d been using for years suddenly looked intentional instead of like a display shelf at a seasonal pop-up store.
Here’s the complete process, step by step, so your mantel gets that same layered, professional look this fall.
Why Most Mantels Look Flat No Matter How Much Gets Added
Before getting into the actual steps, it’s worth understanding why so many mantels look underwhelming even when they’re not lacking in decorations.
- Everything gets placed at the same height, creating a single flat visual line instead of the layered depth a great mantel needs
- Decorations get spread perfectly evenly across the length, rather than grouped with intentional negative space
- Scale gets ignored, so several small items compete for attention instead of a few well-chosen larger pieces anchoring the display
- Texture repeats too much, using only smooth pumpkins or only leafy garland instead of a genuine mix of materials
- The wall space above the mantel gets forgotten entirely, leaving the styling to end abruptly at the mantel’s surface
Fixing these five issues through a proper layering process is what actually transforms a basic autumn mantel into one that looks considered rather than just decorated.
1. Start With a Completely Clear Mantel Surface
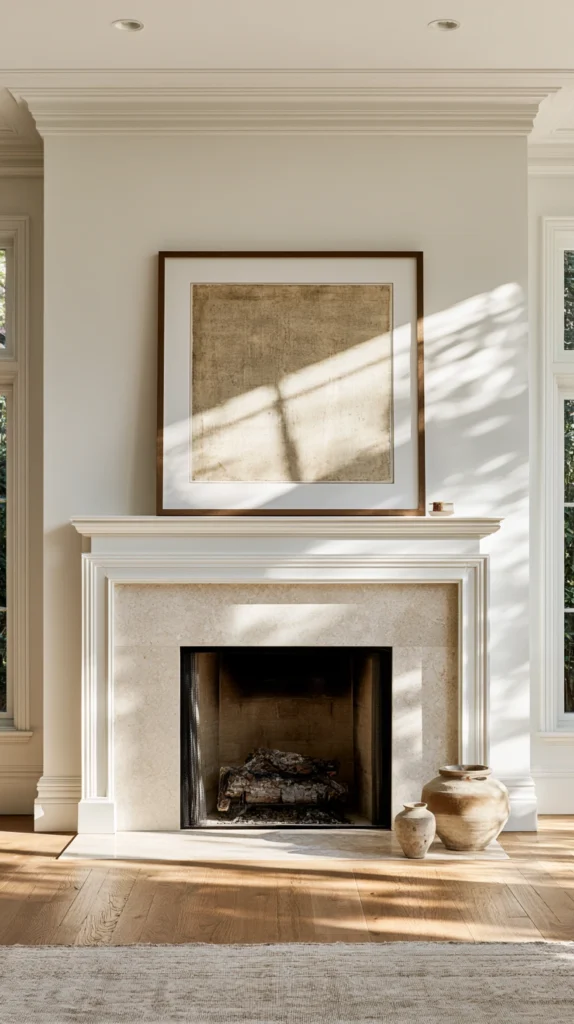
Before adding a single autumn element, remove everything currently on the mantel, including pieces you plan to reuse.
How it comes together:
- Take everything off the surface, including photo frames, everyday decor, and any leftover items from a previous season
- Clean the surface thoroughly, since dust and buildup are much easier to address on a fully empty mantel
- Take a photo of the empty mantel and surrounding wall space, which helps you plan proportions before committing to a layout
- Set aside anything you plan to reuse in a separate pile, rather than leaving it scattered nearby, so you can consciously choose what goes back
Why it matters:
- Building a new layout on top of leftover items almost always results in a cluttered, unplanned look rather than an intentional design
- A truly clear starting point forces you to make deliberate choices about what earns a spot back on the mantel, rather than defaulting to what was already there
Timing:
- The very first step, before any autumn shopping or gathering of materials
Tools needed:
- A cleaning cloth and a few empty boxes or bins for sorting removed items
Common mistakes:
- Leaving one or two “anchor” pieces in place because moving them feels unnecessary, which limits how freely you can experiment with the new layout
Budget: $0
2. Choose One Dominant Color Story Before Buying Anything
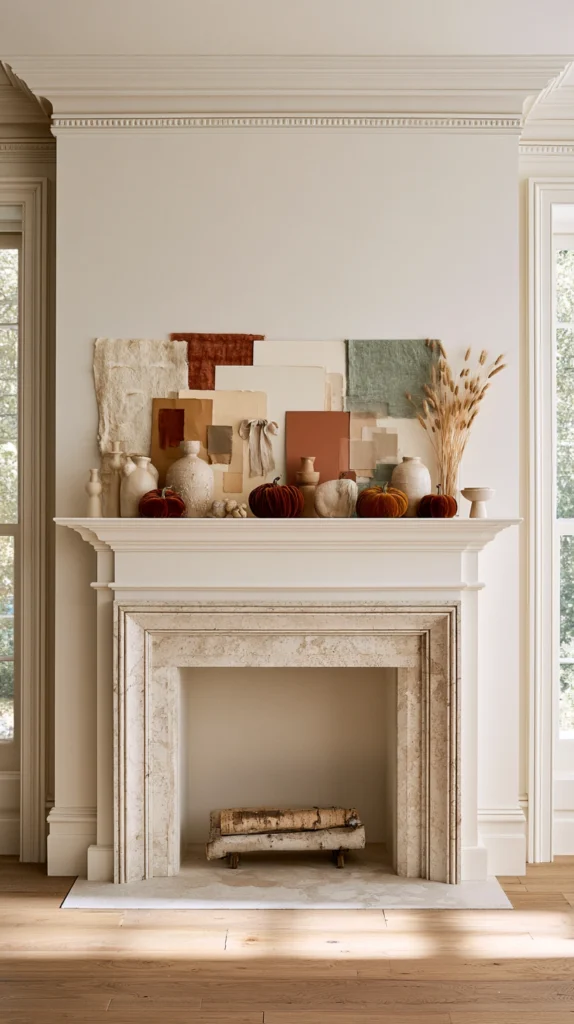
A cohesive mantel starts with a clear color direction, chosen before any new materials are purchased, rather than assembled from whatever autumn items happen to be on sale.
How it comes together:
- Look at your existing living room palette, including wall color, furniture, and any permanent decor, to choose an autumn palette that complements rather than clashes
- Select one dominant tone, like deep rust, muted sage, or warm cream, and one or two supporting accent colors
- Write down your chosen palette before shopping, so you have a clear reference rather than relying on memory in the store
- Resist adding an item that doesn’t fit the palette just because it’s appealing on its own, since a single mismatched color can undo an otherwise cohesive display
Why it matters:
- A mantel with a clear, limited color story reads as intentional and elevated, while one with every available autumn color competing at once looks chaotic regardless of how nice the individual pieces are
- Choosing a palette that complements your existing room means the mantel enhances the space instead of looking like a separate, disconnected display
Timing:
- Before any shopping trip, ideally while still looking at your empty, cleaned mantel from step one
Tools needed:
- A notepad or phone photo of your existing room palette for reference while shopping
Common mistakes:
- Choosing a palette based purely on a photo inspiration board without checking it against your actual room’s existing colors
Budget: $0, this step is planning only
3. Build the Background Layer With a Garland or Greenery Base
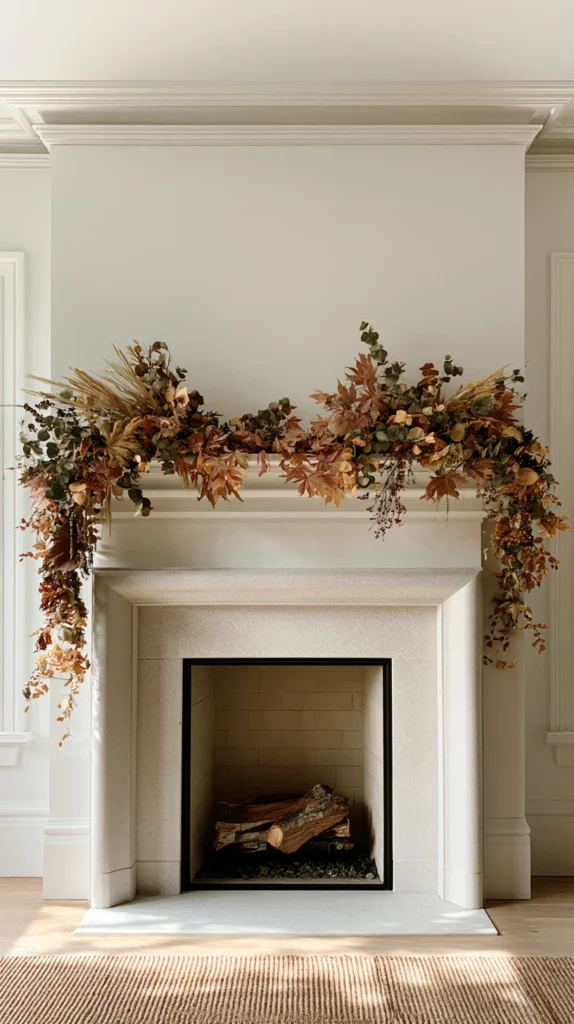
The first physical layer to add is a garland or greenery base, which becomes the foundation that everything else gets layered on top of.
How it comes together:
- Choose a garland in a material that fits your palette, whether that’s traditional autumn leaves, preserved eucalyptus, or a simple dried wheat and grain mix
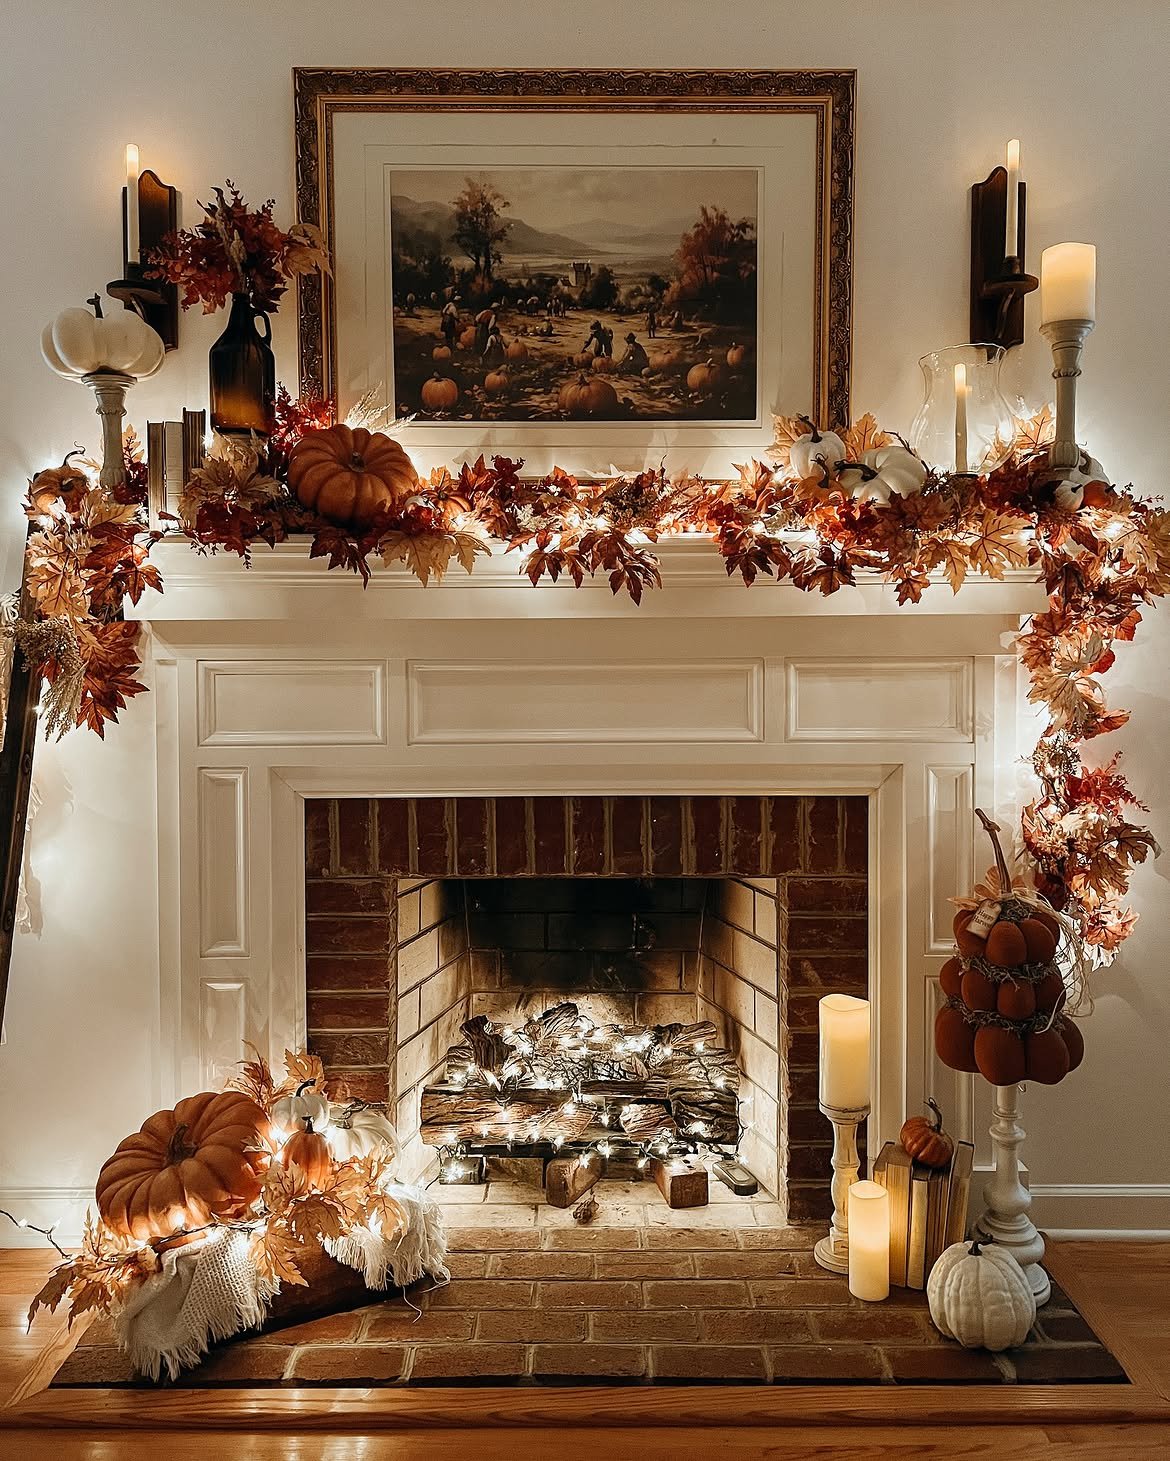
- Drape the garland along the mantel’s front edge, allowing it to dip slightly between the ends rather than lying perfectly straight
- Let a small portion trail down each side of the mantel, extending the styling beyond just the flat top surface
- Secure the garland with small removable adhesive hooks or museum putty if it needs to stay in place through the season
Why it matters:
- This background layer establishes the overall shape and movement of the display before any other elements are added, which is far easier than trying to retrofit a garland around a finished arrangement
- The slight dip and side trailing is what creates the layered, dimensional look rather than a flat, straight-line arrangement
Timing:
- The first material added after choosing your color palette
Tools needed:
- Removable adhesive hooks or museum putty for securing the garland in place
Common mistakes:
- Laying the garland perfectly straight and taut, which removes the natural, organic movement that makes this layer feel intentional rather than mechanical
Budget: $25–$60 for a quality garland depending on material and length
4. Add Your Largest Anchor Pieces First, Not Last
Once the background garland is in place, add your largest decorative items next, working from biggest to smallest rather than starting with small accents and hoping the big pieces fit in later.
How it comes together:
- Choose two to three larger anchor pieces, like a substantial pumpkin grouping, a large vase, or an oversized frame, as your starting points
- Place these anchor pieces asymmetrically rather than perfectly centered, positioning one slightly larger cluster on one side and a secondary anchor on the other
- Leave the center of the mantel slightly more open if using an asymmetrical layout, rather than placing your biggest piece dead center
- Step back and view the placement from across the room before committing further, since anchor piece placement affects every layer that follows
Why it matters:
- Starting with large pieces establishes the overall visual weight and balance of the mantel, which is much harder to correct if you’ve already filled in smaller details around a poorly placed anchor
- Asymmetrical anchor placement is what separates a professionally styled mantel from a symmetrical, matched-set look that reads as more generic
Timing:
- Immediately after the garland base is secured
Tools needed:
- None beyond the decorative pieces themselves
Common mistakes:
- Placing anchor pieces in perfect symmetry, evenly spaced from the center, which tends to look less dynamic than an intentionally asymmetrical arrangement
Budget: $30–$80 depending on the specific anchor pieces chosen
5. Layer in Height Variation With Candles or Vertical Elements
Once anchor pieces are placed, add height variation using candles, small vases, or other vertical elements to break up the horizontal line the garland and larger pieces naturally create.
How it comes together:
- Choose candle holders or vases in at least two or three different heights, from short votives to taller pillar candle holders
- Cluster taller pieces near your larger anchor items rather than scattering them evenly across the mantel
- Vary the actual candle heights within a cluster as well, rather than using uniform pillar candles that create another flat line at the top
- Position at least one taller element slightly behind an anchor piece, creating actual visual depth rather than a single flat row
Why it matters:
- Height variation is what creates the layered, dimensional look that separates a styled mantel from a simple row of same-sized objects
- Depth created by placing elements at slightly different distances from the mantel’s front edge adds a sense of dimension that flat, single-row arrangements lack
Timing:
- After anchor pieces are placed, before adding smaller filler details
Tools needed:
- A mix of candle holders or small vases in varying heights
Budget: $20–$50 depending on the number and style of candle holders used
Common mistakes:
- Using candle holders that are all the same height, which recreates the same flat-line problem the garland base was meant to solve
6. Add Textural Filler Pieces to Fill Gaps Without Cluttering
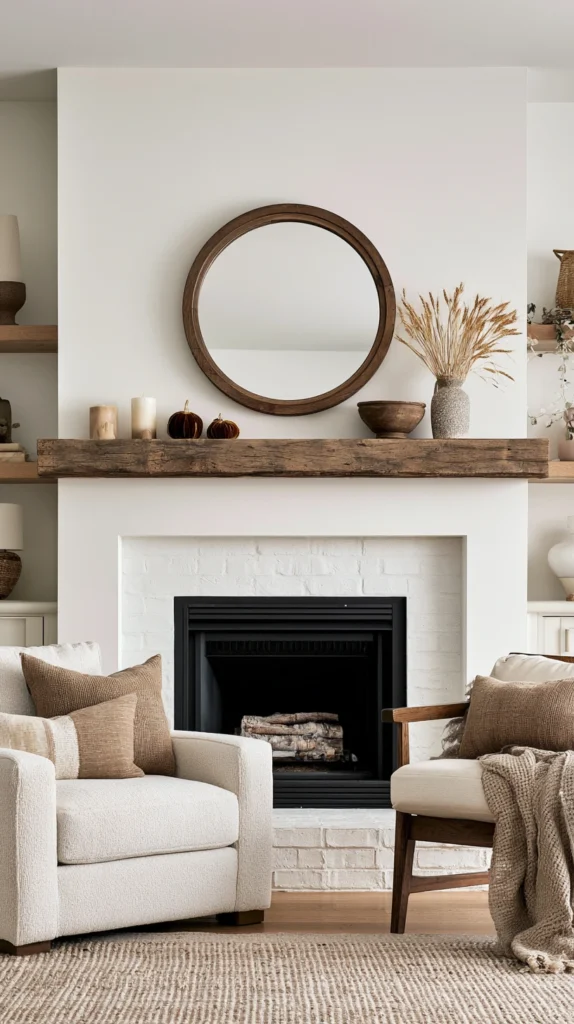
With the major structural elements in place, add smaller textural pieces to fill remaining gaps, being careful to add just enough rather than filling every available inch of space.
How it comes together:
- Choose smaller filler items like mini pumpkins, dried floral picks, or small decorative bowls that complement your chosen palette
- Tuck fillers into the natural gaps between anchor pieces and candle clusters, rather than adding a new isolated grouping
- Leave some genuine negative space between elements, since a mantel filled edge to edge with no breathing room reads as cluttered rather than abundant
- Step back periodically during this step to assess whether you’re filling a genuine gap or simply adding items out of habit
Why it matters:
- Filler pieces are meant to support the existing structure, not become a second competing layer of decoration
- Negative space is what allows the eye to rest and actually appreciate the anchor pieces and height variation established in earlier steps
Timing:
- After the main structural layers, as a final detail pass
Tools needed:
- None beyond the filler decor pieces themselves
Common mistakes:
- Continuing to add filler pieces until every gap is filled, which undoes the intentional negative space that makes the overall display feel curated rather than cluttered
Budget: $15–$35 for a selection of small filler pieces
7. Incorporate at Least One Unexpected Texture or Material
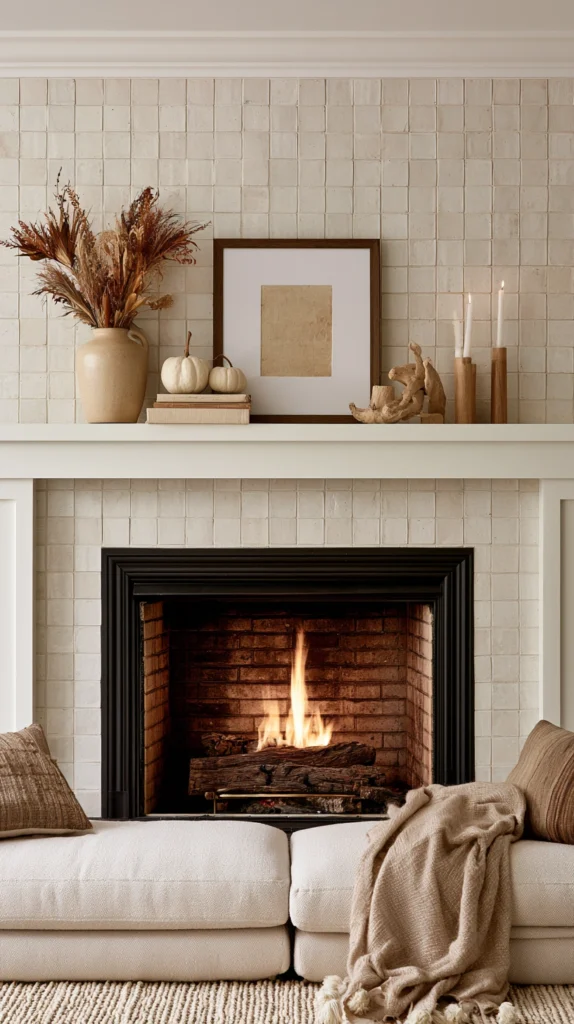
A mantel built entirely from traditional autumn materials, like pumpkins and leaf garland, can start to feel predictable, so including one unexpected texture adds interest without disrupting the overall cohesion.
How it comes together:
- Choose one material outside the typical autumn decor category, like a woven basket, a ceramic vessel, a piece of natural wood, or a stack of vintage books in a complementary color
- Position this unexpected element near one of your anchor pieces rather than isolating it in its own separate area
- Make sure the unexpected piece still fits within your chosen color palette from step two, so it adds variety without breaking cohesion
- Limit this to just one or two unexpected pieces total, since too many “unexpected” elements start to look like an unplanned mix rather than an intentional design choice
Why it matters:
- A single unexpected texture prevents the mantel from feeling like a predictable, catalog-style display and instead gives it a more personal, collected feeling
- Keeping this element within your established color palette ensures it reads as an intentional accent rather than a mismatched addition
Timing:
- After the main structural and filler layers are complete, as a refining detail
Tools needed:
- None beyond the specific unexpected piece chosen
Common mistakes:
- Choosing an unexpected element that clashes with the established color palette, which reads as a mistake rather than an intentional styling choice
Budget: $10–$40 depending on the specific item chosen, often something already owned and repurposed from elsewhere in the home
8. Extend the Styling Above the Mantel, Not Just On It
The wall space directly above the mantel is often left completely untouched, but incorporating it into the overall design extends the styling into a full vertical display rather than a flat horizontal one.
How it comes together:
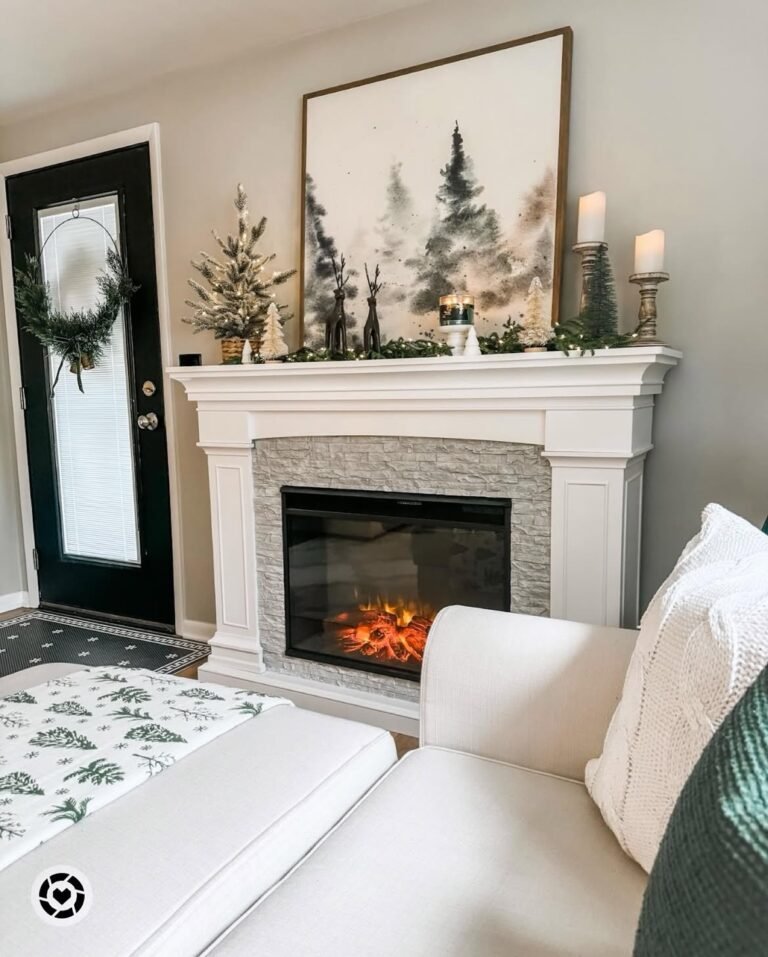
- Hang a mirror, artwork, or a seasonal wreath on the wall space above the mantel, chosen to complement rather than compete with the styling below
- Consider adding a garland or draped greenery cascading down from the top piece to visually connect the wall element with the mantel surface below
- Keep the above-mantel element proportional to the mantel’s width, generally no more than two-thirds of the total width for the best visual balance
- Step back and assess the full vertical composition together, from the mantel surface up through the wall piece, rather than styling each separately
Why it matters:
- A mantel styled without any consideration for the wall space above it can feel visually incomplete, since the eye naturally continues upward from the mantel surface
- Connecting the wall element and mantel surface with a cascading garland or similar visual link creates one cohesive display rather than two separate, disconnected zones
Timing:
- After the mantel surface itself is fully styled, as this step ties the whole composition together
Tools needed:
- Appropriate wall-mounting hardware for whatever piece is chosen, whether a mirror, artwork, or wreath
Common mistakes:
- Choosing an above-mantel piece that’s too large relative to the mantel’s width, which overwhelms the styled surface below rather than complementing it
Budget: $30–$100 depending on whether an existing piece is reused or something new is purchased
9. Step Back and Edit Before Considering the Mantel Finished
The final step is often the most skipped, but stepping back to critically edit the finished display is what separates a genuinely polished mantel from one that simply has all the right individual pieces.
How it comes together:
- View the mantel from across the room, from a seated position on your couch, and from the actual entry point of the room, since perspective changes significantly between these viewpoints
- Identify any single element that feels unnecessary or redundant, and remove it even if you like the piece individually
- Check that the asymmetrical balance established in step four still feels intentional once every layer has been added
- Take a final photo and compare it against your original empty mantel photo from step one to fully appreciate the transformation and catch anything that still feels off
Why it matters:
- What looks correct up close while actively arranging pieces doesn’t always translate to how the mantel reads from typical viewing distances in the room
- This editing step is specifically about subtraction rather than addition, since most over-decorated mantels suffer from too much rather than too little
Timing:
- The final step, once every other layer has been added
Tools needed:
- None beyond your own critical eye and a few different vantage points around the room
Common mistakes:
- Skipping this step because the mantel already looks “done,” when a genuine edit often reveals one or two pieces that were added out of habit rather than necessity
Budget: $0
10. Consider Lighting Separately From Daytime Styling
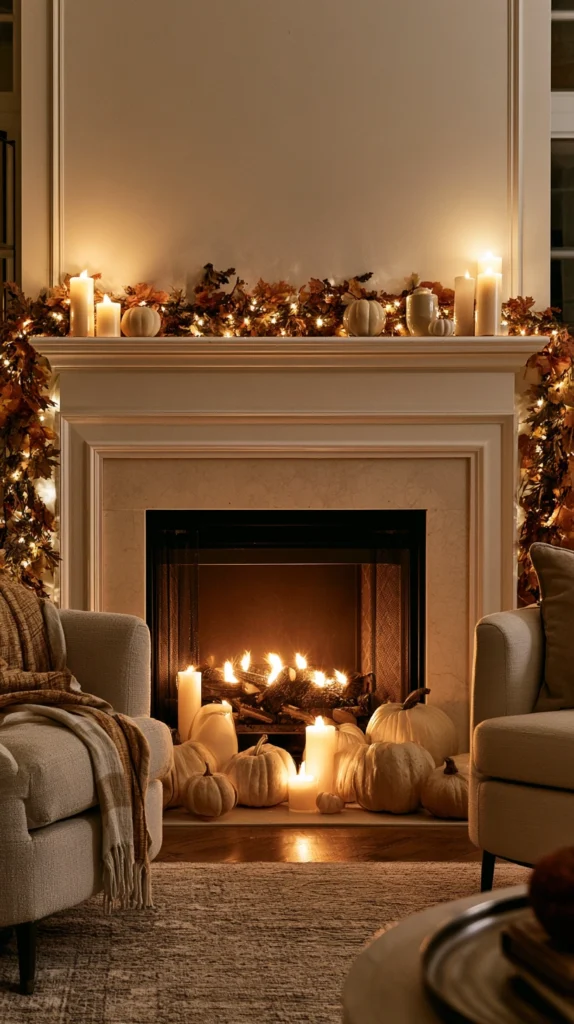
A mantel that looks beautifully styled in daylight can fall flat once evening arrives if lighting hasn’t been considered as its own separate layer.
How it comes together:
- Add battery-operated flameless candles among your candle clusters if the mantel doesn’t have safe clearance for real flame, especially near any garland or greenery
- Consider a small strand of warm white string lights woven subtly through the garland base for gentle evening ambiance
- Check how any existing overhead or lamp lighting in the room interacts with the mantel once it gets dark, adjusting placement of reflective elements like mirrors or metallic accents accordingly
- Test the full display after dark at least once, since lighting gaps are far easier to spot in person than to predict during daytime arranging
Why it matters:
- A mantel used and viewed primarily in the evening, which is common in the shorter daylight hours of fall, deserves lighting consideration equal to how it looks during the day
- Flameless candles specifically solve the safety concern of real flame near dry garland material, which is a genuine fire risk many people overlook
Timing:
- After the full daytime styling is complete, tested specifically once it’s dark outside
Tools needed:
- Flameless candles or a small string light strand if not already incorporated
Common mistakes:
- Using real flame candles directly against or beneath dry garland material, which creates a genuine fire hazard regardless of how visually appealing it looks
Budget: $15–$40 for flameless candles or a string light strand
11. Coordinate the Mantel With the Rest of the Room, Not Just Itself
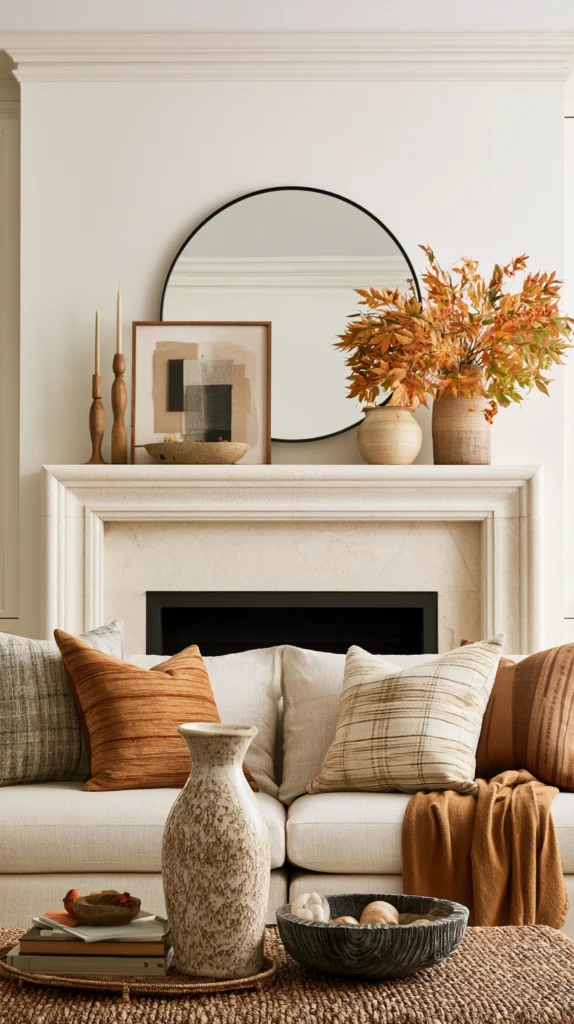
A beautifully styled mantel can still feel disconnected if it doesn’t relate at all to the rest of the room’s existing decor and seasonal touches.
How it comes together:
- Pull at least one material or color from the mantel into another part of the room, like a matching throw pillow, a coordinating candle scent, or a complementary accent piece on a side table
- Avoid introducing a completely new, unrelated color exclusively on the mantel that appears nowhere else in the space
- Consider how the mantel will be viewed alongside any other seasonal decor already in the room, like a styled console table or dining area, ensuring a consistent thread runs between them
- Walk the full room, not just the mantel wall, to confirm the seasonal styling feels cohesive throughout rather than concentrated in one single spot
Why it matters:
- A mantel that ties into the broader room reads as a considered part of the overall seasonal refresh, rather than an isolated project that doesn’t relate to anything else
- This coordination doesn’t require matching everything exactly, just a few intentional threads connecting the mantel to its surroundings
Timing:
- Alongside or shortly after the main mantel styling process, while reviewing the room as a whole
Tools needed:
- None beyond items already present elsewhere in the room
Common mistakes:
- Treating the mantel as a completely separate styling project from the rest of the room, which can make it feel like an add-on rather than a natural extension of the existing space
Budget: $0–$30 depending on whether any small coordinating pieces need to be added elsewhere in the room
12. Plan for a Mid-Season Refresh Rather Than a Single Static Display
Autumn spans several weeks, and a mantel that looks perfect on the first day of October can benefit from small adjustments as the season progresses toward Thanksgiving.
How it comes together:
- Choose a few materials, like fresh gourds or seasonal blooms, that you’re prepared to swap out partway through the season if they begin to fade or wilt
- Keep the core structural layers, like the garland base and larger anchor pieces, as the consistent foundation that doesn’t need mid-season replacement
- Set a simple reminder partway through the season to walk by and assess whether anything needs refreshing before it starts to look tired
- Have a small backup supply of filler pieces on hand, so a quick refresh doesn’t require an entirely new shopping trip
Why it matters:
- A static mantel assembled once in early October can start to look stale by mid-November if any fresh or delicate materials were used without a refresh plan
- Building the display in structural layers from earlier steps makes a partial refresh simple, since only the top filler layer typically needs updating rather than the entire arrangement
Timing:
- Planned at the same time as the initial styling, with the actual refresh happening three to five weeks into the season if needed
Tools needed:
- A small reserve of extra filler materials matching your original palette
Common mistakes:
- Assuming the mantel is a one-time project with nothing to revisit until the next seasonal changeover, which can leave fading materials on display for weeks longer than ideal
Budget: $10–$25 for a small reserve of refresh materials
Adjusting This Process for Different Mantel Sizes
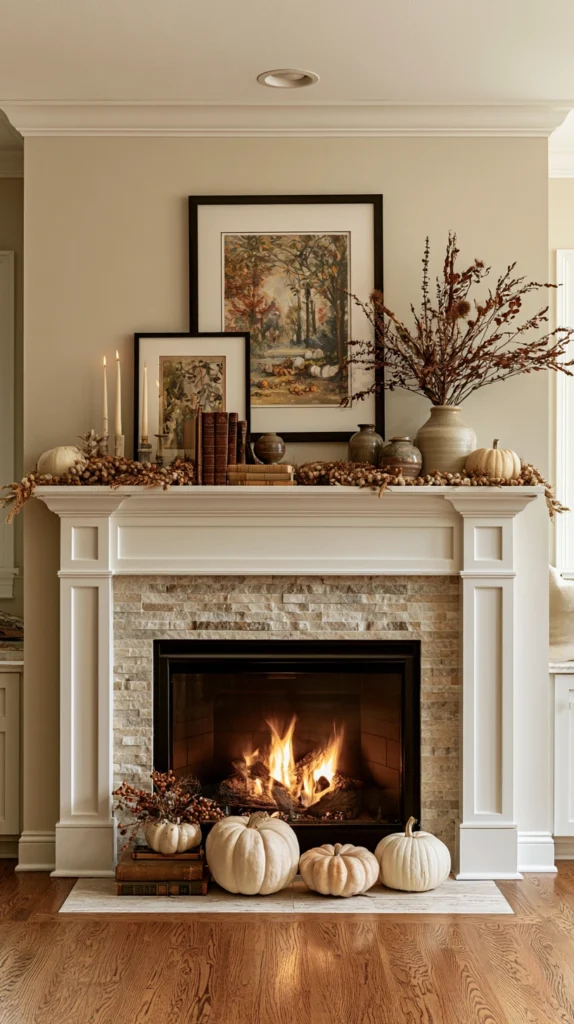
The core process stays the same regardless of mantel size, but a few adjustments help it translate properly to your specific space.
- Narrow or short mantels benefit from fewer, more intentional anchor pieces, since a small surface overcrowds quickly if the same number of items meant for a longer mantel gets used
- Extra-long mantels may need two distinct anchor groupings rather than one, treating the mantel as having two visual halves that still relate to each other through a shared color palette
- Mantels without a fireplace surround, like a floating shelf styled as a mantel, benefit especially from the above-mantel wall element in step eight, since there’s no fireplace opening below to visually anchor the display
A Simple Way to Judge When You’re Actually Finished
A useful gut check, once you think the mantel is complete, is to imagine removing any single piece and asking whether the overall display would genuinely suffer from its absence.
If the answer is no for a particular item, that’s usually a sign it can be removed without any real loss to the finished design.
This simple test, applied honestly during the editing step, is often what separates a mantel that looks effortlessly curated from one that still reads as slightly overdone despite every individual piece being beautiful on its own.