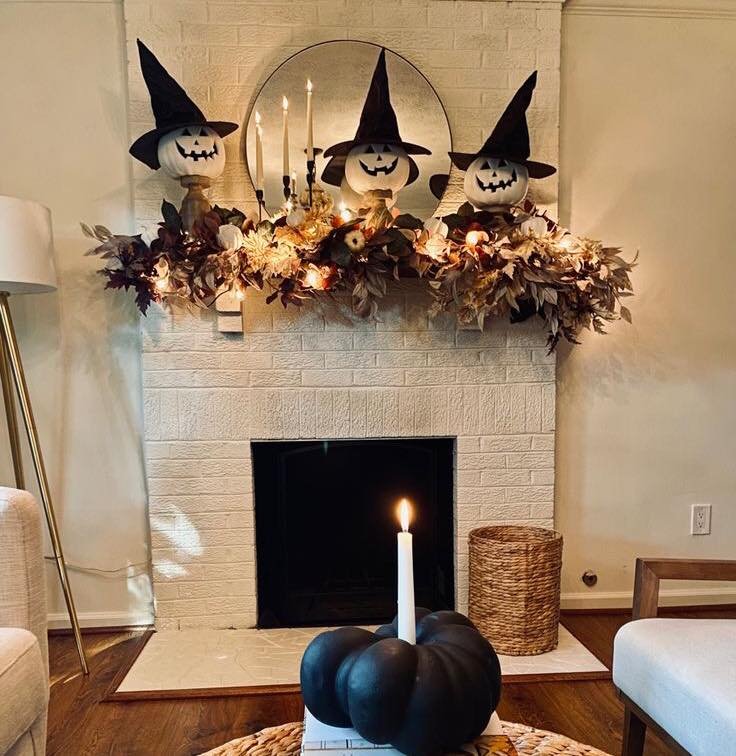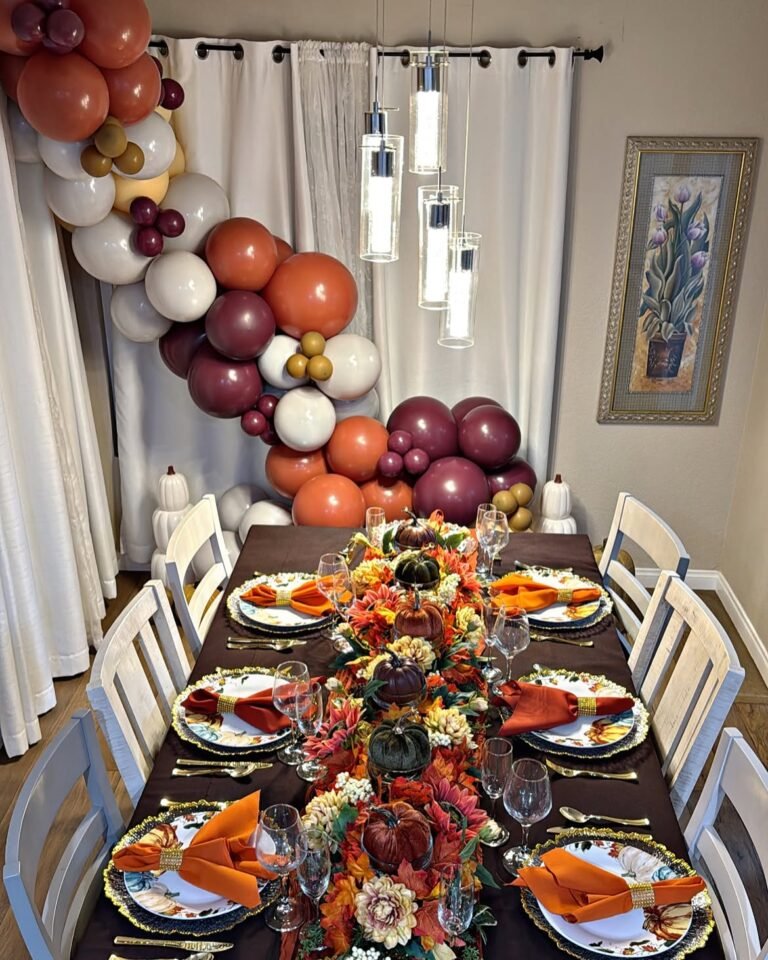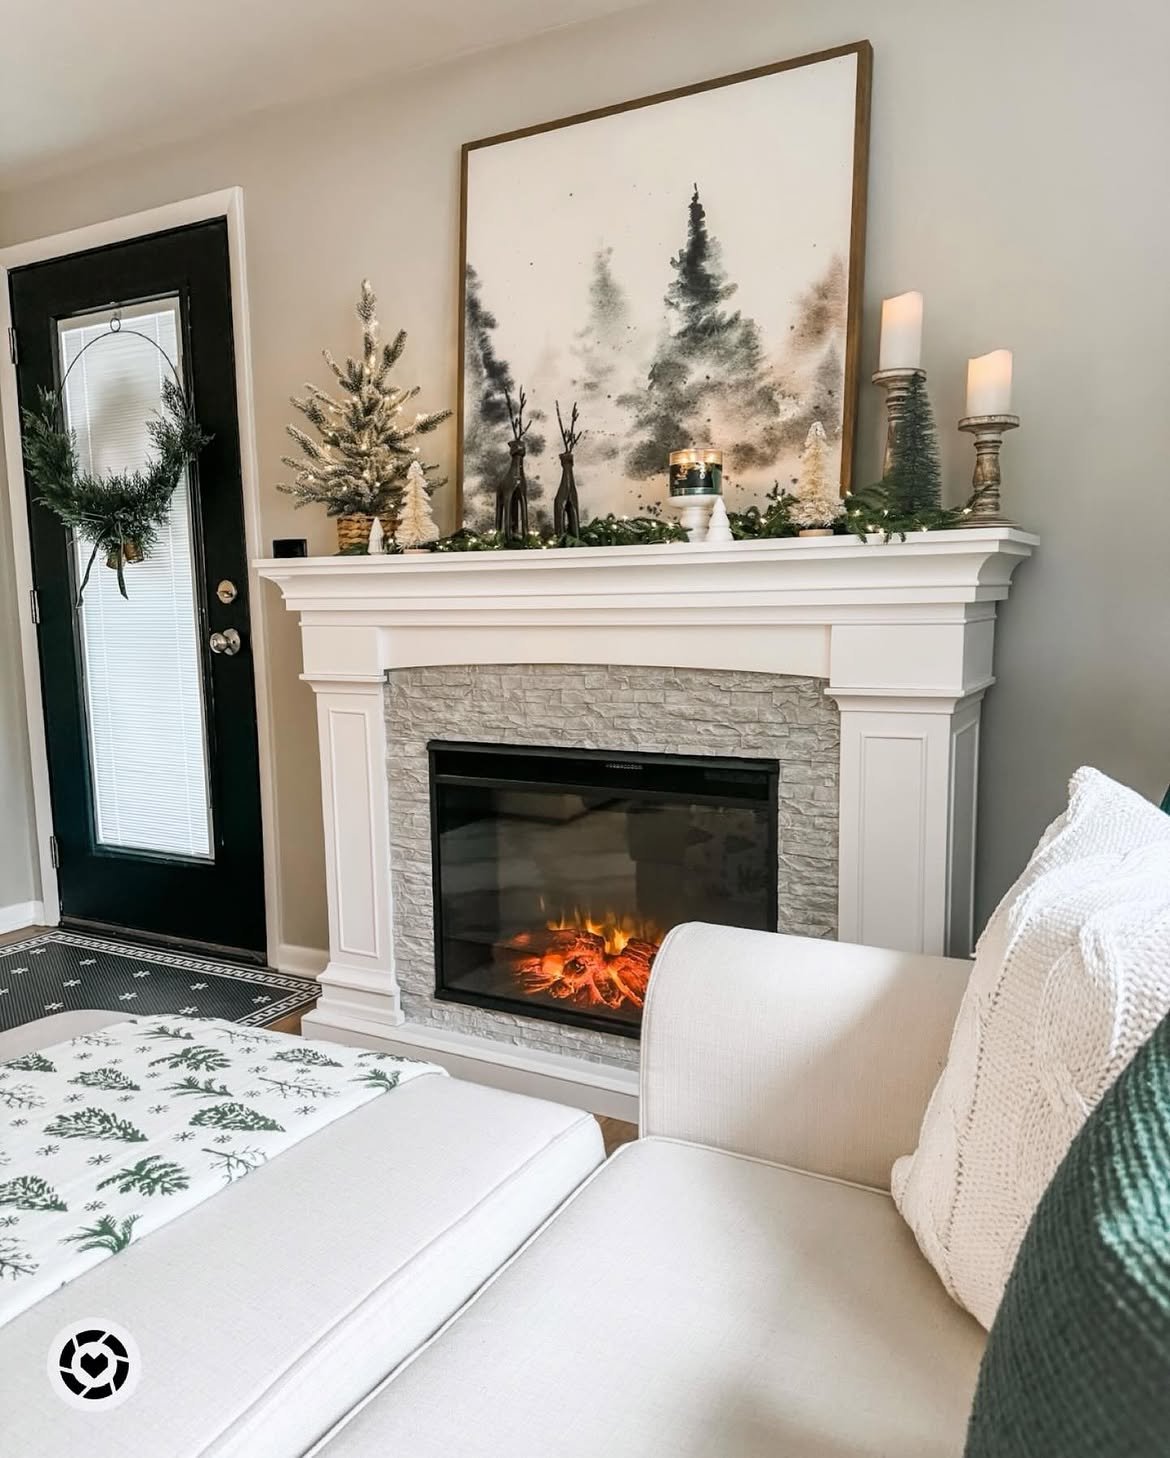
15 Fall Fireplace Mantel Decor Ideas
My fireplace mantel looked the same in November as it did in March. One framed print, two identical white candles, space on either side. Seasonal as a parking lot.
Tried adding an orange plastic pumpkin. Looked like it was waiting for trick-or-treaters, not decorating a home. Removed it before the week was out.
Then I stopped adding seasonal objects and started building a complete mantel composition. Layers, heights, varied textures, a genuine color story. Room finally understood it was fall.
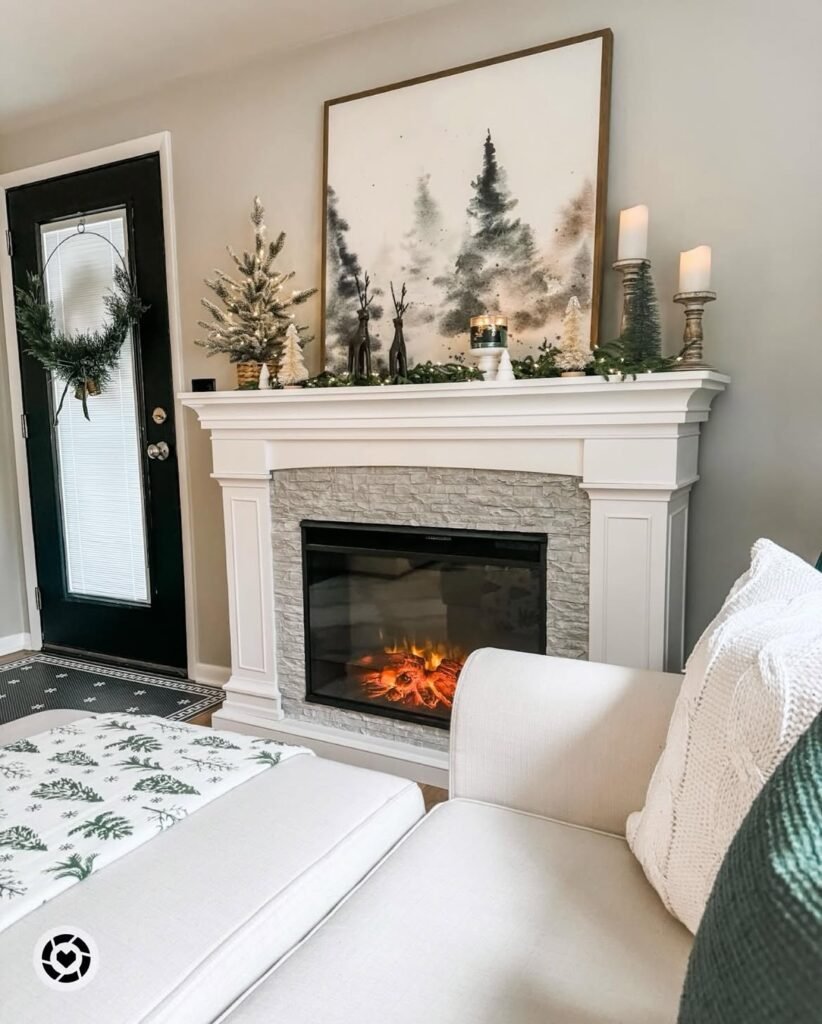
Now guests walk past the sofa and stop at the fireplace. Every single time. Same mantel, same fireplace, completely different focal point.
Let me show you 15 mantel ideas that turn the most important surface in your living room into the room’s best fall moment.
Why Most Mantels Look Unfinished
The common failures:
The symmetry trap:
- Identical objects placed at each end
- One thing dead center
- Perfect mirror image left and right
- Looks like a furniture store display not a curated home
The sparse mistake:
- Three objects spread across six feet
- Too much empty space between pieces
- Objects look lonely not composed
- Eye travels the gaps not the objects
The wrong scale:
- Small objects on a large mantel (lost and insignificant)
- Objects too short (mantel shelf and objects, but no vertical presence)
- Nothing reaching toward the ceiling (composition has no height)
- Flat surface with flat objects
The seasonal object dropped on a neutral background:
- Adding one fall item to an otherwise unchanged display
- Fall piece looks out of place
- No color story connecting it to the room
- Decoration not design
What a successful fall mantel does:
Creates a complete composition:
- Varied heights (the tallest element reaches up significantly)
- Asymmetry within a general balance
- Color story consistent from one end to the other
- Texture variation visible from across the room
My revelation: A mantel is a stage. The composition, not the individual objects, is what makes it work. Fall objects arranged randomly never look as good as fewer objects arranged with intention.
1. The Natural Abundance Arrangement (Dried Botanicals and White Pumpkins)
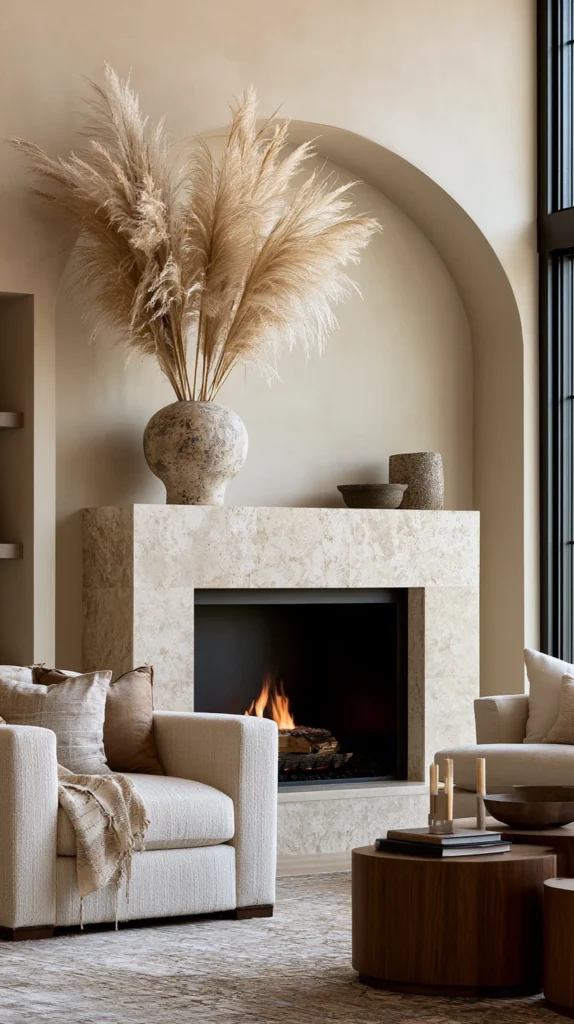
Dried stems, preserved leaves, and cream-colored pumpkins — the most elegant interpretation of fall without a single bright orange piece.
My orange pumpkin problem:
What I had been doing:
- Bright orange pumpkins from the grocery store
- Lasted two weeks before going soft and wrinkled
- Looked festive but not designed
- Removed before Halloween was even over
The natural abundance switch:
Why white and cream pumpkins:
- Cream and white pumpkins read as decor not Halloween
- Stay in place from September through November
- Pair with everything in the fall color palette
- More sophisticated than any orange option
The complete natural arrangement:
Anchor element (tallest, back center or slightly off-center):
- Tall vase with dried pampas grass plumes (24-30 inches)
- Or dried wheat stalks in a terracotta vessel
- Or dried lunaria (silver dollar plant) in a dark glass bottle
- This element gives the mantel its vertical height
Middle layer:
Varying the heights:
- Three cream or white pumpkins in varied sizes beside the tall anchor
- Mixed small gourds (white, green, buff, tan) clustered together
- Two or three dried botanical stems in a shorter vessel
Ground layer (on the mantel shelf itself):
Filling the horizontal plane:
- A handful of acorns scattered naturally (not in a perfect row)
- Small pinecones grouped at the base of the taller elements
- A few dried oak leaves pressed and placed casually
- A small candle tucked among the elements
Color palette for this arrangement:
Cream, tan, and warm white:
- White and cream pumpkins
- Natural dried botanical tones (wheat, oat, pale plume)
- Terracotta or dark ceramic vessel (earthy contrast)
- One brass or aged gold candleholder (warm metal)
Where to source:
Pumpkins and gourds:
- Farmers markets (most variety, best quality, seasonal)
- Grocery stores (limited variety but convenient)
- Craft stores (faux versions for longer display life)
Dried botanicals:
- Trader Joe’s and Whole Foods (seasonal dried stems)
- Hobby Lobby and Michael’s (year-round dried selection)
- Forage outside (dried seed heads, reeds, branches)
White and cream pumpkins specifically:
- Not always in grocery stores early in fall
- Farmers markets usually have them
- Faux versions available at craft stores ($8-25) for permanent display
Faux vs real:
The case for faux pumpkins:
- Real pumpkins last 3-6 weeks before softening
- Faux pumpkins last indefinitely (use every fall for years)
- Quality faux pumpkins look convincing from normal viewing distance
- Investment that pays off over multiple seasons
Cost:
- Dried botanical stems: $15-40
- Three white pumpkins (real): $10-20
- Mixed gourds: $8-15
- Candle and holder: $15-30
- Total: $48-105
My natural abundance mantel: No orange anywhere, cream pumpkins and dried pampas grass stayed up from September through Thanksgiving without looking out of place, most seasonally flexible arrangement I have ever done.
Natural Abundance Tips
The odd number rule:
Always:
- Three pumpkins not two or four
- Five gourds not six
- Odd numbers feel natural and dynamic
- Even numbers feel static and too deliberately placed
Forage before buying:
Free elements that add authenticity:
- Fallen branches from the yard or park
- Dried seed heads and grasses from roadsides
- Oak leaves pressed flat under heavy books
- Pinecones collected on a walk
- These foraged elements have a naturalness purchased decor cannot replicate
2. The Candle Cluster Mantel (Warmth Through Repetition)
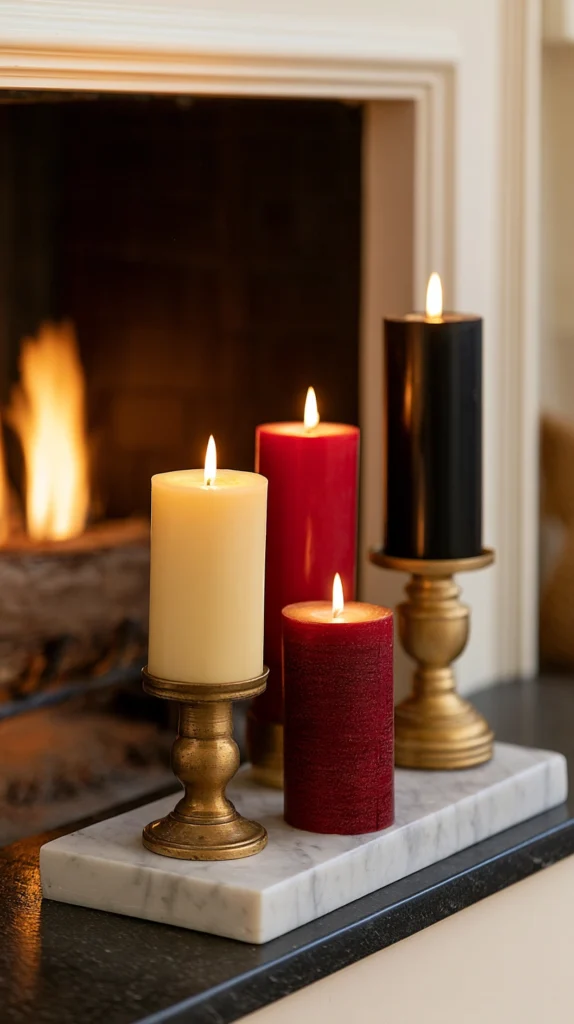
Multiple candles of varied heights grouped in a deliberate arrangement — the most atmospheric fall mantel for evening.
My single candle problem:
What I had:
- One candle at each end (symmetrical and flat)
- No height variation between the two
- Not enough warm glow to make any impact
- Looked like forgotten afterthoughts, not intentional design
The cluster transformation:
Why multiples beat singles:
- One candle: functional
- Three candles: intentional
- Seven candles: atmospheric
- The cluster creates a scene, not just a light source
Pillar candle cluster formula:
Height variation is everything:
- One tall pillar (12-18 inches, back position)
- Two medium pillars (8-10 inches, middle position)
- Two or three short pillars (4-6 inches, front and sides)
- All grouped closely, not spread out
Color coordination:
Best fall candle colors:
- Deep burgundy (richest fall tone)
- Forest green (unexpected and sophisticated)
- Deep cream or ivory (most versatile, lets wax show beautifully)
- Black (most dramatic, pairs with warm metal)
- Avoid: bright orange (too Halloween), stark white (too cool)
Wax types:
Pillar candle materials:
- Beeswax pillars (most beautiful, natural golden tone, slow burn, warm scent)
- Soy wax pillars (cleaner burn, good for scented options)
- Paraffin (most affordable, most common, adequate)
The base they sit on:
Protecting the mantel and elevating the composition:
- Wooden board or slice (rustic, natural)
- Marble slab or tile (most elegant)
- Antique mirror tile (reflects the flame, most glamorous)
- Simple tray (keeps everything contained)
- Never directly on the mantel shelf without protection (wax damage)
Adding non-candle elements:
Supporting the cluster:
- Small pumpkin or gourd tucked beside the cluster
- Dried botanicals behind the tallest candle
- A few scattered acorns or berries around the base
- One or two brass or antique candlestick holders mixed in (height and texture variation)
Safety considerations:
With real candles:
- Never leave lit candles unattended
- Keep clear of mantels with low-hanging decor above
- LED candle alternatives for mantels with garland or wreaths above
- Snuff candles instead of blowing (prevents wax spray)
LED candle alternative:
For safety and convenience:
- High-quality LED pillar candles (Luminara brand most realistic)
- Realistic flickering flame effect
- Remote and timer controlled
- Use the same cluster formula, all the atmospheric benefit
- Cost: $20-50 per quality candle versus $5-15 for real pillars
Cost:
- Pillar candle set (5-7 candles): $25-60
- Wooden board base: $15-30
- Supporting fall objects: $15-35
- Total: $55-125
My candle cluster mantel: Seven candles of varied heights on a wooden board became the most-photographed corner in my house, guests stand at the fireplace before sitting anywhere, at night with only candle light the entire room transforms.
Candle Cluster Tips
Tight grouping matters:
The clustering principle:
- Candles spread far apart (look random)
- Candles grouped closely, even touching (look composed)
- The cluster creates visual mass that reads as one composed object
- More dramatic from across the room
Uneven numbers of each height:
Not a matched set:
- Avoid purchasing three of the same height candle
- Variation in height, width, and texture makes the cluster look assembled not purchased
- Buying candles individually from different sources creates the most authentic cluster
3. The Asymmetric Statement Arrangement (One Side Heavy, One Side Light)
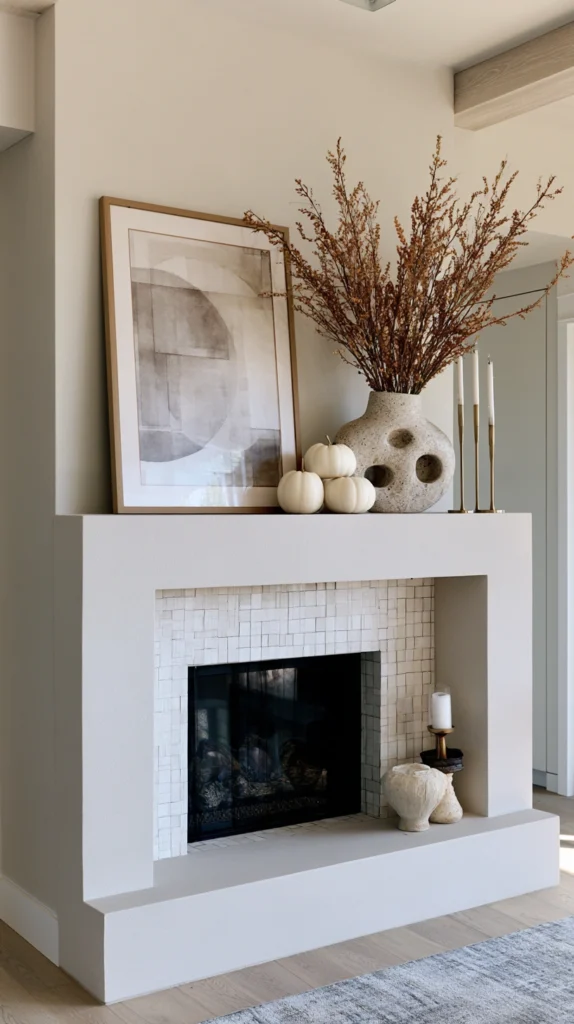
Deliberate imbalance with most visual weight on one side — the arrangement that looks most designed and least accidental.
My symmetry problem:
Why I thought symmetry was correct:
- Every mantel I had ever seen was symmetric
- It felt safer and more deliberate
- Both ends identical seemed organized
- I was wrong
Why asymmetry works better:
The design principle:
- Perfect symmetry (looks manufactured, decorative)
- Asymmetric balance (looks curated, alive)
- The eye is more engaged by asymmetric compositions
- Rooms in design magazines almost always have asymmetric mantels
Building an asymmetric fall mantel:
The heavy side:
- A tall anchor element (large mirror, leaning art, or tall vase with stems)
- A cluster of varied-height pumpkins or gourds beside it
- A lantern or tall candlestick in front
- Approximately two-thirds of the mantel’s visual weight
The light side:
- One or two small elements only
- A single small pumpkin or ceramic piece
- One short candle
- Open space is intentional, not a mistake
The center:
- Usually left relatively open (breathing room)
- Or one small low element
- Connects the heavy and light sides
- The eye should travel from heavy to light, not land in the center
Leaning art or mirror as the anchor:
Why leaning works for this arrangement:
- A leaning large piece (art or mirror) is more relaxed than a hung piece
- Signals that the mantel is a styled surface, not a picture wall
- The lean allows easy seasonal swapping
- Frames other elements loosely
Best anchor choices:
Tall elements for the heavy side:
- Large framed art leaned against the wall (fall landscape or abstract)
- An oversized mirror (arched shape most current)
- A tall dried botanical arrangement
- A clock with visual presence
Transition element:
The connecting piece:
- Something small placed between the heavy and light sides
- A small framed photo or a short candle
- Creates a visual bridge rather than an abrupt gap
- Often a small personal object works here
Cost:
- Leaning art or mirror (thrifted): $20-100
- Fall objects for heavy side: $30-70
- Minimal pieces for light side: $10-25
- Total: $60-195
My asymmetric mantel: Switching from a perfect mirror-image arrangement to one heavy side changed how guests interacted with the mantel entirely, now they lean in to look at the detailed side, the breathing room on the other side makes the room feel larger.
Asymmetric Tips
Three-to-one rule:
Weight distribution:
- Heavy side holds approximately 70% of the visual mass
- Light side holds approximately 30%
- Never 50-50 (symmetry defeats the purpose)
- Never 90-10 (too extreme, looks accidental)
The leaning piece must be substantial:
Scale requirement:
- A small leaned piece on a large mantel looks lost
- The anchor should be at least half the mantel’s height
- If the ceiling is high, the piece can lean even taller
- Undersized anchors undermine the entire asymmetric composition
4. The Greenery and Berry Garland (The Classic Fall Drape)
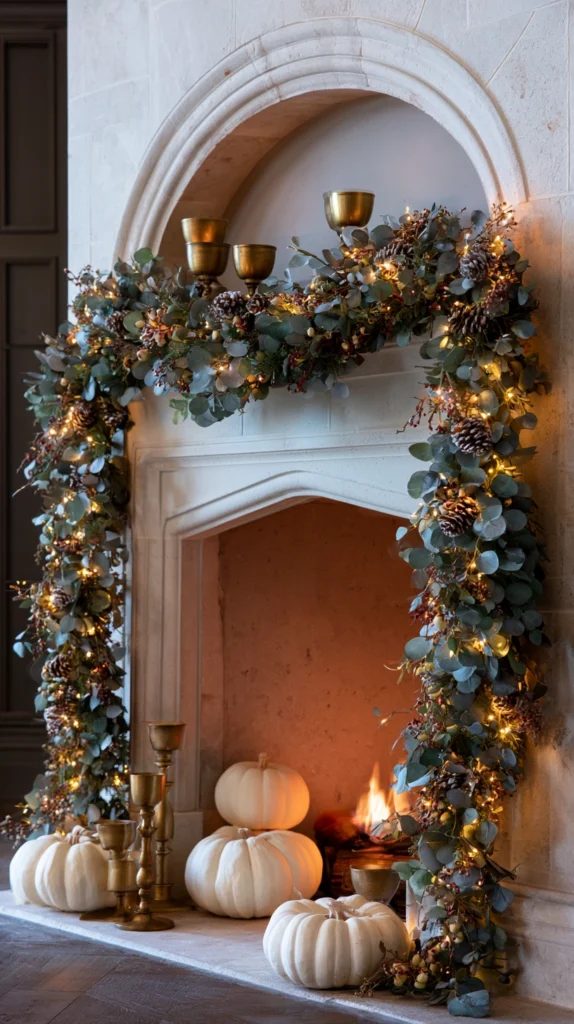
Natural or faux garland draped along the mantel edge — the most immediately recognizable fall mantel treatment.
My bare mantel edge:
What was missing:
- Mantel shelf visible and plain
- No connection between the mantel top and the fireplace below
- The mantel looked like a shelf not a designed element
- Garland fixes exactly this problem
Why garland works so well:
The cascading effect:
- Garland drapes over the mantel edge and hangs down slightly
- Connects the horizontal mantel top to the vertical fireplace surround
- Softens the hard line of the shelf
- Visually ties the upper and lower fireplace zones together
Fall garland types:
Natural fresh garland:
- Eucalyptus (most popular, fragrant, lasts 2-3 weeks fresh)
- Mixed autumn leaves (real gathered leaves, very temporary)
- Pine or cedar boughs (lasts longer, transitions toward winter)
- Cedar berry garland (seasonal, beautiful)
Dried garland:
- Dried eucalyptus (keeps longer than fresh, fades from green to silvery)
- Dried orange slices strung on wire or twine
- Dried bay leaves and seed pods
- Longer lasting than fresh options
Faux garland:
- Most practical for multi-week display
- Wide range of quality (invest in the better options)
- Most realistic versions from specialty shops or Etsy
- Can be reused every fall
Fall-specific garland additions:
What to weave into the garland:
- Small pinecones hot-glued or wired at intervals
- Dried berry clusters (bittersweet, rosehip, pyracantha)
- Small dried orange or lemon slices
- A strand of warm fairy lights woven through
- Miniature pumpkins or gourds clipped onto garland wire
Draping technique:
How to drape for the most impact:
- Start from the center and work outward
- Allow a natural drape and slight sag (too tight looks stiff)
- Let the ends fall over the mantel edge 4-6 inches
- Secure with small clear command strips or mantel clips if needed
Fairy light integration:
Lighting the garland:
- Warm white fairy lights (2200-2700K, never cool white)
- Battery or plug-in both work
- Timer function (comes on at dusk, off at midnight)
- Transform the mantel completely after dark
Combining garland with objects above:
Garland is not the only element:
- Objects still sit on the mantel shelf within or behind the garland
- Candles positioned so they do not touch the garland (fire safety)
- Small pumpkins nested into the garland
- Art or mirror behind, garland in front
Cost:
- Fresh eucalyptus garland (6 feet): $15-30
- Faux fall garland: $20-60
- Fairy lights: $10-20
- Additional garland additions (pinecones, berries): $10-25
- Total: $35-135
My eucalyptus garland mantel: Fresh eucalyptus from Trader Joe’s draped in early October, lasted nearly three weeks before drying beautifully into a silvery-gray that I left up through November, most fragrant and natural fall change possible.
Garland Tips
Let it sag naturally:
The draping mistake:
- Garland pinned or clipped too tightly (looks like a theater prop)
- Natural weight creates a gentle dip at center (correct)
- Slight imperfection in the drape makes it look gathered by hand not staged
- Release control of the drape and let the garland find its natural position
Fire safety with garland:
Non-negotiable rules:
- Garland on an active fireplace: maintain 12 inch clearance from the firebox opening
- Or use the fireplace in a no-fire decorative mode during garland season
- LED candles on the mantel when garland is present (not real flames)
- Dry garland is more flammable than fresh
5. The Vintage and Collected Objects Mantel (Curated Over Time)
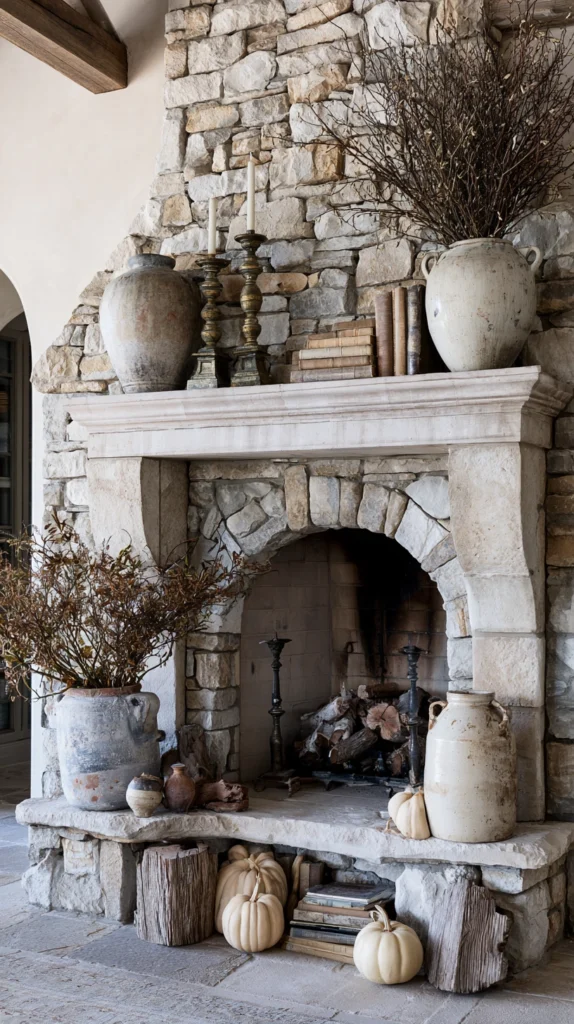
Old pottery, found objects, and vintage pieces arranged as one cohesive vignette — the mantel that looks assembled over years not purchased in one trip.
My impersonal mantel:
What was wrong:
- Everything purchased from the same store in the same season
- Objects clearly matched (bought as a set)
- No history, no story, no personal connection
- Beautiful but hollow
The collected mantel philosophy:
Why vintage and found objects work:
- Age gives objects visual weight that new objects rarely have
- Slight imperfection and patina signal genuineness
- No two vintage arrangements can ever look identical
- Personal selection creates personality the mantel cannot have otherwise
Object categories to look for:
Vintage ceramic and pottery:
- Old crocks or jugs in cream and brown tones
- Earthenware bowls with earthy glazes
- Stoneware in warm natural colors
- Wabi-sabi quality preferred (slight irregularity)
Warm metal objects:
- Aged brass candlesticks (different heights, not a matching set)
- Copper vessels or trays
- Old iron trivets or implements (decorative not functional)
- Unlacquered brass develops beautiful patina
Found natural objects:
- Large interesting stones or geodes
- Driftwood pieces
- Interesting seed pods or dried botanical items
- Objects gathered rather than purchased carry different energy
Books on the mantel:
Stacked books as architecture:
- Two or three hardcovers stacked horizontally
- Creates a platform for a smaller object on top
- Adds the visual weight of a rectangle at different heights
- Choose books with beautiful spines or warm-toned covers
Seasonal objects within the vintage collection:
Where fall appears:
- A few gourds nested among the vintage objects
- A small pumpkin placed beside an old crock
- Dried botanicals in a vintage bottle or jug
- The vintage objects provide the structure, fall elements appear as guests
Sourcing vintage mantel objects:
Best sources:
- Estate sales (best prices, most authentic vintage)
- Antique shops (curated but more expensive)
- Thrift stores (patient hunting, exceptional prices)
- Facebook Marketplace (free section occasionally has objects)
- Family hand-me-downs (most meaningful)
The arrangement approach:
Composing the collection:
- Establish one tallest element (the visual anchor)
- Bring in varied heights around it
- Cluster related objects together
- Leave breathing room between the clusters
- Not wall-to-wall coverage, but thoughtful density
Cost:
- Vintage objects from thrift and estate sales: $20-80
- One quality brass candlestick or vase: $15-40
- Fall additions (gourds, dried botanicals): $15-30
- Total: $50-150
My vintage collection mantel: Every object has a story now, the old earthenware crock belonged to my grandmother, the brass candlestick came from an estate sale for $6, guests ask about specific pieces and conversations start around the mantel rather than elsewhere.
Vintage Collection Tips
Editing is the skill:
The curation principle:
- Every object should earn its place
- Remove anything that does not add something the others do not
- If removing an object makes the arrangement look the same or better, leave it out
- The goal is density that reads as composed, not density that reads as cluttered
Cleaning vintage pieces before display:
Preparation:
- Wash ceramic pieces thoroughly before placing on the mantel
- Wipe metal objects (remove dust, leave patina)
- Oil wooden pieces (brings color back)
- Dust the mantel shelf itself before building the arrangement
6. The Framed Art and Object Layering (Gallery Meets Mantel)
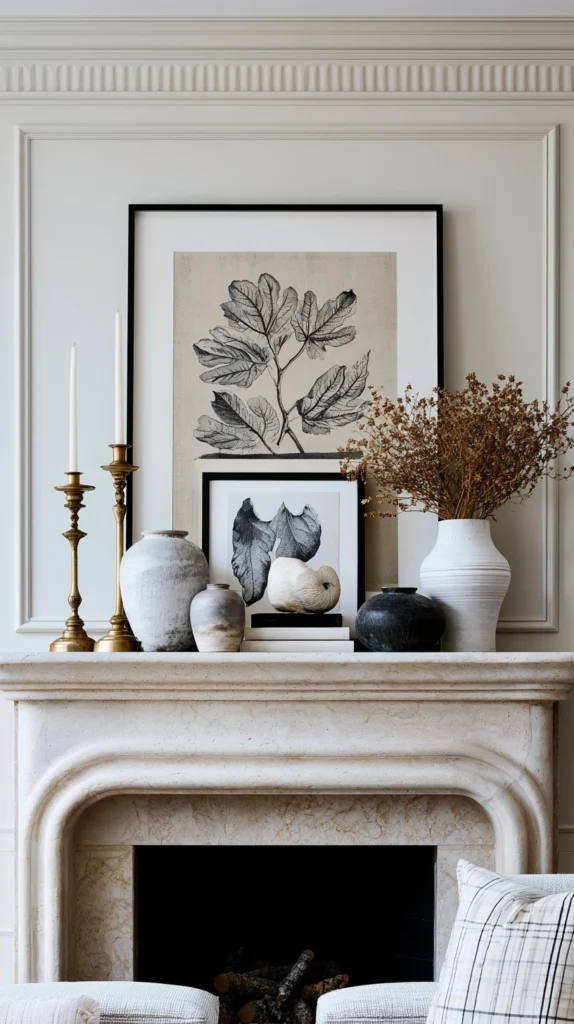
One or more framed pieces leaned at the back with objects in front — creating depth through multiple planes.
My flat mantel problem:
What was happening:
- Everything sitting on the same horizontal plane
- No front-to-back depth
- Eye took in everything simultaneously (no discovery)
- Arrangement read as a shelf not a composition
The layering solution:
Creating planes of depth:
- Back plane: art or mirror leaned against wall
- Middle plane: taller objects placed in front of the art
- Front plane: smaller objects placed at the mantel edge
- The eye travels through depth, not just across width
Art selection for fall mantels:
What works behind mantel objects:
- Fall landscape (warm color, seasonal relevance)
- Abstract in fall palette (rust, ochre, olive tones)
- Botanical print (vintage illustration style)
- Simple warm-toned photograph
- A mirror (reflects the room, most versatile)
Frame style:
Frames that work:
- Warm wood (natural or stained)
- Aged gold or brass (warm and decorative)
- Simple black (graphic, lets art speak)
- Never: chrome, modern geometric, bright colors
Layering objects in front of art:
Creating the depth:
- One taller object beside the art (candlestick, small vase)
- Objects in front do not fully block the art (partial visibility intended)
- The partial blocking creates the layered, dimensional effect
- Everything visible at once defeats the purpose of layering
Multiple frames:
More than one leaned piece:
- Two frames of different sizes leaned together (one slightly in front)
- Creates a mini gallery on the mantel
- Frames should overlap slightly (intentional layering)
- Both frames in the same tone family (even if different specific finishes)
The art content in fall:
Seasonal but not obvious:
- A painting with warm ochre, rust, or deep green tones works without being explicitly “fall”
- A botanical print of dried flowers or seed pods
- A landscape with bare trees or golden fields
- Abstraction allows color to do the seasonal work without a literal image
Sourcing art for the mantel:
Affordable options:
- Print your own from free art websites (Unsplash, Rawpixel, Art Institute Chicago digital collection)
- Print at a local print shop: $5-15 depending on size
- Frame from thrift store: $5-20 for good frames
- Total cost for original-looking art: under $40
Cost:
- Framed art or prints: $20-100
- Objects layered in front: $20-60
- Total: $40-160
My layered art mantel: Leaning a large framed botanical print at the back and layering a tall brass candlestick, a small pumpkin, and a ceramic vessel in front of it created more depth on the mantel than any previous arrangement, photographs like a professional styled vignette.
Art Layering Tips
The partial reveal:
What makes layering work:
- Objects that entirely cover the art behind (defeats the purpose)
- Objects that partially cover (creates mystery, the eye looks behind)
- Aim for the art to be 60-70% visible, objects overlapping the edges
- This partial overlap is the specific detail that creates the dimensional effect
Frame size relative to mantel:
Proportion rule:
- Art should be 50-80% of mantel width maximum
- Narrower art on a wide mantel (looks lost)
- Too-wide art dominates and leaves no room for objects
- Sweet spot is art that anchors without overwhelming
7. The Dark and Moody Gothic Fall Mantel (Dramatically Atmospheric)
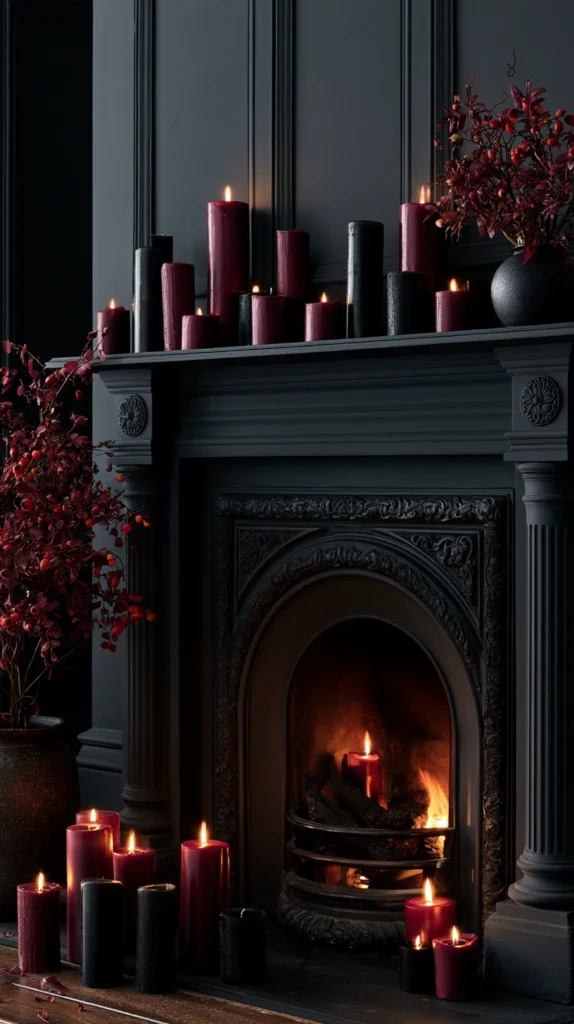
Deep colors, dark candles, dried botanicals, and dramatic objects — the most atmospheric fall mantel that leans into the season’s darker tone.
My fear of going dark:
What held me back:
- Worried dark colors would be too dramatic
- Thought the mantel should be bright and cheerful for fall
- Kept choosing light cream and orange instead
- Finally went dark and never looked back
What the moody mantel looks like:
The color palette:
- Deep burgundy and wine
- Forest and hunter green
- Black or near-black accents
- Warm amber and bronze metals
- Nothing bright, nothing cheerful
Key objects for this style:
Dark candles:
- Black or deep burgundy pillar candles
- Clustered in brass or aged bronze holders
- At night this arrangement is extraordinary
- Lit candles on dark surfaces with dark walls: pure atmosphere
Dark dried botanicals:
Appropriate botanical choices:
- Dried blackberries or elderberries (dark and organic)
- Black seed pods or dark dried flowers
- Dried artichokes or thistles (dramatically structured)
- Dried purple or deep red statice
- Dark wheat or rye (earthy, slightly moody)
Dark or dramatic vessels:
Container choices:
- Dark glazed ceramic jugs (deep navy, forest green, black)
- Black wrought iron candlesticks
- Deep amber glass bottles
- Bronze or aged copper vessels
- Avoid: white, cream, or bright metallic finishes
Skull and subtle gothic elements:
For those who want the reference:
- Small decorative skull (ceramic, neutral, not Halloween plastic)
- Antique or vintage-looking small objects
- Dried flowers arranged in a dark vessel
- These elements work if the rest of the mantel is sophisticated
The fireplace below:
Completing the dark mantel:
- Candles inside a non-functioning fireplace (most dramatic)
- Or a decorative log stack with candles nestled among the logs
- The fireplace itself becomes part of the atmospheric composition
- Dark fireplace surround (painted black if possible and desired)
Who this suits:
Best for:
- Those who embrace the gothic, mysterious aspect of autumn
- Homes with darker walls or existing moody atmospheres
- Evening-focused living rooms
- Anyone tired of the cheerful orange interpretation of fall
Cost:
- Dark pillar candles: $20-40
- Dark ceramic or glass vessels: $25-60
- Dark dried botanicals: $15-35
- Aged metal candlesticks (thrifted): $10-40
- Total: $70-175
My dark moody mantel: The year I finally committed to this look was the year guests stopped just glancing at the mantel and started standing in front of it, the drama is the point, nobody who loves fall wants cheerful.
Dark Moody Tips
Warmth saves dark from cold:
The critical balance:
- Dark colors plus cool lighting: oppressive
- Dark colors plus very warm lighting (2200-2700K candles and lamps): atmospheric
- Warmth is everything in this approach
- Never cool-toned lighting with a dark moody mantel, ever
The non-Halloween distinction:
Keeping it sophisticated:
- No plastic, no bright orange, no cartoon graphics
- All natural materials (dried, ceramic, metal)
- The aesthetic should reference autumn’s melancholy, not a costume party
- This distinction is felt immediately by guests
8. The Harvest Tablescape Style (Mantel as Dining Table Extension)
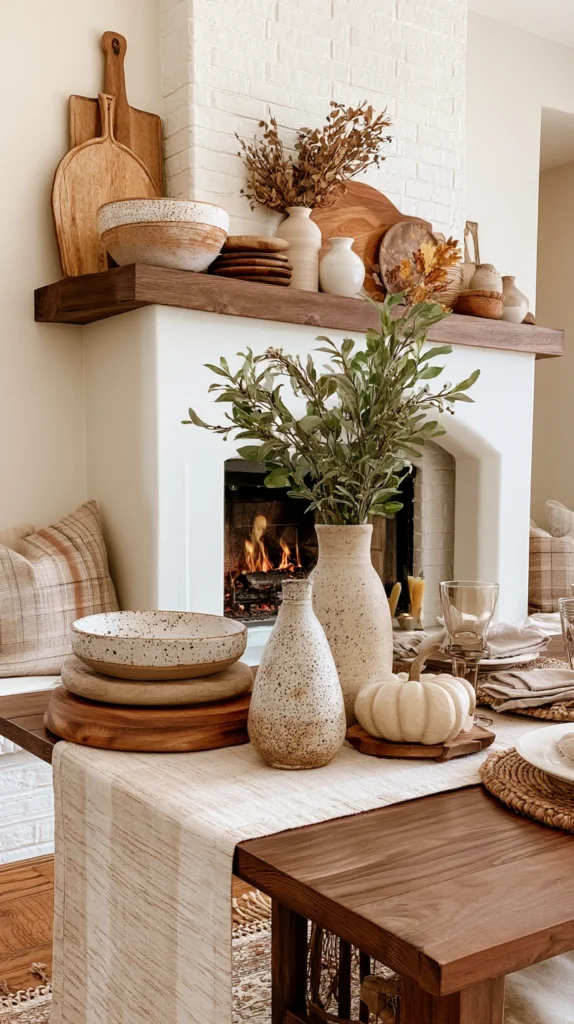
Treating the mantel like a tablescaped surface with food-adjacent elements — the warmest and most welcoming fall mantel interpretation.
My formal and untouchable mantel:
What it communicated:
- “Please do not touch anything”
- Objects chosen for appearance not warmth
- No food, no abundance, no invitation
- Missing the essence of what fall hospitality means
The harvest philosophy:
What this mantel communicates instead:
- Abundance and generosity
- The season of harvest and gathering
- Food and warmth as design elements
- Guests feel welcomed not cautioned
Harvest mantel elements:
Food-related objects:
- A woven bread basket (even without bread inside, the shape communicates warmth)
- Dried corn on the cob grouped in a cluster
- A ceramic bowl filled with nuts, pinecones, or small apples
- A mortar and pestle (culinary and sculptural)
- Jars of honey or preserved fruit as warm amber objects
Natural abundance:
Layering in harvest elements:
- Multiple pumpkins and gourds in a loose cluster
- A small arrangement of dried sunflowers (seeds still present, agricultural feeling)
- Dried herbs hanging or bundled
- Wheat or barley sheaves grouped together
Ceramic and pottery:
Vessels for the harvest mantel:
- Large ceramic crocks (traditional harvest vessel shape)
- Stoneware jugs with natural glaze
- A simple wooden bowl
- Earthenware serving pieces used decoratively
The tablecloth reference:
A runner on the mantel:
- A short woven textile runner laid down the center of the mantel shelf
- Creates a tablescaped quality immediately
- Protects the mantel from objects and wax
- Adds a layer of warmth and pattern
Color palette:
Warm harvest tones:
- Deep harvest gold and mustard
- Warm brown and cognac
- Rust and terracotta
- Cream and natural
- Everything that reads as abundance and warmth
Fragrance element:
Scenting the harvest mantel:
- A small bowl of potpourri with cinnamon and clove
- A cluster of dried cinnamon sticks beside a candle
- An apple and cinnamon-scented candle
- The scent completes the experience (fragrance is the invisible layer)
Cost:
- Woven basket: $15-30
- Ceramic crock or bowl: $15-40
- Gourds and small pumpkins: $10-20
- Dried corn or sunflowers: $10-20
- Textile runner: $15-30
- Total: $65-140
My harvest mantel: Most commented-on mantel I have ever done, guests always said it made them feel immediately hungry for something warm, the abundance communicates a welcome that more formal mantels never quite achieve.
Harvest Mantel Tips
Real food elements:
Using actual food:
- Small apples or pears last 2-3 weeks as decor
- Small gourds last 4-6 weeks depending on temperature
- Dried corn lasts indefinitely
- Replace any softening real food immediately (the abundance aesthetic requires everything looking abundant and fresh)
The layering principle:
Height even on a harvest mantel:
- Tall wheat sheaf or sunflower cluster at back
- Medium gourds and basket at middle height
- Small nuts and cinnamon sticks at ground level
- Even abundance needs height variation to read as composed
9. The Framed Mirror and Pumpkin Pairing (Simple and Timeless)
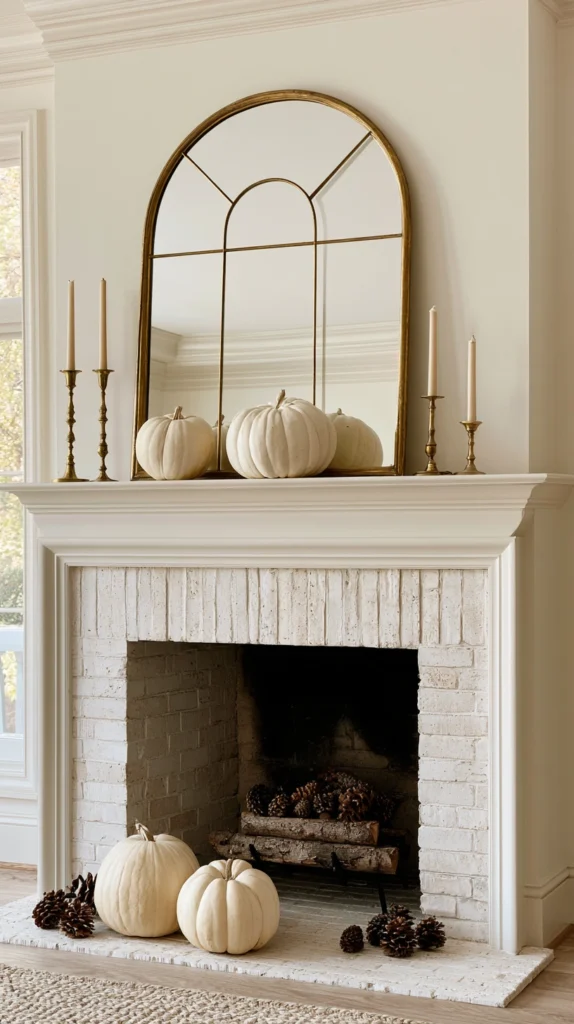
One beautiful mirror with carefully chosen fall objects below and beside it — elegant restraint that still reads as fall.
My over-decorated mantel phase:
What I had overcorrected to:
- Too many objects after realizing a bare mantel was wrong
- Overcrowded and visually exhausting
- Nowhere for the eye to rest
- More was no longer more
The mirror solution:
Why a mirror anchors any mantel:
- Reflects the room (doubles perceived space)
- Reflects candlelight (most beautiful evening effect)
- Acts as the anchor that makes everything else make sense
- Works in every style from traditional to modern
Mirror styles for fall mantels:
Most current and versatile:
- Arched top mirror (most hobbitcore and cottage-adjacent)
- Round mirror with warm frame
- Large rectangular mirror with ornate gold frame
- Sunburst mirror (more dramatic, graphic statement)
Frame materials that work:
Correct choices:
- Aged brass or gold
- Natural or stained wood
- Antique bronze
- Avoid: chrome, modern geometric black metal frames, glossy white
The pumpkin positioning:
Where pumpkins go with a mirror:
- Directly in front of the mirror at the base (reflects in the glass, doubles visually)
- Flanking the mirror on either side (framing it)
- One large white or cream pumpkin centered below the mirror is often sufficient
- The mirror behind amplifies whatever is placed in front of it
Simple supporting objects:
What goes with mirror and pumpkins:
- Two brass candlesticks on either side (allowed to be roughly symmetrical here)
- A small bundle of dried herbs or botanicals
- One or two small gourds to break pure symmetry
- A flat dish with acorns or small pinecones at the base
The restraint principle:
Why less works here:
- The mirror does heavy visual lifting on its own
- Too many competing objects fight the mirror’s presence
- Five or six objects maximum is usually correct for this arrangement
- Each object should be visible as an individual choice, not lost in a crowd
Mirror sizing:
Right size for the mantel:
- Mirror should be 50-75% of the mantel width
- Too narrow (looks lost)
- Full mantel width (competes with objects on the sides)
- Sweet spot allows breathing room on each side
Cost:
- Mirror (thrifted or mid-range): $40-200
- Three to five fall objects: $25-55
- Two brass candlesticks: $15-40
- Total: $80-295
My mirror and pumpkin mantel: The simplest successful mantel I have ever built, one arched mirror with two brass candlesticks and three white pumpkins in front, sometimes the formula is that uncomplicated and that is exactly the point.
Mirror Tips
The lean versus hang:
Which approach to choose:
- Hung mirror (more permanent, cleaner look, requires wall anchoring)
- Leaned mirror (more casual, flexible, no wall damage, can be repositioned)
- Mantels specifically benefit from leaned mirrors (more relaxed, easier to style around)
- Either works, the lean is more forgiving for seasonal rearranging
Reflection planning:
What the mirror reflects:
- Before placing a mirror, look at what it will reflect from that position
- A mirror reflecting a beautiful lit lamp or candlelit scene: perfect
- A mirror reflecting a cluttered wall or an ugly ceiling fixture: adjust position
- The reflection is half the mirror’s contribution
10. The Nature Walk Mantel (Foraged and Found Elements)
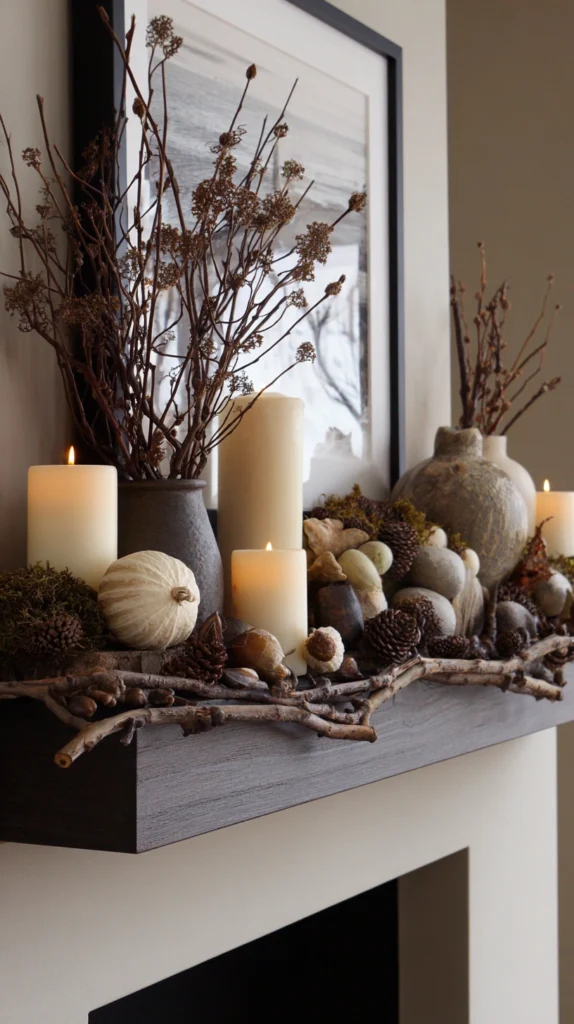
Objects gathered from outside rather than purchased — the most authentic and most free fall mantel.
My purchased-everything problem:
What I never tried:
- Going outside and gathering elements
- Treating the yard and park as a source of decor
- Combining foraged with owned objects
- Everything I had was bought; nothing was found
The foraged mantel philosophy:
Why gathered elements are different:
- No factory produced them
- They belong to the specific landscape and season
- Nothing could be exactly replicated
- Personal and site-specific in a way purchased objects cannot be
What to forage for a fall mantel:
From the yard and neighborhood:
- Interesting fallen branches (twisted, silvery, textural)
- Dried seed heads and grasses
- Acorns and oak leaves
- Pinecones (various sizes)
- Dried berry clusters (bittersweet, if available)
- Mossy stones or lichen-covered wood
From farms and roadsides (with permission or from public areas):
- Dried corn stalks or husks
- Dried sunflowers (seed head only)
- Dried grasses and reeds
- Wild rose hips (beautiful deep red)
Processing foraged materials:
Before bringing inside:
- Inspect for insects (especially pinecones and dense seed heads)
- Knock or shake outdoors first
- Let air dry in a warm space for 24-48 hours if any dampness
- A light spray of hairspray or matte clear coat preserves dried elements
Arranging foraged elements:
Composition approach:
- Gathered branches as the tall anchor (most dramatic, completely free)
- Varied stones grouped as weight and structure at the base
- Acorns and pinecones scattered naturally at ground level
- Seed heads and dried grasses in a simple found bottle or vessel
Combining foraged and owned:
The hybrid approach:
- Foraged elements plus one or two owned objects
- A vintage crock filled with gathered branches
- Owned candles placed among gathered pinecones
- The owned objects lend polish, the foraged lend authenticity
Moss and lichen:
The woodland floor element:
- Preserved sheet moss (purchased, stays green indefinitely)
- Or actual gathered dried moss (browns beautifully)
- Laid flat on the mantel surface as a base layer
- Objects set on top of or nestled within the moss
- Most woodland and natural arrangement technique
Cost:
- Foraged elements: $0
- One preserved moss sheet: $8-15
- Vessel or vase for branches (if not owned): $10-25
- Candle to add warmth: $10-20
- Total: $8-60 (least expensive mantel on this list)
My foraged mantel: A twisted bare branch gathered from a park walk, a handful of pinecones, gathered dried seed heads in an old bottle, and a few mossy stones cost me nothing and generated more genuine compliments than anything I ever purchased for the same surface.
Foraged Mantel Tips
The finding mindset:
Training the eye:
- Start noticing interesting fallen objects on every outdoor walk
- Keep a small bag for gathering
- The habit of noticing changes what appears available
- Most people walk past dozens of potential mantel elements every day without seeing them
Seasonal progression of foraged elements:
What changes month to month:
- September: Still-green pods and seed heads drying
- October: Peak acorn and pinecone season, dried grasses gold
- November: Bare branches, dried berry clusters, rich dried leaves
- The mantel can evolve weekly with new finds without any cost
11. The Layered Vignette With Personal Objects (The Most Meaningful Mantel)
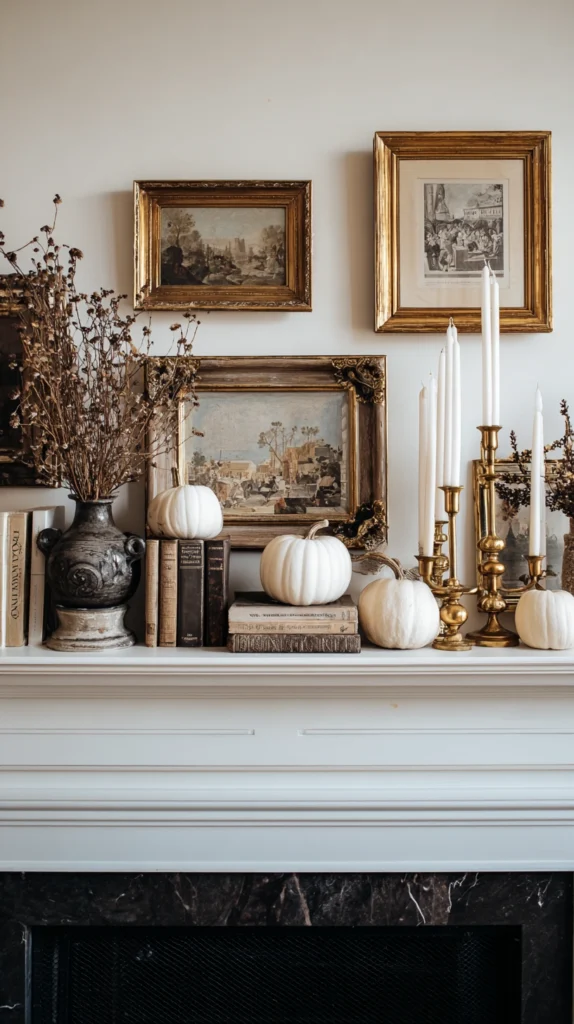
Combining fall seasonal elements with genuinely personal and meaningful objects — the arrangement that tells your specific story.
My impersonal mantel problem:
What it was missing:
- Every object purchased for appearance
- Nothing with personal history
- Nobody’s specific life represented
- Guests saw a styled surface, not a person
The personal vignette philosophy:
Why personal objects belong on the mantel:
- The mantel is the room’s most prominent display surface
- What is displayed communicates what is valued
- A mix of beautiful and meaningful creates a mantel that invites conversation
- Fall elements framing personal objects makes both categories more powerful
What personal objects to consider:
Categories of meaningful objects:
- A small heirloom piece (ceramic, metal, wood) from family
- A found object from a meaningful trip or experience
- A photograph in a simple warm frame
- A book with personal significance displayed with its spine visible
- Something handmade, given as a gift, or made yourself
How to integrate with fall elements:
The surrounding approach:
- Fall elements (gourds, botanicals, candles) surround the personal object
- The personal piece sits in the composed center or at a prominent height
- Seasonal decor honors the personal object rather than competing with it
- Fall provides context and warmth, personal object provides meaning
Keeping it from looking random:
The composition still matters:
- Even with personal objects, the height variation, odd numbers, and clustering principles still apply
- Personal objects are not an excuse to abandon composition
- Apply all the same principles and let the personal objects work within that structure
Rotating personal objects seasonally:
Different objects for different seasons:
- Keep a small collection of personally meaningful objects
- Bring out those most relevant to fall (a small carved gourd from a childhood trip, a grandmother’s ceramic piece)
- Rest others until a season that suits them better
- This rotation keeps the mantel fresh and the personal objects in conversation with the season
Framing personal photographs:
Photographs on the mantel:
- Simple warm wood or brass frame
- One photograph per mantel (not a photo gallery)
- Fall-toned frame complements the seasonal arrangement
- The photograph should be something that sparks a genuine conversation
Cost:
- Personal objects already owned: $0
- Fall elements surrounding: $25-60
- New frame for photograph (if desired): $15-30
- Total: $25-90
My personal vignette mantel: Adding my grandmother’s small salt-glaze crock among the fall elements transformed the mantel from a styled surface to something that guests asked about immediately, the object’s age and history gave everything around it more meaning.
Personal Vignette Tips
One meaningful object is enough:
Restraint with personal pieces:
- One genuinely meaningful object anchors the entire arrangement
- Multiple personal objects can tip into sentimentality or visual confusion
- Choose the single most meaningful piece for this season
- Let one object carry the personal story rather than trying to tell everything simultaneously
Telling the story when asked:
The social function of a personal mantel:
- When a guest asks about the meaningful object, tell the story briefly
- This moment of sharing is the entire point of integrating personal objects
- The mantel becomes a conversation catalyst rather than just a styled surface
- Design that creates connection is the most successful design of all
12. The Spiced and Scented Mantel (Fragrance as a Decorative Layer)
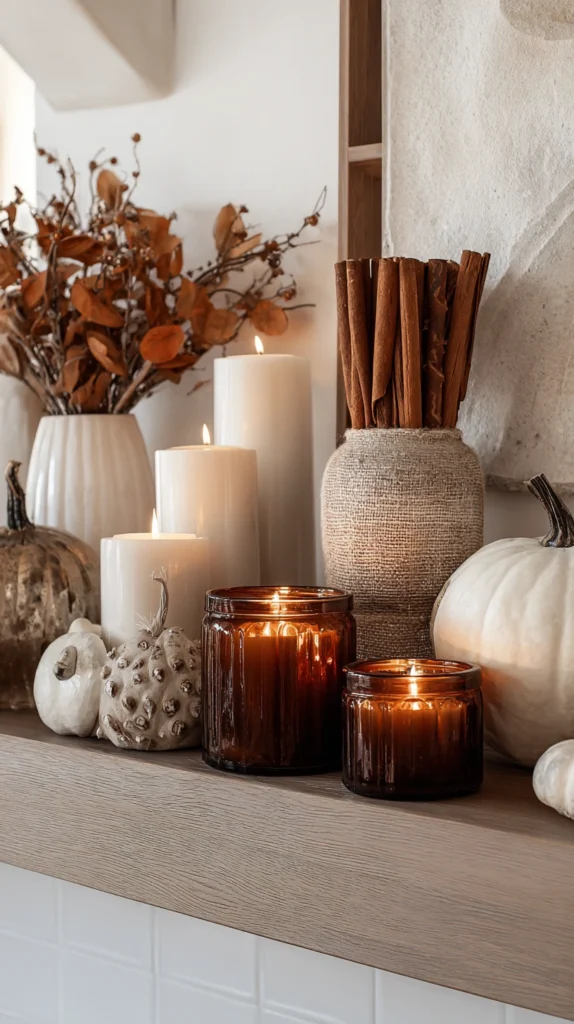
Scent-delivering elements built into the visual composition — the mantel that guests experience with more than their eyes.
My unscented mantel limitation:
What I had not considered:
- The mantel could deliver fragrance not just appearance
- Scented elements could be decorative simultaneously
- Fall is partly an olfactory experience (cinnamon, woodsmoke, apple)
- Adding scent to the mantel unlocks an entirely new dimension
Scent-delivering decorative elements:
Cinnamon sticks:
- Bundled with twine and placed upright in a vessel
- Or scattered horizontally at the base of the composition
- Strong, warm, classically fall scent
- Lasts the entire season without replacing
- Cost: $3-8 per large bag
Dried orange and clove:
- Studded oranges (cloves pressed into orange skin)
- Traditional pomander ball (Victorian origin)
- Incredibly fragrant for weeks
- Beautiful amber and brown color
- Cost: $5-10 in supplies, highly fragrant result
Dried herbs:
- Bundles of dried rosemary, lavender, or sage
- Tied with twine, hung or placed
- Subtle and sophisticated fragrance
- Long-lasting when dried
- Visual texture plus scent
Pine and cedar:
- Fresh or dried pine branches on the mantel
- Cedar blocks or chips in a small bowl
- Woodsy, clean, most authentic fall-into-winter scent
- Available foraged or purchased
Scented candles:
Beyond unscented pillar candles:
- Spiced apple, pumpkin spice, woodsmoke, or clove-scented candles
- The candle itself provides both scent and visual warmth
- Large three-wick candles for more scent throw
- Quality brands (Voluspa, P.F. Candle Co., Homesick) for best balance of scent and appearance
Potpourri vessels:
Contained scent display:
- A beautiful ceramic bowl filled with fall potpourri
- Visible as a decorative object, functional as a scent source
- Potpourri in earthy, dark tones (dried botanicals, cinnamon, seed pods)
- Refresh with a few drops of essential oil when scent fades
Building scent into the composition:
Placement strategy:
- Scented candles toward the front (heat and air circulation carries scent forward)
- Dried scented elements (cinnamon, herbs) throughout the composition
- Potpourri bowl at one end
- Multiple scent sources at different heights create a fuller fragrance experience
The unified fragrance story:
Avoiding conflicting scents:
- All scent elements should be from the same fragrance family (warm spice, woodsy, apple)
- Mixing fragrance families on one surface (floral candle plus woodsy potpourri) creates confusion
- Choose one scent direction and commit all elements to it
Cost:
- Cinnamon sticks (bag): $4-8
- Clove-studded orange: $5-10
- Scented candle: $15-35
- Dried herbs bundle: $5-15
- Potpourri bowl: $10-20
- Total: $39-88
My scented mantel: Adding cinnamon stick bundles and a studded orange to an existing mantel arrangement cost under $15 and changed how guests experienced entering the room, scent reaches people before they even see the mantel, the first impression is olfactory.
Scented Mantel Tips
Less scent, more impact:
Fragrance accumulates:
- Multiple strong scent sources together (overwhelming)
- One or two well-placed scented elements (intentional)
- The mantel should smell like fall subtly, not like a candle store
- Stand back from the finished arrangement and assess the fragrance at six feet away
Refreshing scent mid-season:
Maintaining the fragrance:
- Cinnamon sticks fade after 2-3 weeks
- Add a drop or two of cinnamon essential oil directly to old cinnamon sticks
- Refreshes the scent without replacing the decorative element
- Same technique works for dried herb bundles and potpourri
13. The Stacked Wood and Candle Interior (Styling the Firebox Itself)
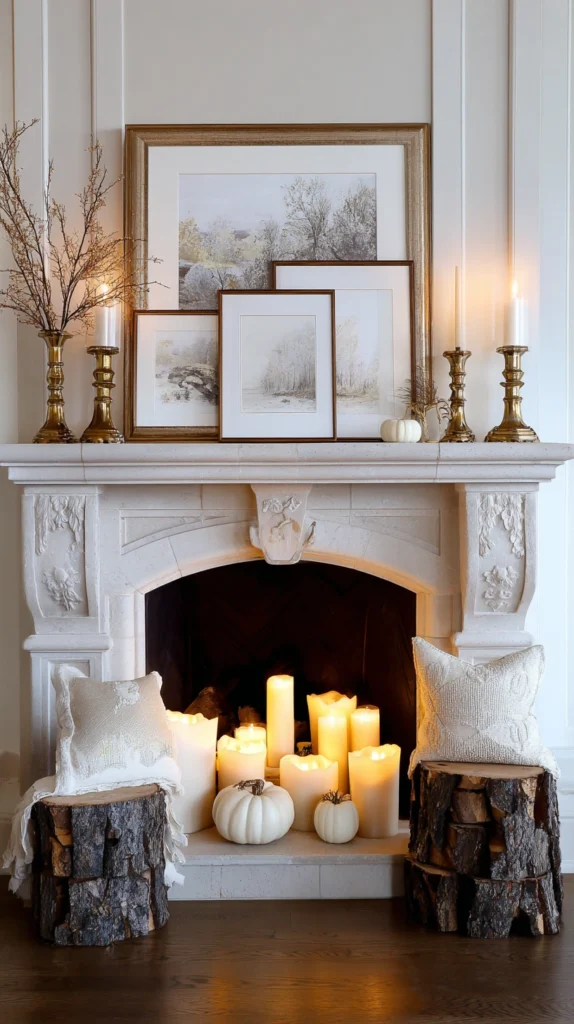
Arranging the inside of the fireplace as an additional decorative surface — turning the dark firebox into part of the composition.
My ignored firebox:
What I was overlooking:
- The fireplace opening itself, when not in use
- A black void below the styled mantel
- The two areas completely disconnected visually
- The firebox is a frame, not just a hole
Why style the firebox:
The complete fireplace composition:
- A beautiful mantel above an empty black opening looks unfinished
- The firebox, styled, completes the visual from floor to mantel
- When the fireplace is not in use seasonally, this is especially important
- Together they create a unified, floor-to-mantel vignette
Firebox styling options:
Stacked wood arrangement:
- Stack split logs neatly in the firebox
- Adds immediate warmth and authenticity
- Even if the fireplace is gas or non-functioning, real or faux logs work
- Height of the stack can vary for visual interest
Candles inside the firebox:
Most dramatic option:
- Multiple candles of varied heights inside the firebox
- Creates a flame-filled opening without a real fire
- LED candles safest (real candles in an enclosed space need specific ventilation)
- Extraordinary visual impact at night
Candle and wood combination:
Best approach:
- Logs stacked at the back (structural base)
- Candles placed in front of or nestled among the logs
- Both elements visible, the combination more beautiful than either alone
- Traditional and atmospheric simultaneously
Plant inside the firebox:
The unexpected option:
- Large plant placed inside a non-functioning fireplace
- Particularly beautiful with trailing or large-leaf varieties
- Creates the sense that nature has reclaimed the space
- Works for summer or very early fall before the fireplace would normally be used
Dried botanical arrangement:
In place of candles:
- A large cluster of dried pampas grass or botanical arrangement inside the firebox
- Spectacular visual from across the room
- Free-standing vase with tall dried stems
- Not safe if the fireplace has any possibility of being used
Firebox screen as design element:
The screen itself:
- A beautiful decorative fireplace screen in front of any firebox arrangement
- Frames the interior composition
- Provides a safety layer if real candles are used
- Choose a screen that matches the mantel’s metal finish (brass screen with brass candlesticks)
Cost:
- Real firewood (already owned or inexpensive): $0-20
- Faux log set: $30-80
- LED candles (6-8 for firebox): $30-60
- Decorative screen (if not owned): $50-200
- Total: $30-360
My firebox candle arrangement: Sixteen LED pillar candles of varied heights inside the firebox behind an antique brass screen is the most dramatic thing in any room I have ever decorated, guests stop mid-conversation to look at it, the firebox became as important as the mantel above it.
Firebox Tips
Gas fireplace consideration:
If the firebox is gas:
- Never place anything inside a gas fireplace (the pilot light can ignite unexpectedly)
- Style the exterior and mantel only
- Place candles and objects outside the firebox opening, not within
- Safety is absolute, no exceptions
Height variation inside the firebox:
Same principle as the mantel:
- Varied candle heights inside the firebox (same as the mantel arrangement above)
- Short candles in back, medium in middle, varied heights throughout
- This depth of varied heights inside the firebox mirrors the mantel’s composition above
- The two arrangements relate and speak to each other visually
14. The Textile and Hung Object Mantel (Softening With Fabric)
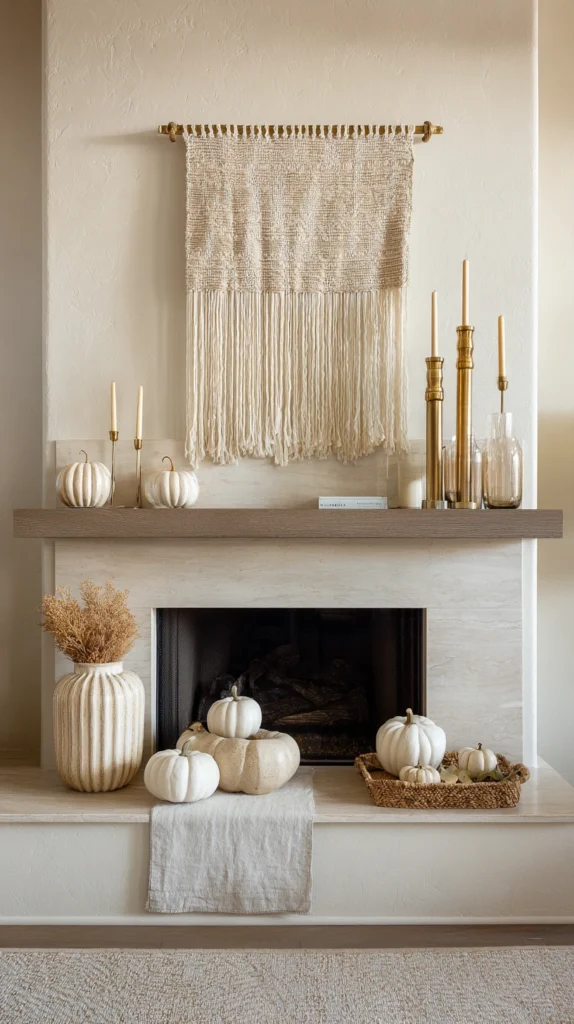
A textile or soft hung element incorporated into the mantel display — bringing the warmth of fabric to the room’s hardest surface.
My all-hard-objects problem:
What I had not tried:
- Every mantel I built used only rigid objects
- Ceramic, metal, wood, and glass
- Nothing soft or textile anywhere on the mantel
- Missing an entire category of texture and warmth
Why textiles on a mantel:
The softening effect:
- Hard surfaces throughout a room create visual rigidity
- One textile element on the mantel introduces warmth and softness
- Contrasts beautifully with the ceramic and metal objects
- Unexpected quality makes guests look more carefully
Textile elements for mantels:
Small woven wall hanging:
- A 12-18 inch woven piece hung on the wall above the mantel
- Natural fibers (wool, cotton, jute) in earthy fall tones
- Does not need to be large — small and textured is sufficient
- Bridges the wall and the mantel surface
A draped textile:
- A small woven runner or piece of cloth draped over one side of the mantel
- Or folded and laid across the mantel shelf itself as a base layer
- Embroidered or woven with a fall pattern (leaves, geometric, botanical)
- Acts as a tablecloth equivalent for the mantel surface
A small quilt or textile fragment:
Vintage textile as object:
- A small section of a vintage quilt folded and placed as an object
- A fragment of antique embroidery framed or simply placed
- Woven pocket or small bag hung from the mantel edge
- Textile-as-art approach
Macrame or knotted hanging:
For the bohemian cottage approach:
- A small macrame piece hung on the wall above or on the mantel face
- Natural rope or jute color (fits earthy palette)
- Adds handcrafted quality (ties to hobbitcore and cottage-core adjacent styling)
- Cost: $20-60 for small pieces, or DIY for almost nothing
A seasonal banner or pennant:
Textile typography:
- A small woven or embroidered banner (“Autumn,” a single word, or a simple symbol)
- Hung from a thin dowel or small stick
- Charming without being kitschy if the material is high quality
- Natural fiber, muted color, handmade appearance
Combining textile with hard objects:
The placement:
- Textile element behind or beside hard objects (not in front, gets visually buried)
- Hard objects in front of soft textile (classic layering principle)
- Textile provides the warm background, objects provide the structure
Cost:
- Small woven wall hanging: $20-60
- Vintage textile fragment: $5-25
- Macrame piece: $20-50
- Embroidered banner: $15-35
- Total: $20-60
My textile mantel addition: A small woven piece hung on the wall above the mantel changed the whole arrangement’s quality, the texture visible from across the room, the combination of a woven hanging with ceramic and brass objects below created a layered warmth no all-hard arrangement had ever achieved.
Textile Mantel Tips
Scale the textile correctly:
Size matters:
- Too-small textile on a wide mantel (looks like a forgotten detail)
- Textile sized to 30-50% of mantel width (correct visual weight)
- A small textile on a small mantel section (correct proportion)
- Proportion prevents the textile from disappearing among the hard objects
Securing textiles:
Practical attachment:
- Small command hooks on the wall above (renter-safe)
- A thin branch or dowel as a hanging rod (charming and lightweight)
- Simply draped over the mantel edge (the most casual approach)
- Choose the attachment method based on desired formality
15. The Evolving Mantel (Updating Through the Season)
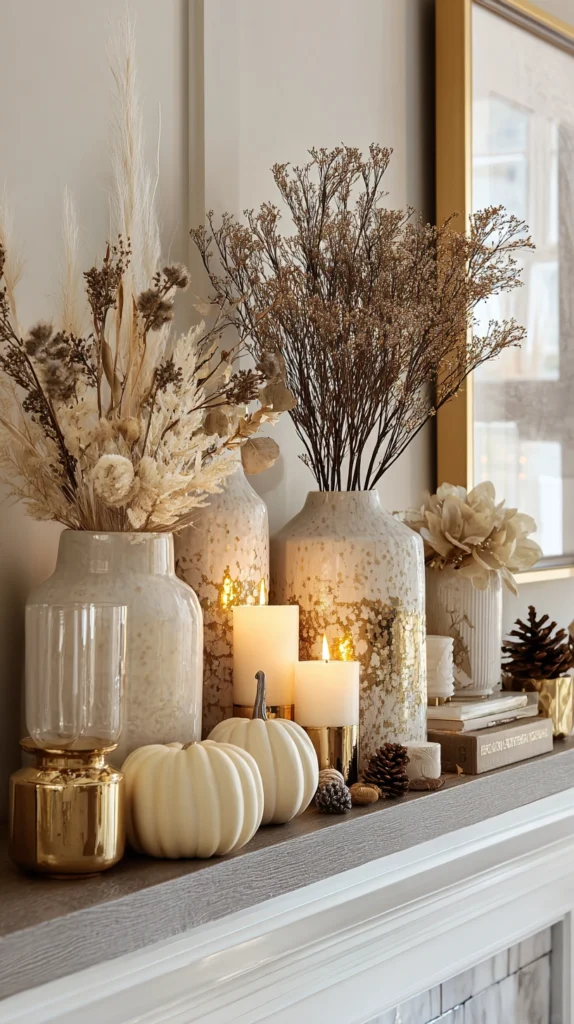
A system designed to shift gradually from September through November — the mantel that reflects the actual progression of autumn.
My static display problem:
What I kept doing:
- Setting the fall mantel once in early October
- Leaving it unchanged until December
- Missing the chance to reflect fall’s actual movement
- October and late November feel different; the mantel should too
The three-stage fall mantel:
Why stages work:
- Early fall (September-early October) feels different from deep fall (late October-November)
- The mantel can honor that emotional and visual progression
- Small changes cost almost nothing but feel entirely fresh
- Guests who visit multiple times see an evolving room not a static one
Stage one — Early fall (September through first week of October):
The transitional look:
- Still some green (eucalyptus, real greenery not yet gone)
- First appearance of gourds and mini pumpkins (not yet fully committed to fall)
- Warm candles added
- Colors still somewhat warm-neutral, not yet deeply autumnal
- The feeling: summer loosening its grip
Stage two — Peak fall (mid-October through early November):
Full commitment:
- All green removed or fully dried
- Maximum gourd and pumpkin presence
- Deepest color palette in place
- Most botanicals, most candles, full fall
- The feeling: the season at its richest
Stage three — Late fall into winter transition (mid-November through end of month):
The turn toward winter:
- Pumpkins and gourds removed (or replaced with faux for longevity)
- Greenery returns but now in pine and cedar (evergreen, not deciduous)
- Colors deepen toward burgundy and forest green (year-round but winter-leaning)
- Candles increase (darker evenings, more warmth needed)
- The feeling: the harvest is over, the long dark is beginning
What stays constant through all three stages:
The anchors:
- The main mirror or art piece (does not change)
- The primary candlesticks or main lantern
- Any personal meaningful object
- The structural bones remain; the seasonal details are what shift
Planning the stages:
Before the season begins:
- Gather elements for all three stages at once
- Store stage two and three in a labeled bin
- When stage one’s time passes, swap in stage two elements
- Takes fifteen minutes per transition
The budget distribution:
Spending across stages:
- Stage one: lightest investment (transitional, some elements reused from summer)
- Stage two: largest investment (peak fall, the primary display)
- Stage three: smallest investment (reuses elements plus a few additions)
- Total spread across the season is often less than one large all-at-once purchase
Cost:
- Stage one elements: $20-50
- Stage two peak fall: $50-100
- Stage three transition additions: $15-40
- Total for entire season: $85-190
My evolving mantel: Guests who came in late September and again at Thanksgiving commented that the house always looked different and always felt exactly right for whenever they visited, the evolving system creates the impression of a home that is genuinely alive and responsive to the season.
Evolving Mantel Tips
Calendar reminder system:
Staying on schedule:
- Set actual phone reminders for each stage transition
- Without reminders, stage two and three often never happen
- The transition itself takes fifteen to twenty minutes
- The reminder is the most important tool in this system
Photographing each stage:
Building the personal reference:
- Take a photo when each stage looks its best
- Creates a reference for next year
- Shows how the arrangement evolved (satisfying to review)
- Refine each stage year over year based on what worked and what did not
Choosing Your Mantel Style
By room and style:
Traditional and classic living room:
- Vintage and collected objects mantel (idea 5)
- Mirror and pumpkin pairing (idea 9)
- Greenery and berry garland (idea 4)
- Framed art and object layering (idea 6)
Modern and contemporary:
- Asymmetric statement arrangement (idea 3)
- Candle cluster on a marble or minimal base (idea 2)
- Natural abundance with simple vessel (idea 1)
Cottage-core and hobbitcore adjacent:
- Nature walk foraged mantel (idea 10)
- Harvest tablescape style (idea 8)
- Textile and hung object (idea 14)
- Personal and vintage objects (idea 5 and 11)
Dramatic and atmospheric:
- Dark and moody gothic (idea 7)
- Firebox candle arrangement (idea 13)
- Candle cluster with very warm lighting (idea 2)
By effort level:
Lowest effort:
- Mirror and pumpkin pairing (idea 9)
- Nature walk foraged mantel (idea 10)
- Layered throws without pillow changes (idea 11)
Medium effort:
- Natural abundance arrangement (idea 1)
- Candle cluster (idea 2)
- Garland (idea 4)
- Harvest tablescape (idea 8)
Higher commitment:
- Evolving three-stage mantel (idea 15)
- Firebox styling (idea 13)
- Dark moody full palette (idea 7)
By budget:
Under $50:
- Foraged nature walk mantel (idea 10)
- Candle cluster (using owned candles): idea 2
- Personal vignette with owned objects (idea 11)
$50-150:
- Natural abundance with white pumpkins (idea 1)
- Garland (idea 4)
- Harvest tablescape (idea 8)
- Scented mantel (idea 12)
$150-300:
- Framed art layering (idea 6)
- Mirror and pumpkin (idea 9)
- Textile and hung object (idea 14)
- Evolving seasonal system (idea 15)
$300+:
- Thrifted vintage collection (idea 5, with quality pieces)
- Firebox candle arrangement with decorative screen (idea 13)
- Full moody palette with quality candles (idea 7)
Maintenance Through the Season
Weekly (5 minutes):
- Check and refresh any real botanicals or food elements
- Straighten objects that have shifted
- Replace burned-down candles
- Dust the mantel shelf visible around the arrangement
Monthly:
- Assess whether any elements are past their prime
- Replace real pumpkins if softening
- Refresh dried elements if fading significantly
- Consider adding one new element (keeps the mantel alive)
End of season:
- Store all faux and non-perishable elements in labeled fall bin
- Compost or discard all real botanicals and food elements
- Photograph the final arrangement for reference next year
- Clean the mantel shelf thoroughly before building the winter arrangement
My Complete Mantel Journey
What I built across four falls:
Fall one ($45):
- Candle cluster on a wooden board
- Everything else bare
- Learned that lighting is the mantel’s most important element
Fall two ($120):
- Natural abundance with white pumpkins and pampas grass
- Added garland along the mantel edge
- Learned that height variation changed everything
Fall three ($90):
- Asymmetric arrangement with leaned art
- Vintage crock and collected objects
- Learned that asymmetry and personal objects made guests stop and engage
Fall four ($75):
- Evolved to the three-stage system
- Foraged branches plus owned objects plus stage shifts
- Most natural, most authentic, most commented-on
Total investment: $330 over four falls Most important lesson: The composition always matters more than the individual objects Single highest-impact change across all four falls: Removing symmetry and committing to asymmetric arrangement
Getting Started This Weekend
Clear the mantel before adding anything.
This weekend:
Step 1 — Remove everything currently on the mantel:
- Bare surface, fresh start
- See the actual proportions of the surface
- Identify the tallest point the mantel can reasonably display
Step 2 — Establish the height:
- Find or source one tall element (a branch, a vase with stems, a candlestick above 18 inches)
- Place it off-center (asymmetric, as per idea 3)
- This single decision establishes the arrangement’s entire feel
Step 3 — Add the medium layer:
- Two or three objects of medium height clustered near the tall anchor
- One or two pumpkins or gourds
- A candle
Step 4 — Add the ground layer:
- Scattered acorns, a few pinecones, one small object
- At the base of the taller elements
My recommendation:
Start with the candle cluster (idea 2):
- Most immediately impactful at lowest cost
- Teaches the height variation principle
- Works as a foundation for adding other elements later
Light the candles on the first evening and see how completely the room transforms before you have changed anything else.
Now go build the fall mantel that makes guests stop mid-sentence and look.
Quick Summary
The 15 fall mantel ideas:
Natural and foraged:
- Natural abundance with white pumpkins (idea 1): elegant, no orange required
- Nature walk foraged mantel (idea 10): free, authentic, site-specific
Atmosphere and light:
- Candle cluster (idea 2): most atmospheric, transforms after dark
- Dark and moody gothic (idea 7): dramatic, leans into fall’s darker quality
- Firebox candle styling (idea 13): most dramatic single addition possible
Structure and composition:
- Asymmetric statement arrangement (idea 3): looks most designed
- Framed art and object layering (idea 6): creates depth across planes
Softness and texture:
- Garland drape (idea 4): classic and immediately recognizable
- Textile and hung object (idea 14): softens the room’s hardest surface
Personal and collected:
- Vintage and collected objects (idea 5): most characterful
- Personal meaningful vignette (idea 11): most emotionally resonant
Abundance and welcome:
- Harvest tablescape style (idea 8): warmest, most welcoming
- Scented mantel (idea 12): olfactory layer most people never consider
Simple and elegant:
- Mirror and pumpkin pairing (idea 9): restrained, always works
System and evolution:
- Three-stage evolving mantel (idea 15): the most alive, the most responsive to the actual season
The universal mantel rules:
Always:
- Vary heights (the tallest element should be significantly taller than the rest)
- Place the tallest element off-center
- Use odd numbers (three pumpkins, five candles, seven objects)
- Cluster objects rather than spreading them evenly
- Consider what is in the firebox below as part of the total composition
Never:
- Perfect symmetry (looks manufactured)
- All objects at the same height (reads as flat)
- More than two elements matching exactly (matching set appearance)
- Real candles near garland without 12-inch clearance
- Ignoring the firebox below (the mantel and firebox are one composition)
Common mistakes:
- Adding fall objects to an unchanged neutral arrangement (no color story)
- Spreading objects too evenly across the mantel (needs clusters not rows)
- All objects the same height (most common and most damaging mistake)
- Symmetric arrangement (looks safe but reads as designed by furniture store)
- Ignoring the firebox as part of the composition
- Buying everything from one store in one trip (looks matched, not curated)
- Using bright orange when cream and rust are more sophisticated
- Forgetting that candle light at night is when the mantel performs best (design for the evening)
Remember: Height variation is the single most important principle on a mantel and the one most consistently ignored, asymmetry always looks more designed than symmetry even though it feels riskier, the firebox is part of the composition not a dark hole below the styled surface, odd numbers in every cluster are non-negotiable, the candle arrangement only shows its full potential after dark so always assess the mantel by lamp light not daylight, foraged elements cost nothing and often look more authentic than purchased objects, and the best mantel in the room is one where guests stop moving and stand still to look.