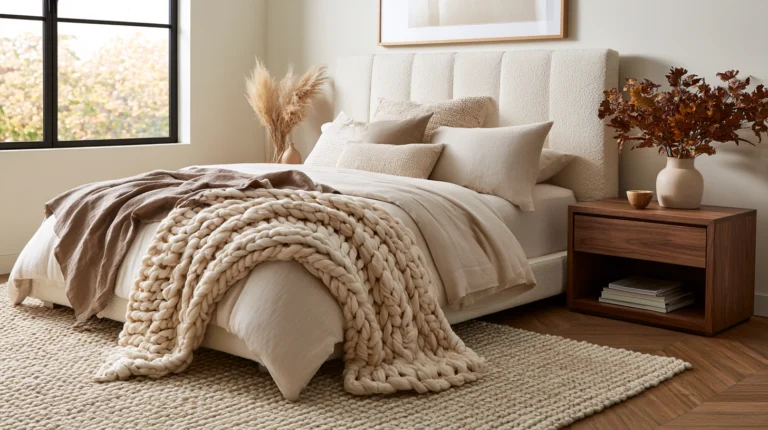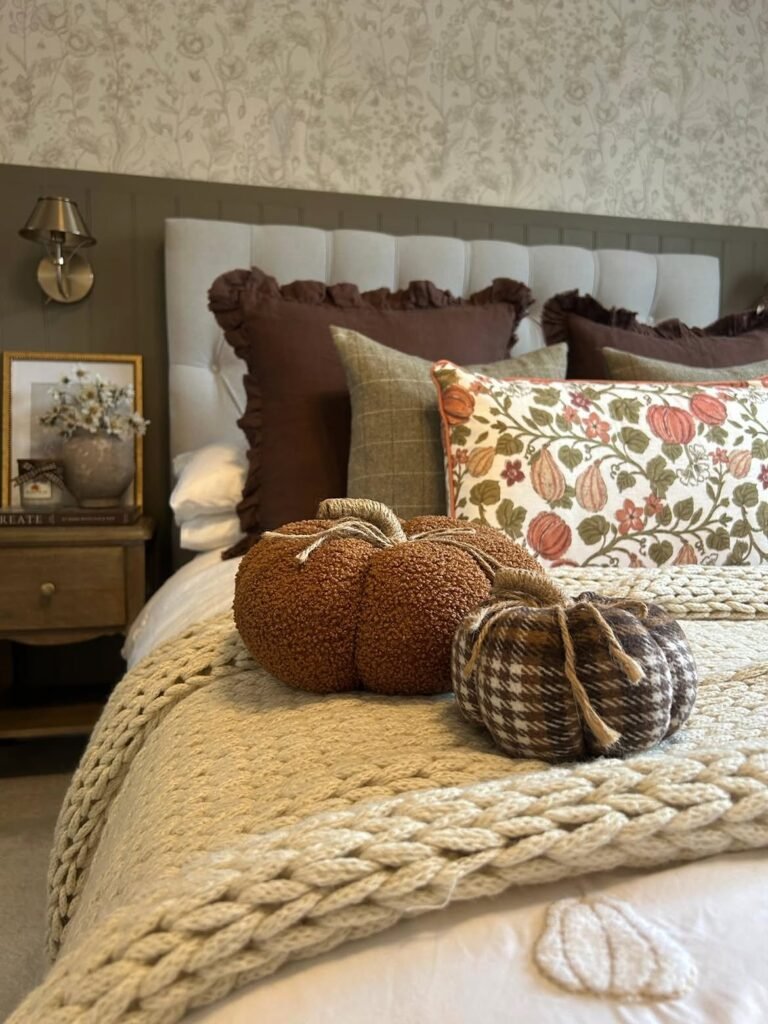
13 Layered Bedding Ideas for Chilly Autumn Nights
My bed had one flat sheet and one polyester comforter for years. No adjustability, no texture, the same setup whether it was 75 degrees or 45 degrees outside.
Tried adding a second blanket once. Just stacked it on top, no thought to order or material. Woke up tangled and sweating at 3am with my feet still cold.
Then I learned that layering bedding is an actual system, not just piling on more blankets. Specific materials in a specific order, each layer serving a different purpose. The difference in how I slept was immediate.
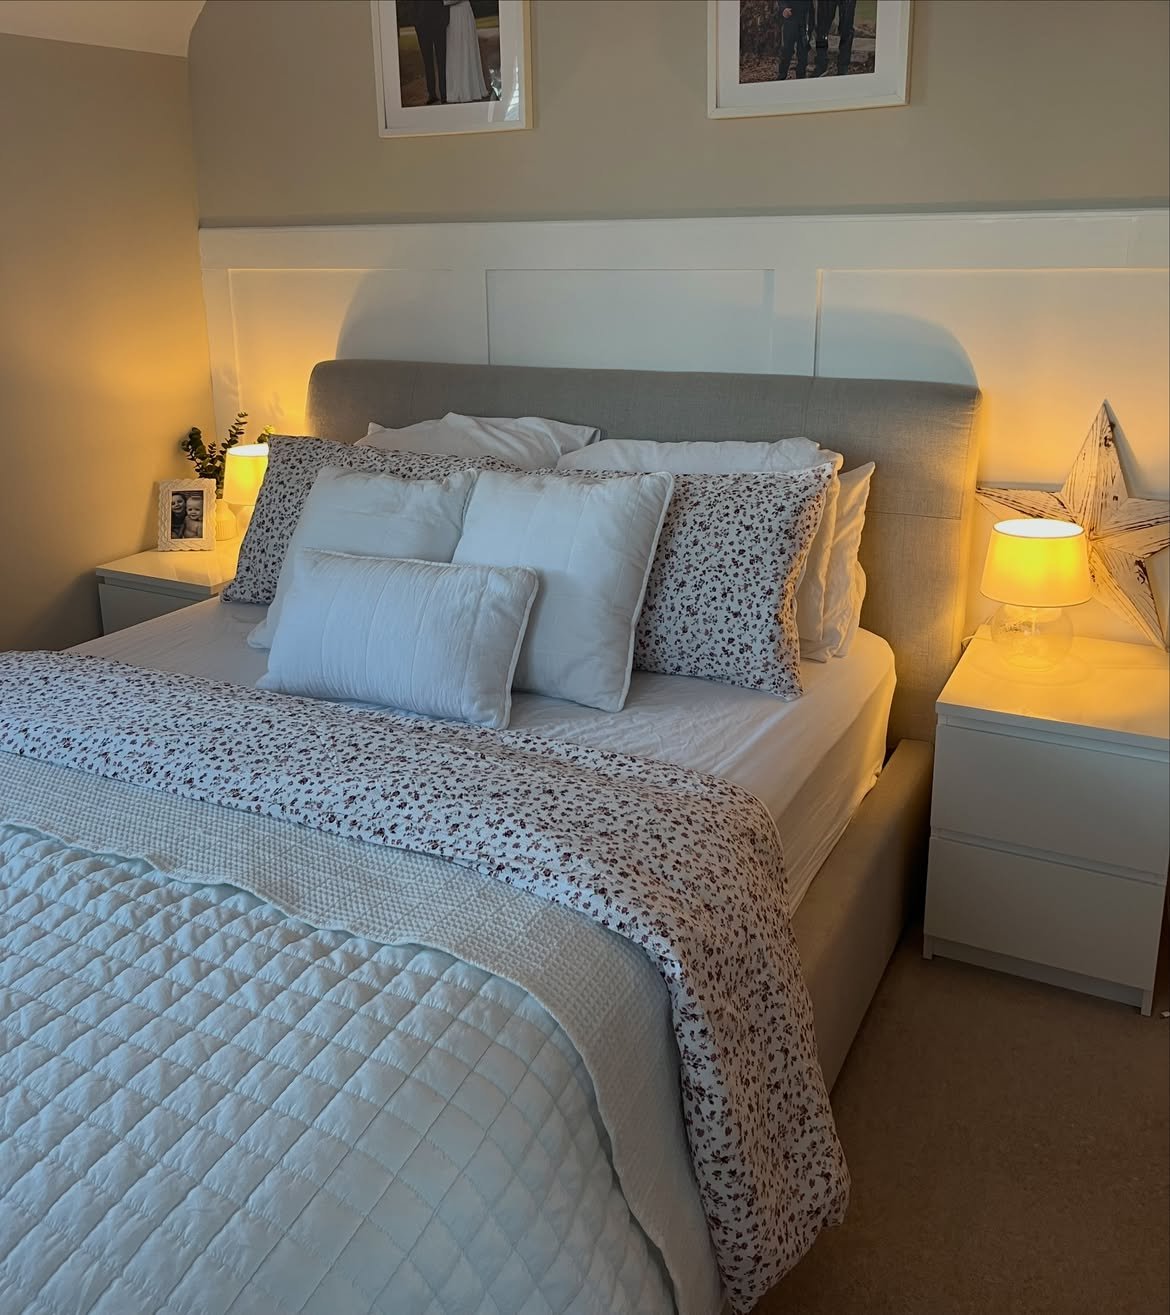
Now my bed adjusts itself to whatever the night brings. Same mattress, same room, completely different relationship with sleep from October through the coldest nights of the year.
Let me show you 13 layering combinations that turn a flat, one-note bed into an adjustable system built specifically for chilly autumn nights.
Why One Heavy Comforter Always Fails in Fall
The single-layer problem:
What goes wrong with one heavy layer:
- Too warm in the first half of the night (before temperatures drop outside)
- Too cold in the second half (after body temperature naturally decreases)
- No way to adjust without fully waking and getting up
- One-size-fits-all in a season that changes temperature constantly
Why fall specifically breaks single-layer bedding:
- Fall has the widest temperature swing of any season (warm days, cold nights, both shifting weekly)
- A single heavy comforter calibrated for the coldest night is wrong on the mild nights
- A lightweight comforter calibrated for early fall fails by November
- No single weight works for the entire season
What layering actually solves:
The adjustability principle:
- Push aside one layer without leaving the bed
- Different layers for different parts of the body (feet colder, push extra weight there)
- Partners with different temperature preferences can each adjust their own side
- The system flexes with the night instead of fighting it
The order matters as much as the materials:
Why random stacking fails:
- Heaviest layer on the bottom traps heat against the body too early
- Wrong material order disrupts the breathability each layer is meant to provide
- A true layering system has a deliberate sequence, not an accumulation
- Getting the order right is the difference between adjustable comfort and a tangled mess
My revelation: Layering bedding is a system with rules, not an instinct to pile on more when it gets cold. Once the rules are understood, any bed becomes adjustable to any autumn night.
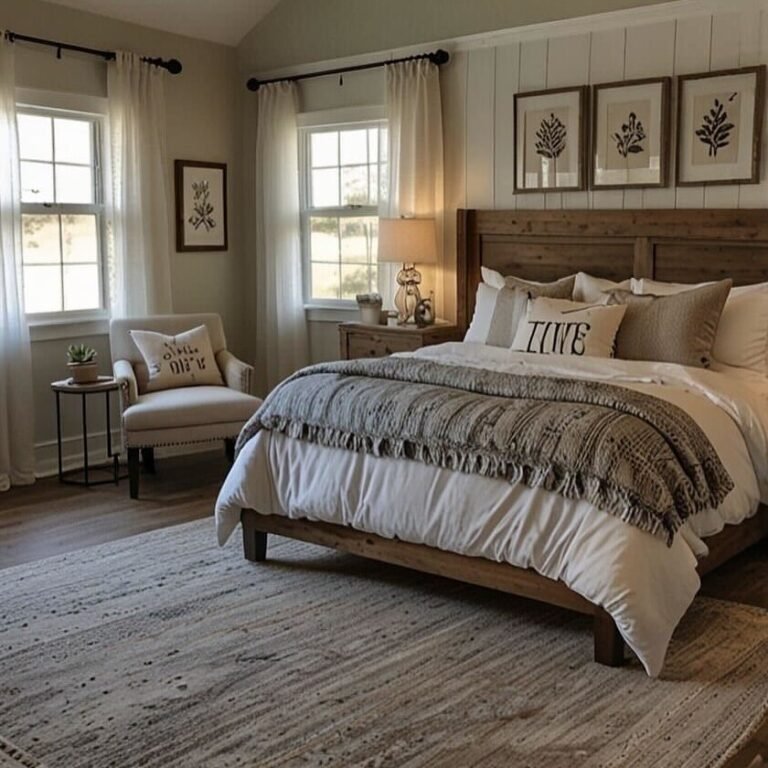
1. The Five-Layer Classic Stack (The Foundation System Everyone Should Know)
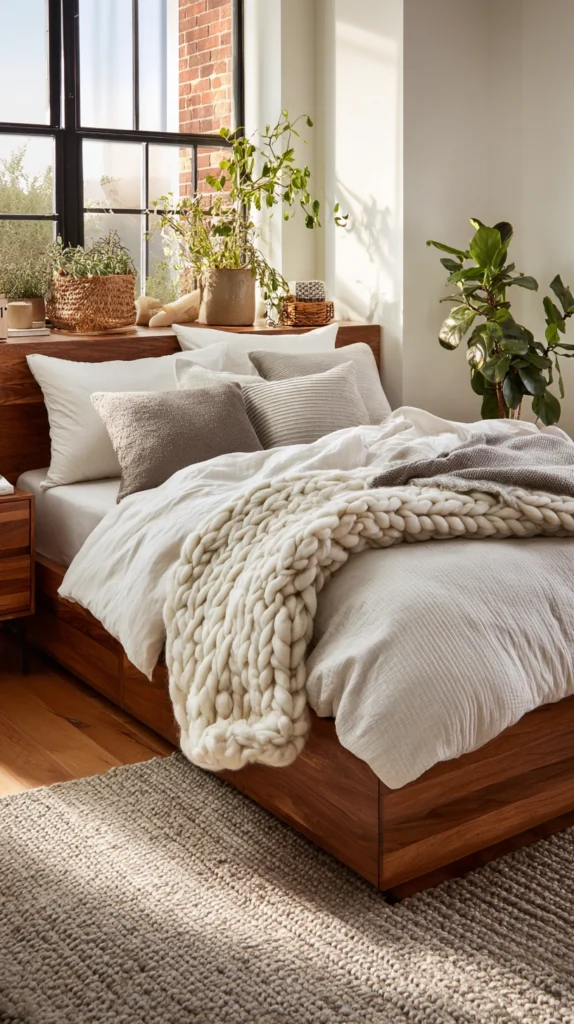
Fitted sheet, flat sheet, blanket, duvet, throw — the sequence that works as the basis for every other combination on this list.
My starting point:
What I learned first:
- Five distinct layers, each with a specific job
- This sequence underlies every other combination below
- Master this order before customizing with different materials
- The order is non-negotiable; the materials within each layer are flexible
The five layers in sequence:
Layer one — fitted sheet:
- Closest to the body, must be soft and breathable
- Cotton percale or linen (natural fiber, always)
- This layer rarely changes regardless of temperature
- Job: comfort against skin, moisture management
Layer two — flat sheet:
- A barrier between the body and the heavier layers above
- Same material family as the fitted sheet
- Often the first layer pushed aside on a warm fall night
- Job: a breathable buffer, easy to add or remove without disturbing the duvet
Layer three — lightweight blanket:
- Cotton waffle weave, thin wool, or cotton thermal blanket
- The most-used adjustable layer in early and mid fall
- Sits between the flat sheet and the duvet
- Job: moderate warmth without commitment to the full duvet weight
Layer four — the duvet or comforter:
- The main warmth layer, fall-weight (400-600 fill power)
- Natural down or quality down alternative
- This is the layer that stays consistent most nights
- Job: primary insulation, the bed’s main warmth source
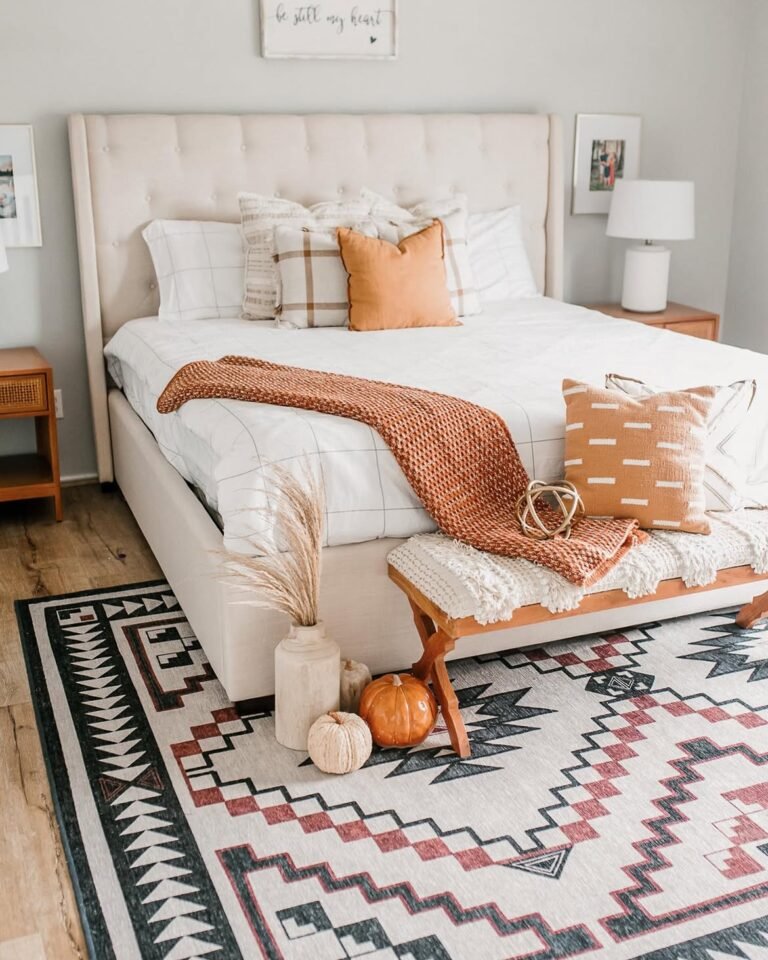
Layer five — the throw or foot blanket:
- Visible, styled, draped at the foot of the bed
- Chunky knit, sherpa, or heavy woven texture
- Pulled up over the duvet on the coldest nights only
- Job: the adjustable top layer and the decorative finishing touch
Why this specific order:
The breathability logic:
- Lightest, most breathable materials closest to skin
- Heaviest, most insulating materials furthest from skin
- This mirrors how outdoor layering for cold weather works (base layer, mid layer, outer layer)
- Reversing the order traps heat unevenly and causes overheating then chilling
Building variation within the five layers:
Where customization happens:
- The fitted and flat sheet material can shift from percale to flannel as fall deepens
- The lightweight blanket can be swapped for a heavier wool blanket in late fall
- The duvet fill weight is the main seasonal adjustment point
- The throw blanket is purely aesthetic and can change weekly without affecting function
Cost:
- Cotton percale sheet set: $40-90
- Lightweight cotton or wool blanket: $40-80
- Fall-weight duvet insert: $80-200
- Duvet cover: $40-120
- Throw blanket: $35-70
- Total: $235-560 (often less, since pieces are reused year to year)
My five-layer stack result: This sequence taught me everything else on this list, the bed finally adjusts to actual temperature instead of fighting it, I have not woken up too hot or too cold once since establishing this order.
Five-Layer Stack Tips
Test the order, not just the pieces:
The verification step:
- Lie in the made bed for a few minutes before officially “finishing” the setup
- Confirm each layer can be individually pushed back without disturbing the others
- If the flat sheet and blanket are bunching together, the order or tucking needs adjustment
- This five-minute test prevents the 3am tangle problem entirely
Tucking versus loose layers:
The foot-of-bed approach:
- Sheets and the lightweight blanket: tucked at the foot (prevents foot-cold drafts)
- Duvet: loose, not tucked (allows it to be kicked partially off without fully escaping)
- Throw: always loose and decorative, never tucked
- This combination of tucked and loose is what makes the whole system adjustable
2. The Flannel and Wool Combination (Maximum Warmth Without Maximum Weight)
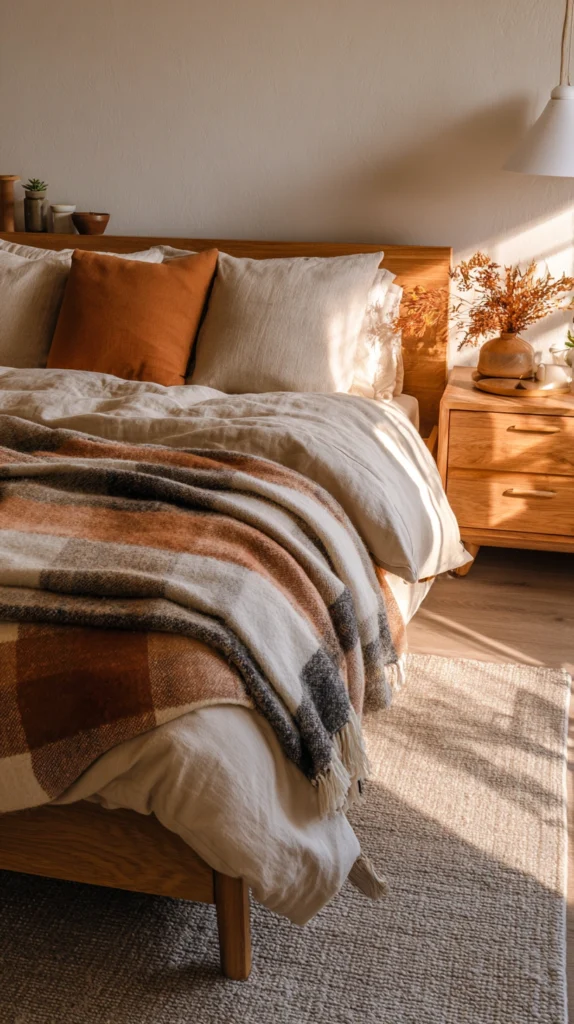
Flannel sheets paired with a wool blanket layer — two natural materials that trap warmth differently and complement each other.
My cold-sleeper problem:
Why I needed this specifically:
- Naturally run cold, especially in the feet
- A single heavy duvet never felt warm enough at the extremities
- Adding more duvet weight made the torso too warm while feet stayed cold
- The flannel and wool combination solved both problems simultaneously
Why flannel and wool work together:
Two different warming mechanisms:
- Flannel: brushed cotton fibers trap air close to the skin (immediate warmth on contact)
- Wool: natural fiber that regulates temperature actively, wicking moisture while retaining warmth
- Together: immediate warmth (flannel) plus sustained regulation (wool)
- Neither material alone does both jobs as well as the combination
The flannel sheet layer:
What to look for:
- Cotton flannel, not flannel-blend with synthetic fibers
- Weight measured in ounces per square yard (look for 5-6 oz, the warmer range)
- Brushed on both sides for maximum softness and heat retention
- Flannel softens further with each wash, improving over the season
The wool blanket layer:
Best wool options:
- Merino wool blanket (softest, least itchy, most breathable)
- Wool blend with cashmere (luxurious, very warm, higher cost)
- Traditional Pendleton-style wool blanket (durable, classic, slightly more texture)
- Avoid scratchy low-grade wool against skin; place it above the flat sheet, not directly on skin
Where the wool blanket sits:
Placement in the sequence:
- Directly on top of the flannel flat sheet
- Underneath the duvet (not as the top decorative layer)
- This placement lets the wool do its temperature-regulating work close to the body
- A wool blanket as the very top layer loses some of its regulating benefit
Why this combination suits fall specifically:
The seasonal logic:
- Too warm for summer (flannel alone is already warm)
- Appropriately warm for the fluctuating fall temperature range
- Not yet at full winter weight (reserving the heaviest duvets for deeper cold)
- The combination flexes well across the entire fall temperature range without needing further additions until true winter
Color and texture for this combination:
Aesthetic pairing:
- Flannel in a plaid or solid warm tone (rust, forest green, warm gray)
- Wool blanket in a complementary solid (cream, camel, charcoal)
- The wool blanket often becomes visible at the foot of the bed, folded back
- This visible wool edge adds texture without needing a separate throw layer
Cost:
- Flannel sheet set: $50-110
- Quality wool blanket: $70-200
- Total: $120-310
My flannel and wool result: Cold feet stopped being a nightly complaint within the first week, the wool blanket folded back at the foot looks intentional and beautiful, this combination alone often makes the heavier throw blanket from idea 1 unnecessary on milder fall nights.
Flannel and Wool Tips
Washing wool correctly:
Maintenance specifics:
- Wool blankets generally require gentle or hand washing, never hot water
- Lay flat to dry (hanging stretches the fibers)
- Wash far less frequently than sheets (wool is naturally odor and stain resistant)
- Cedar storage between seasons (natural moth deterrent, no chemicals needed)
The itch factor:
Avoiding discomfort:
- Lower-quality wool can feel itchy against skin
- Always place at least the flat sheet between skin and wool blanket
- Merino wool is the least itchy option if budget allows the upgrade
- A wool blanket with a smooth cotton backing solves the itch issue at a lower cost than full merino
3. The Down Duvet and Linen Duvet Cover (Breathable Warmth)
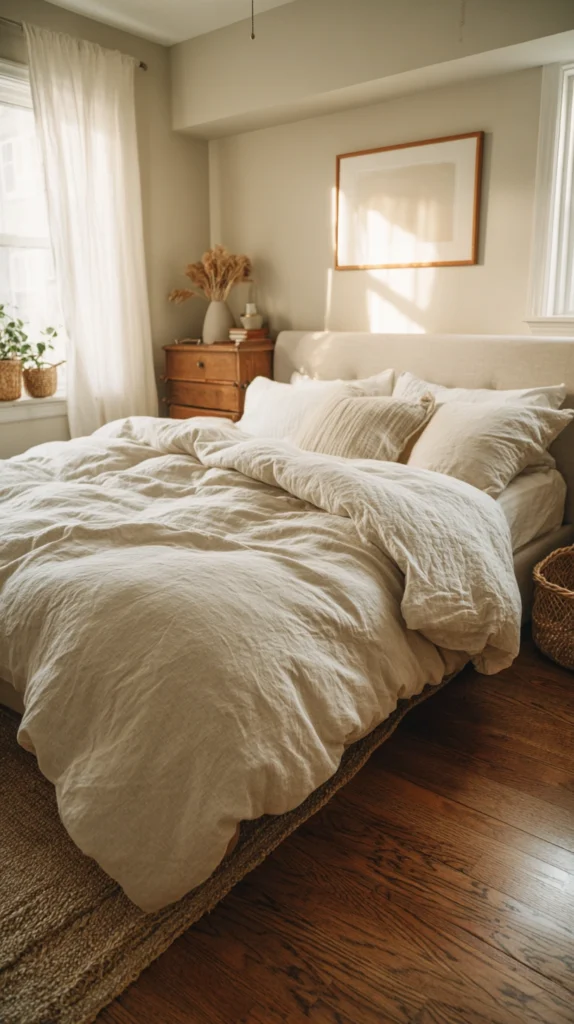
A natural down insert inside a linen cover — warmth that does not trap heat the way synthetic materials do.
My overheating duvet problem:
What was happening:
- Polyester duvet insert and polyester duvet cover
- Trapped heat unevenly, leading to waking up sweaty then quickly cold
- No breathability in either layer
- Switching both pieces to natural materials solved the issue entirely
Why down plus linen specifically:
The breathability combination:
- Down: naturally insulating without trapping moisture against the body
- Linen: the most breathable common bedding fabric, moves air actively
- Together: warmth that breathes, rather than warmth that suffocates
- This pairing is specifically recommended by sleep specialists for temperature-sensitive sleepers
Down fill weight for fall:
Choosing the right weight:
- Light fall weight: 300-400 fill power (early fall, warmer climates)
- Medium fall weight: 400-600 fill power (the most common fall recommendation)
- Heavy fall weight: 600-700 fill power (late fall, cold climates, cold sleepers)
- Going straight to winter weight (700+) in early fall causes overheating
Down alternative consideration:
For those avoiding animal products or with allergies:
- High-quality down alternative (microfiber clusters designed to mimic down structure)
- Performs nearly identically to real down at a lower price point
- Slightly less compressible and slightly heavier for the same warmth
- A legitimate substitute, not a significant compromise
The linen duvet cover:
Why linen specifically:
- Most breathable natural fiber commonly used for bedding
- Gets softer with every wash (improves over the season, not just at purchase)
- Naturally temperature regulating (cool in warmer fall moments, warm in cooler ones)
- Wrinkled texture is the correct, intended look (never needs ironing)
Linen color for fall:
Best fall linen duvet cover colors:
- Warm oat or natural undyed linen (most versatile)
- Deep terracotta or rust (richest fall statement)
- Sage or olive green (sophisticated, slightly unexpected)
- Warm charcoal (modern, pairs with amber lighting beautifully)
The combination in practice:
How it performs through the night:
- Down insulates without trapping excess heat
- Linen cover allows what heat does build to escape gradually
- The combination self-regulates far better than synthetic insert plus synthetic cover
- Most people report needing fewer total layers when using this combination as the core
Sourcing:
By budget:
- Budget down alternative insert: $50-100
- Mid-range real down insert: $100-250
- Linen duvet cover (Bed Threads, Cultiver, Quince): $80-200
- Budget linen cover (IKEA, Target): $40-90
Cost:
- Down alternative insert: $50-100
- Linen duvet cover: $80-200
- Total: $130-300
My down and linen result: The single biggest improvement to how the duvet itself performed, no more waking up in a sweat at midnight only to be cold by 4am, the linen cover alone made noticeable difference in temperature regulation compared to the cotton-poly cover I had before.
Down and Linen Tips
Fill power versus fill weight:
Understanding the labels:
- Fill power measures down quality (loft and insulating efficiency per ounce)
- Fill weight measures total quantity of down used
- Higher fill power means warmer at a lighter actual weight
- For fall, prioritize finding the right fill weight in the 400-600 range regardless of fill power marketing
Shaking and fluffing:
Daily maintenance:
- Down duvets need to be shaken out each morning to redistribute fill
- Uneven fill distribution creates cold spots
- Hang or air out occasionally (once every few weeks) to maintain loft
- This small daily habit significantly extends the duvet’s performance
4. The Quilted Coverlet Plus Duvet Combination (Textural Depth)
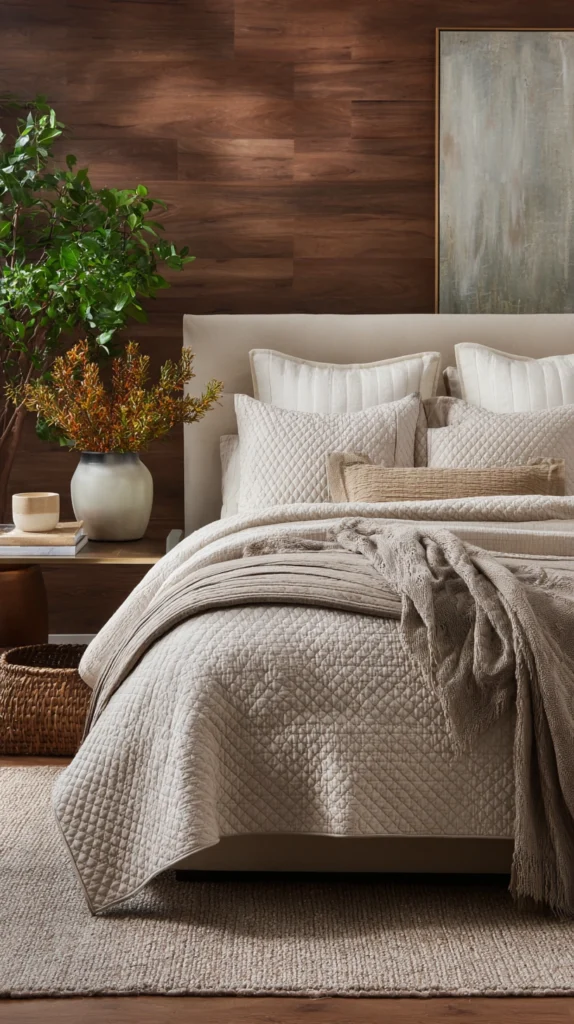
A lightweight quilted coverlet beneath the main duvet — adding both warmth and visual texture in one layer.
My textureless bed problem:
What was missing:
- A flat duvet cover with nothing beneath it but sheets
- No visual depth when looking at the made bed
- No additional adjustable warmth layer
- The coverlet addition solved both the aesthetic and functional gaps simultaneously
What a quilted coverlet is:
Defining the piece:
- A lighter-weight quilted bedspread, thinner than a duvet
- Often patterned (diamond quilting, channel quilting, or a printed quilt pattern)
- Sits between the sheets and the duvet, or as a layer folded at the foot
- Adds warmth without the full bulk of a second duvet
Placement options:
Two ways to use a coverlet:
Under the duvet:
- Coverlet directly on top of the flat sheet
- Duvet on top of the coverlet
- Adds a moderate warmth layer that can be felt but does not show
- Best for consistently cold sleepers who want guaranteed extra warmth
Folded at the foot, visible:
- Coverlet folded in thirds and placed at the foot of the bed, on top of the made duvet
- Visible texture and pattern (the styling benefit)
- Pulled up and over when extra warmth is wanted
- This is the more common and more decorative approach
Fall coverlet patterns and colors:
What suits the season:
- Diamond or channel quilting in a solid fall color (most versatile)
- A printed botanical or paisley pattern in warm tones
- Quilted plaid (classic fall reference, ties to the plaid throw ideas elsewhere)
- Textured matelassé weave (woven texture rather than printed pattern, very elegant)
Material considerations:
Best coverlet fabrics:
- Cotton (breathable, classic, widely available)
- Cotton-linen blend (slightly more textural and breathable)
- Avoid: polyester quilted coverlets (less breathable, often shinier in a way that looks cheap)
Building the full bed look with a coverlet:
Styling sequence:
- Bottom layer: sheets (as in idea 1)
- Main layer: duvet, made smooth and full
- Coverlet: folded at the foot, one-third to one-half the bed’s length
- Pillows: arranged in front of or on top of the folded coverlet edge
The visual weight a coverlet adds:
Why it matters for fall specifically:
- A flat duvet alone can look slightly bare for the season
- The folded coverlet at the foot adds the same visual layering principle used in the throw blanket and pillow arrangements
- Creates a bed that looks intentionally dressed for fall, not just covered
Cost:
- Quilted coverlet (queen or king): $60-150
- Budget option (IKEA, Target): $35-70
- Mid-range (West Elm, Pottery Barn): $90-180
My coverlet addition: Folding a diamond-quilted rust coverlet at the foot of the bed added the missing texture and an easy-grab extra warmth layer simultaneously, on the coldest nights I pull it up over the duvet and it solves the problem instantly without getting up.
Coverlet Tips
Matching versus contrasting the duvet:
Two valid approaches:
- Matching tone family (coverlet and duvet in related warm colors): cohesive, calm
- Contrasting pattern or texture (solid duvet, patterned coverlet): more visual interest
- Both work; choose based on whether the room wants calm or visual energy
- A pattern-heavy bedroom benefits from a solid duvet and patterned coverlet, and the reverse for a calmer room
Washing frequency:
Practical care:
- Coverlets touch the body less directly than sheets (wash less frequently)
- Once every two to three weeks is generally sufficient unless used as the primary top layer nightly
- Quilted construction can be bulkier to wash; check care labels for machine capacity considerations
5. The Heated Mattress Pad Foundation (Warming From Below)
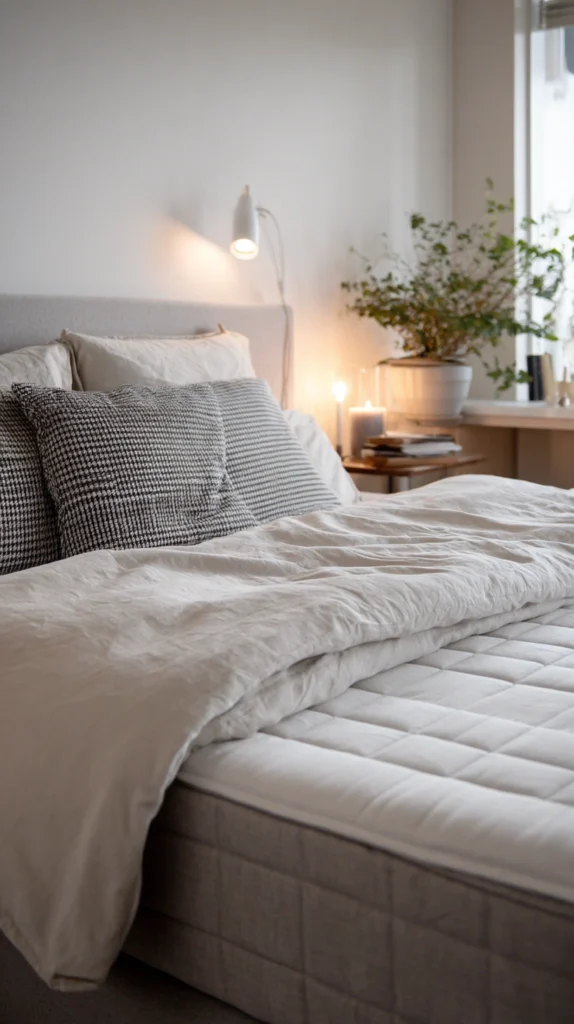
A heated layer beneath the fitted sheet, working with the layers above rather than replacing them — warming the bed itself before getting in.
My cold-bed-entry problem:
What getting into bed felt like:
- Cold sheets immediately upon entry, regardless of how many blankets were piled on top
- Took ten to fifteen minutes of personal body heat to warm the bed enough for comfort
- Adding more blankets did nothing to solve the initial cold-entry problem
- A heated mattress pad addressed the issue from an entirely different angle
Why heating from below works differently:
The mechanism:
- Traditional layering (blankets and duvets) traps existing body heat
- A heated mattress pad actively generates warmth before the body heat exists
- This is the only layer in the entire system that adds energy rather than retaining it
- Solves the specific problem that layering above cannot solve: the cold entry moment
How it fits into the layering system:
Placement in the sequence:
- Directly on top of the mattress, underneath the fitted sheet
- Essentially becomes part of the mattress surface itself
- All other layers (sheets, blankets, duvet) proceed as normal above it
- Does not replace any layer; it adds a new foundational one
Using it correctly:
The timer approach:
- Turn on 20-30 minutes before getting into bed
- Pre-warms the sheets and mattress surface
- Turn off once in bed (most models auto-shutoff after a set period, or use a separate timer)
- Running it all night is generally unnecessary and reduces its specialness as a pre-bed ritual
Dual-zone consideration for partners:
For shared beds:
- Many heated mattress pads offer dual-zone control
- Each side of the bed independently controlled
- Solves the common partner conflict where one person runs warm and the other cold
- This single feature resolves more bedroom temperature arguments than any other bedding change
Material and quality:
What to look for:
- Cotton or microfiber top layer (not synthetic mesh that feels plasticky)
- Low-voltage, safety-certified models (auto shutoff features standard on quality brands)
- Machine washable (check the specific model, some have removable wiring components)
Wool mattress topper alternative:
For those avoiding electrical bedding:
- A wool mattress topper provides natural insulation from below
- No electricity, no auto-shutoff to manage, no wiring
- Slightly less immediately warm than a heated pad, but warms over the course of lying down
- A genuinely good alternative for those with safety concerns about heated bedding
Brands and cost:
By price point:
- Budget: Sunbeam, Biddeford ($35-70)
- Mid-range: Serta, Beautyrest ($70-120)
- Investment with smart features: Sleep Number, Eight Sleep ($150-400)
- Wool topper alternative: $80-200
Cost:
- Heated mattress pad: $40-150
- Wool topper alternative: $80-200
My heated mattress pad result: Getting into bed stopped being an uncomfortable cold-shock moment, the 20-minute pre-warming routine became a genuine signal that bedtime was approaching, the dual-zone control ended every temperature negotiation with my partner.
Heated Mattress Pad Tips
Safety first:
Non-negotiable practices:
- Never use a heated mattress pad with a young child unsupervised
- Check the cord and connections each season before first use
- Replace any pad showing wear, fraying, or uneven heating
- These pads are very safe when used as directed, but basic checks matter
The pre-bed ritual benefit:
Beyond just warmth:
- Turning on the heated pad becomes a cue that signals “bedtime is approaching”
- This behavioral trigger works alongside dimming lights and other wind-down routines
- The warmth itself is only part of the benefit; the ritual habit is equally valuable
6. The Cooling Base Layer With Warm Top Layers (Solving the Hot Sleeper Problem)
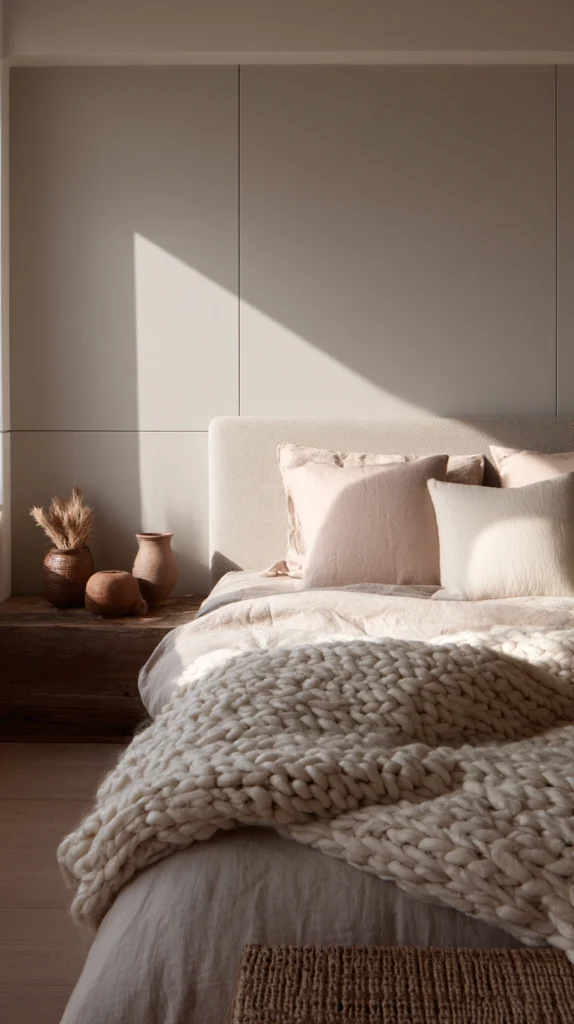
A cooling mattress protector or cooling sheet at the base, with traditional warm layers above — for sleepers who run hot but still want cozy fall bedding.
My hot-sleeper-in-a-cold-room problem:
The specific conflict:
- Naturally run warm at night even in a cool fall bedroom
- Wanted the visual and tactile coziness of fall layering
- Standard heavy layering made overheating worse
- A cooling base layer let me have both: cozy appearance, comfortable temperature
The cooling and warm combination logic:
Why this is not a contradiction:
- The cooling layer manages heat at the skin-contact level
- The warm visual layers (duvet, throw) provide the psychological and aesthetic coziness of fall
- Heat management happens close to the body; coziness happens at the surface
- This separation allows a hot sleeper to participate fully in fall bedding aesthetics
Cooling base layer options:
Cooling mattress protector:
- Phase-change material technology (absorbs and releases heat to regulate temperature)
- Sits directly on the mattress, under the fitted sheet
- Brands: Slumber Cloud, SoCloud, Bedjet
- Most effective option for significant heat regulation
Cooling sheets:
Material-based cooling:
- Bamboo viscose sheets (naturally cooling, moisture-wicking)
- Percale cotton (breathable weave, cooler than sateen)
- Tencel or eucalyptus fiber sheets (excellent moisture management)
- A simpler and often more affordable approach than a dedicated cooling pad
Building the layers above:
What stays warm-weighted:
- Lightweight blanket: still cotton or wool, fall-appropriate
- Duvet: can still be a fall-weight down or down alternative
- Throw blanket: chunky knit, full fall aesthetic, no compromise needed
- The cooling happens beneath; everything visible and touchable above remains cozy
Why the order matters specifically here:
The heat escape pathway:
- Cooling layer closest to the body actively manages heat at the source
- Breathable sheet above that allows continued heat escape
- The duvet and throw, while visually heavy, are not pressed directly against skin (the sheet is)
- This arrangement lets a hot sleeper use heavier-looking bedding without the heavier-feeling heat retention
For couples with mismatched temperature needs:
The split system:
- The hot sleeper’s side: cooling base layer plus lighter blanket weight, same duvet
- The cold sleeper’s side: standard layering from idea 1, same duvet
- A shared duvet with this approach still requires some compromise, or consider two twin duvets pushed together (the “Scandinavian sleep method,” increasingly popular for exactly this reason)
Cost:
- Cooling mattress protector: $80-200
- Cooling sheet set: $50-150
- Total: $50-200 (choose one, not necessarily both)
My cooling base and warm top result: Finally able to have the chunky knit throw and the rich duvet cover I wanted aesthetically without overheating, the bamboo sheets beneath everything else made the entire system work for my specific temperature needs, this solved years of choosing between looking cozy and feeling comfortable.
Cooling Base Layer Tips
The two-duvet solution for couples:
The Scandinavian method explained:
- Two twin or twin-XL duvets placed side by side on a queen or king bed
- Each person has their own duvet, their own warmth level, no shared tug-of-war
- A single duvet cover designed to hold two duvets (or two separate covers) maintains a unified look
- This solves temperature mismatch more completely than any single shared layering system
Testing before full commitment:
Trial approach:
- Try cooling sheets first (lower investment) before a full cooling mattress protector
- Many hot sleepers find sheets alone sufficient when combined with breathable layers above
- Reserve the more expensive cooling protector for those who need more significant intervention after testing sheets alone
7. The Faux Fur Throw Over Linen Duvet (Textural Contrast at the Top Layer)
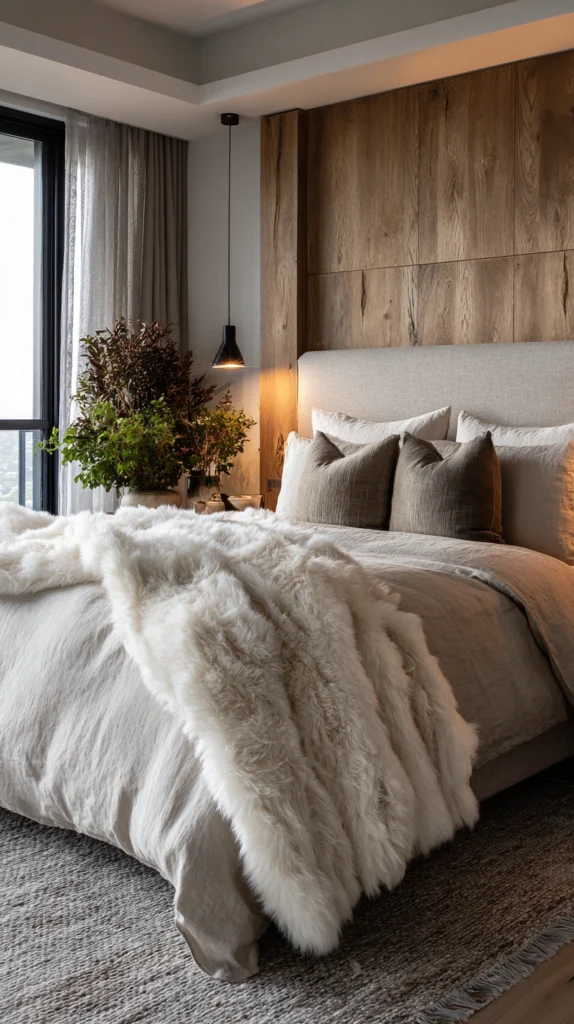
A dramatic faux fur throw as the final layer over a simple linen duvet cover — maximum coziness signal with minimum complexity.
My flat top-layer problem:
What the bed looked and felt like:
- A plain linen duvet cover with nothing on top
- Functional and breathable, per idea 3’s principles
- But visually and texturally flat
- Needed one dramatic top layer without overcomplicating the system underneath
Why faux fur as the single top layer:
The restraint principle:
- One faux fur throw provides maximum textural and visual impact
- Adding it as the only additional layer (beyond the core five-layer system) keeps things simple
- The contrast between smooth linen and plush faux fur is the entire visual statement
- No need for a coverlet, a second blanket, or additional pillows to achieve coziness — the fur does the work alone
Where the faux fur throw goes:
Placement for maximum effect:
- Folded in half and placed diagonally across the foot of the bed
- Or laid flat across the width of the bed, just below where pillows end
- Large enough to be substantial (at least 50×60 inches) — small faux fur throws look like an afterthought
- The throw is functional too: pulled up over the linen duvet on the coldest nights
Faux fur quality matters disproportionately here:
Cheap versus quality:
- Low-quality faux fur sheds, flattens quickly, and looks synthetic up close
- Quality faux fur (longer pile, denser base, realistic coloring) looks genuinely luxurious
- This is one piece worth spending more on, since it carries the entire top-layer visual statement alone
- Brands: Pottery Barn, UGG, Restoration Hardware for quality; avoid ultra-budget options for this specific piece
Color combinations:
Faux fur and linen pairings:
- Cream faux fur over warm oat linen (classic, most versatile)
- Charcoal or warm gray faux fur over cream linen (sophisticated contrast)
- Camel faux fur over deep rust linen (richest, most autumnal combination)
- Avoid bright white faux fur (reads as cold rather than cozy, fights the warm linen underneath)
Why this combination feels luxurious without effort:
The design principle:
- One dramatic texture against one simple, quiet texture
- The eye and hand both register the contrast immediately
- Complexity in materials (many different layers) is not required to achieve a luxurious effect
- Sometimes restraint, applied to one excellent piece, outperforms abundance
Cost:
- Quality faux fur throw: $40-90
- Linen duvet cover: $80-200
- Total additional cost beyond the base system: $40-90 (assuming linen duvet already covered under idea 3)
My faux fur and linen result: This became the single addition every guest who has stayed in the room comments on first, the simplicity of just one dramatic layer over the quiet linen base proved that more layers do not always mean more coziness, sometimes one excellent layer does more than three average ones.
Faux Fur Tips
Fluffing maintenance:
Keeping it luxurious:
- Faux fur flattens with body contact and use
- Shake out and fluff by hand every few days
- Keep away from direct heat sources (radiators, space heaters) which can damage synthetic fibers
- A monthly gentle brush with a wide-tooth comb restores loft significantly
Avoiding the costume look:
Quality and color discipline:
- One faux fur piece, not multiple (avoid faux fur pillows plus faux fur throw plus faux fur bed skirt)
- Natural, muted color tones over bright or novelty colors
- The goal is luxurious texture, not a costume reference
- Restraint in quantity is what separates sophisticated from excessive
8. The Striped Wool Blanket and Solid Duvet (Pattern Restraint)
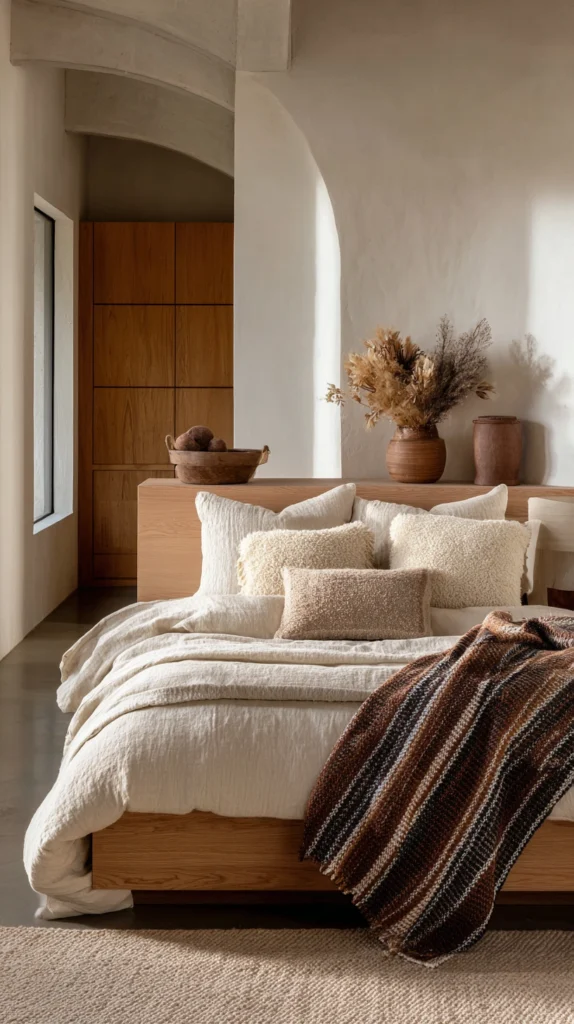
A single patterned layer against an otherwise solid bedding system — pattern used deliberately rather than throughout.
My pattern-overload mistake:
What I tried first:
- Patterned duvet cover, patterned pillow shams, patterned throw
- Too much visual competition, no single element could be appreciated
- Removed almost everything and started over with a single patterned piece
- The restraint immediately improved both the look and the simplicity of the system
Why one patterned layer works better than several:
The visual hierarchy principle:
- Multiple patterns at once compete for attention and create visual noise
- One pattern against solid surroundings gets to be seen and appreciated fully
- This mirrors the same principle used in pillow and throw styling for living rooms
- Applies equally well to the bed’s layering system
The striped wool blanket specifically:
Why stripes work well here:
- Graphic and clean pattern, reads well even folded or partially covered
- Wool stripe blankets have genuine heritage (Hudson Bay, Pendleton style blankets)
- The stripe pattern is visible whether the blanket is fully spread or folded at the foot
- Provides genuine warmth (wool, per idea 2) while also being the visual statement piece
Placement of the striped blanket:
Where it goes in the layering sequence:
- Underneath the duvet, with a portion folded back to reveal the stripe (most common styling)
- Or entirely on top as the final layer, fully visible
- Folded back at the head of the bed (a classic styling technique that reveals a band of pattern just below the pillows)
The solid duvet underneath or around it:
Keeping everything else quiet:
- Solid color duvet cover (no pattern, no competing texture)
- Solid color sheets (cream, oat, or one fall tone)
- Solid color pillowcases
- The striped blanket is the only patterned element in the entire bed
Color combinations for the striped blanket:
Classic stripe colorways:
- Cream and rust stripe (most fall-appropriate)
- Charcoal and cream stripe (most versatile, works year-round)
- Forest green and natural stripe (sophisticated and seasonal)
- Multi-stripe in earthy tones (most traditional Hudson Bay style)
Sourcing quality striped wool blankets:
Where to find them:
- Pendleton (the most recognized brand, $150-250)
- Faribault Woolen Mill (heritage American wool, $130-220)
- Hudson Bay Company (the original reference point, $200-300)
- More affordable interpretations: Amazon and Target wool-blend stripe throws ($40-80)
Cost:
- Quality wool stripe blanket: $130-250
- Budget wool-blend version: $40-80
- Solid duvet cover and sheets (per earlier ideas): already covered
My striped wool blanket result: Folding back the Pendleton-style stripe blanket to reveal just a band of pattern at the head of the bed against an otherwise entirely solid cream bedding system created more visual interest than any fully patterned duvet ever did, restraint genuinely was the better choice here.
Pattern Restraint Tips
The fold-back reveal technique:
Styling the single pattern:
- Fold the patterned blanket back about 12-18 inches from the head of the bed
- This reveals a clean band of pattern just below where pillows sit
- More sophisticated than fully displaying the pattern across the entire bed
- A technique borrowed directly from luxury hotel bed styling
When to break the one-pattern rule:
The exception:
- A very subtle second pattern (like a textured weave with no real color contrast) can coexist
- True color and graphic patterns should remain limited to one element
- If uncertain, defaulting to fewer patterns is almost always the safer and more elegant choice
9. The Vintage Quilt Layer (Handmade Warmth and Character)
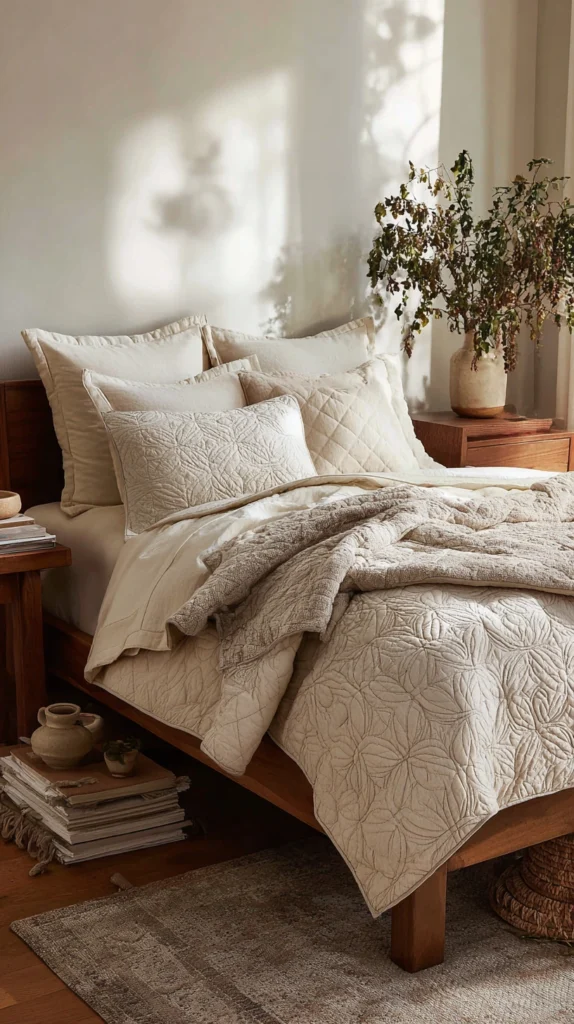
A genuine or vintage-style patchwork quilt incorporated into the layering system — warmth with history and texture machine-made bedding cannot replicate.
My uniform bedding problem:
What was missing:
- Every piece of bedding purchased new from the same source
- Nothing with age, irregularity, or a sense of having existed before this season
- The bed looked complete but impersonal
- A vintage quilt addition introduced exactly the character that was missing
Why a quilt specifically fits fall layering:
The historical and material logic:
- Quilts were traditionally made for exactly this purpose: an additional warm layer for cold seasons
- Patchwork construction creates natural texture and slight thickness variation
- The handmade (or handmade-style) quality signals warmth psychologically as much as physically
- A quilt connects the bed to a long tradition of seasonal layering practice
Placement in the system:
Where the quilt goes:
- Folded at the foot of the bed, similar to the coverlet placement in idea 4
- Or used as the primary top layer instead of a duvet on milder fall nights
- Quilts are generally lighter than a full duvet, making them perfect for the early fall transition period
- As temperatures drop further, the quilt moves to a supplementary position folded at the foot, with the duvet taking over as the primary layer
Sourcing a genuine vintage quilt:
Best sources:
- Estate sales (most authentic, often most affordable, $40-150)
- Antique shops (curated selection, $80-250)
- Etsy vintage sellers (searchable by pattern and color, $60-200)
- Family hand-me-downs (priceless, often the most meaningful option)
New quilts made in traditional style:
For those without access to vintage pieces:
- Etsy independent quilters making new patchwork quilts ($150-400)
- Anthropologie and similar retailers carry quilted bedspreads inspired by traditional patterns ($100-250)
- Less expensive manufactured quilted bedspreads (less authentic character, but accessible, $50-100)
Fall-appropriate quilt patterns and colors:
What to look for:
- Log cabin pattern (classic, geometric, works in earthy tones)
- Patchwork with a warm color story (rust, brown, cream, forest green pieces)
- Star or geometric block patterns in fall colors
- Avoid: quilts in pastel or spring-associated colorways for this specific seasonal use
Caring for a vintage quilt:
Preservation practices:
- Hand wash or very gentle machine cycle in cold water
- Air dry flat (never tumble dry a genuine vintage quilt, the stitching is often delicate)
- Store folded with cedar blocks, away from direct light when not in use
- These pieces are meant to last decades longer with proper care
Cost:
- Vintage quilt (estate sale or thrift): $40-150
- New quilt in traditional style: $100-400
- Total: $40-400 depending on source
My vintage quilt result: Finding a log cabin pattern quilt at an estate sale for $65 and folding it at the foot of the bed added more genuine character to the room than any new purchase could, the slight fading and soft worn quality of the fabric tells a story new bedding simply cannot tell.
Vintage Quilt Tips
Inspect before buying:
What to check:
- Look for any significant tears, weak seams, or extensive staining
- Minor fading and soft wear are desirable (part of the character)
- Smell the quilt closely for any musty or mildew odor (often treatable, sometimes a sign of deeper damage)
- A few small flaws are acceptable and add character; structural damage is not worth the investment
Using a quilt as the primary duvet alternative:
For lighter fall nights:
- A quilt alone, without an additional duvet, often provides sufficient warmth for September and early October
- This delays the need to bring out the heavier duvet system until temperatures genuinely require it
- A practical and authentic way to extend the season-appropriate use of a single beautiful piece
10. The European Pillow and Body Pillow Layering (Structural Comfort Beyond the Blankets)
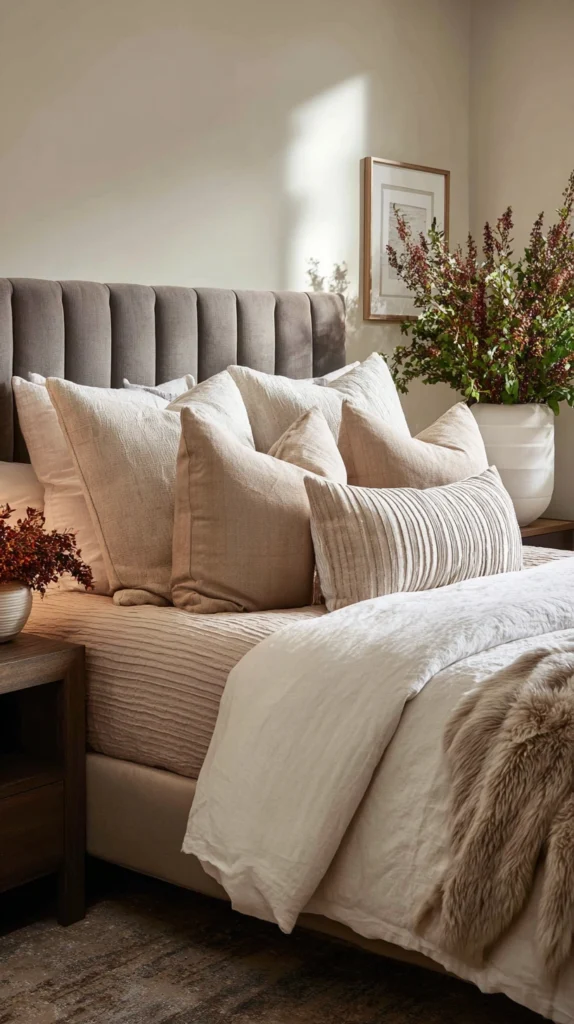
Building pillow layers with the same intentionality as blanket layers — comfort and support that complements the temperature layering system.
My single-pillow-type problem:
What every pillow on the bed was:
- Identical standard pillows, same size, same fill, same firmness
- No variation in support or function
- The pillow arrangement contributed nothing to either comfort or the visual coziness of the bed
- Adding intentional pillow layering, much like the blanket system, transformed both function and appearance
The pillow layering system:
Layer one — Euro pillows (against the headboard):
- Large square pillows (26×26 inches)
- Positioned upright against the headboard, behind all other pillows
- Provide the backdrop and visual height for the rest of the arrangement
- Often firmer fill (supports an upright reading or lounging position)
Layer two — standard sleeping pillows:
- The pillows actually used for sleep, positioned in front of the Euro pillows
- Two per person at minimum (a single pillow rarely provides adequate neck support through a full night)
- Medium fill, chosen based on individual sleep position needs (side, back, stomach sleepers each need different firmness)
Layer three — decorative lumbar or accent pillow:
- A smaller rectangular pillow placed in front of the sleeping pillows
- Primarily decorative, removed at night
- Often the piece carrying the most pattern, texture, or fall color statement
Body pillow integration:
For additional support and warmth:
- A body pillow alongside the main pillows provides both physical support (especially side sleepers) and an additional warm mass in the bed
- Particularly useful for those sleeping alone in colder months (something substantial to curl into)
- Available in down, down alternative, or memory foam fill depending on support preference
Fall pillowcase and sham strategy:
Coordinating with the blanket layers:
- Euro pillow shams in a fall solid or subtle texture (linen, velvet)
- Sleeping pillowcases in the same material as the sheets (consistency, comfort)
- Decorative lumbar pillow carrying the boldest fall color or pattern
- This hierarchy mirrors the same large-medium-small principle used in living room pillow arrangements
Pillow fill considerations for fall:
Temperature regulation in pillows:
- Down or down alternative pillows: warmer, can feel hot for some sleepers
- Buckwheat or latex pillows: naturally cooler, good for hot sleepers wanting fall coziness without overheating at the head
- A mixed approach (different fill types for different household members) often works best
Cost:
- Two Euro pillow inserts and shams: $50-100
- Two to four quality sleeping pillows: $60-160
- One lumbar pillow and cover: $25-50
- One body pillow (optional): $30-80
- Total: $135-390
My pillow layering result: Adding Euro pillows behind the standard sleeping pillows gave the bed actual visual height and a place to lean back while reading in bed, the body pillow became unexpectedly essential on the coldest nights as an additional warm presence, the whole arrangement finally looked as intentional as the blanket layers beneath it.
Pillow Layering Tips
The pillow count formula:
Standard arrangement for a queen or king bed:
- Two Euro pillows (one per person, even for a single sleeper for visual balance)
- Two to four sleeping pillows (two per person)
- One to two decorative lumbar pillows
- Total of five to eight pillows depending on bed size and personal preference
Removing pillows for actual sleep:
The practical nightly routine:
- Euro pillows and decorative lumbar pillows are removed and placed on a nearby chair or the floor at bedtime
- Only the sleeping pillows remain on the bed during actual sleep
- This routine takes thirty seconds and prevents decorative pillows from being crushed, lost, or kicked off during the night
11. The Channel-Quilted Velvet Throw Over Crisp Cotton (Luxury Hotel Styling)
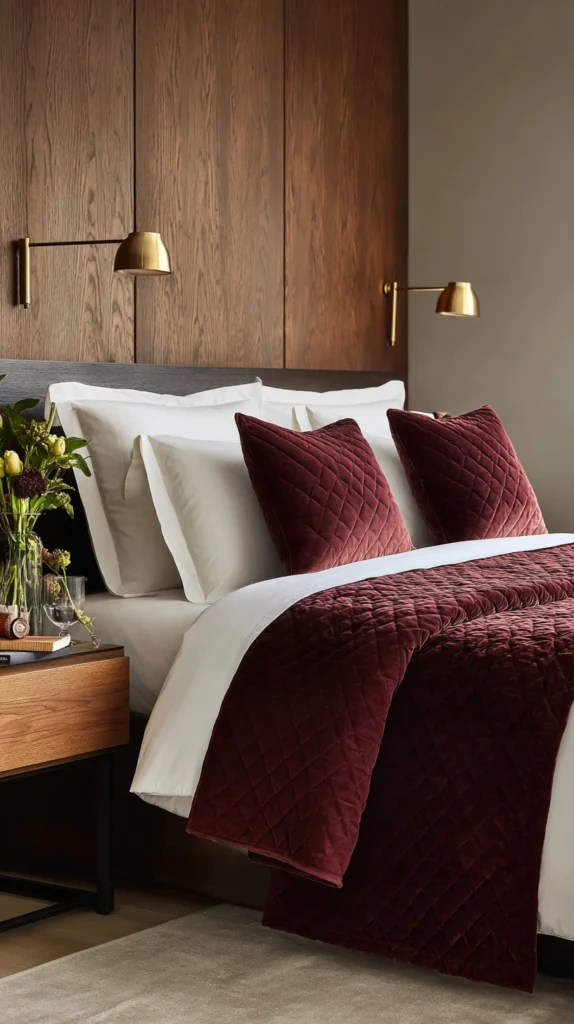
A structured, channel-quilted velvet throw paired with crisp white or cream cotton bedding beneath — the specific combination most associated with high-end hotel beds.
My unstructured bedding problem:
What the bed lacked:
- Soft, somewhat shapeless bedding with no structural element
- Comfortable but visually flat, lacking the crisp polish of a well-appointed bed
- The channel-quilted velvet throw introduced both structure and luxury simultaneously
What channel quilting is:
The construction detail:
- Long parallel lines of stitching creating tube-like channels filled with batting
- A more structured, tailored look than the diamond or random quilting pattern
- Commonly seen in high-end hotel bed runners and throws
- Creates a substantial, slightly rigid drape that holds its shape beautifully when folded
The velvet material specifically:
Why velvet for this combination:
- Catches light in a way that flat cotton or linen cannot
- Adds a layer of visual richness against the crisp simplicity of white or cream cotton beneath
- The channel quilting prevents velvet from looking overly soft or shapeless
- The combination of structure (quilting) and luxury (velvet) is what creates the hotel-quality effect
Best colors for the velvet channel throw:
Fall-appropriate choices:
- Deep burgundy or wine (most luxurious, most fall-specific)
- Warm charcoal or deep gray (most universally elegant)
- Forest green (sophisticated and seasonal)
- Camel or warm gold (rich and warm, slightly less common but striking)
The crisp cotton beneath:
What goes underneath:
- White or cream percale sheets (crisp, hotel-style, high thread count for the polished look)
- A simple white or cream duvet cover (no pattern, the velvet throw is the statement)
- This crisp simplicity is essential; a patterned or textured duvet beneath competes with the velvet throw rather than supporting it
Placement and folding technique:
The hotel styling method:
- Make the bed completely with the white or cream duvet, smoothed flat
- Fold the velvet channel throw in half lengthwise
- Place it across the foot of the bed, extending up about one-third of the bed’s length
- Smooth any wrinkles for the crisp, tailored hotel appearance
- Arrange pillows behind and slightly overlapping the top edge of the throw
Why this combination reads as luxurious:
The design psychology:
- High contrast between rich texture (velvet) and crisp simplicity (white cotton) is visually striking
- This is the exact combination most luxury hotels use deliberately
- It signals quality and intentional design more immediately than an all-patterned or all-textured bed
- The simplicity of the base layer makes the one luxurious element more impactful
Cost:
- Channel-quilted velvet throw: $60-150
- Crisp cotton percale sheets: $50-120
- White or cream duvet cover: $50-130
- Total: $160-400
My channel velvet and crisp cotton result: This exact combination is what finally made my bed look like something out of a boutique hotel rather than a home bedroom, the contrast between the rich burgundy velvet and the crisp white cotton beneath does more visual work than any other combination I have tried.
Channel Velvet Tips
Velvet care:
Maintaining the finish:
- Spot clean only (avoid full washing when possible, dry clean if heavily soiled)
- Steam gently to remove wrinkles rather than ironing directly
- Store folded rather than compressed when out of season (prevents permanent crush marks)
- This is an investment piece that rewards careful handling
The crisp white maintenance commitment:
Keeping cotton truly crisp:
- White or cream percale requires more frequent washing to maintain the crisp hotel look
- A light starch spray when ironing (for those who iron sheets) enhances the crispness
- This combination requires slightly more maintenance than a more forgiving textured or colored bedding system, but the visual payoff is significant
12. The Linen Blanket and Cotton Quilt Pairing (Lightweight Layering for Mild Fall)
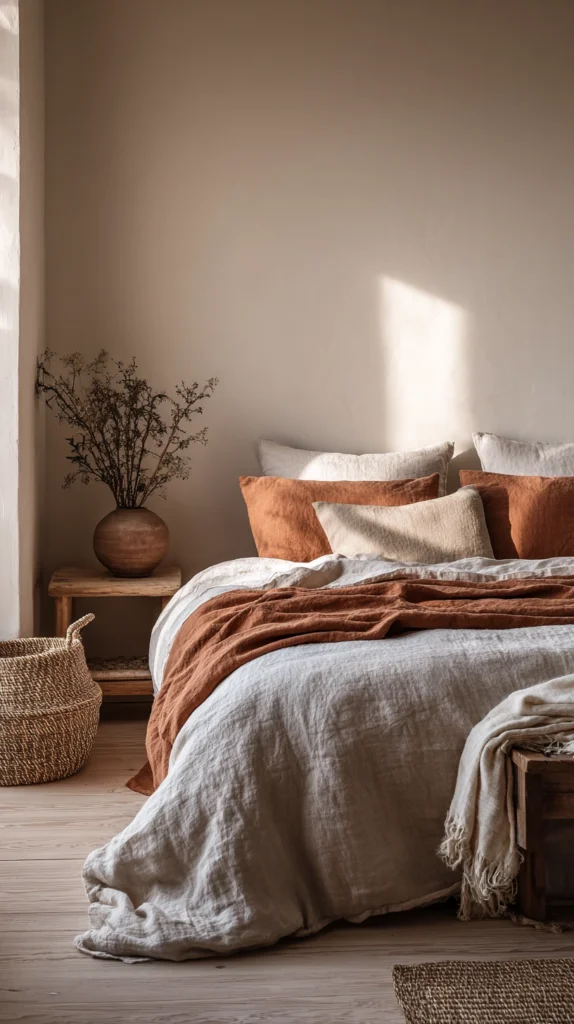
Two lightweight natural layers for early fall and warmer climates — proving that layering does not always mean heavy.
My overcorrection toward heaviness:
What I assumed:
- Fall layering meant everything should be thick and heavy
- Applied heavy wool and down to a bedroom that, in early September, was still quite warm at night
- Overheated constantly until realizing fall layering should match the actual temperature, not the season’s reputation
Why lightweight layering matters for early and mild fall:
The seasonal mismatch problem:
- September and early October in many climates are still warm at night
- Applying full winter-weight layering too early creates immediate overheating
- A lightweight version of the same layering principle works far better for the transitional period
- This combination is specifically for early fall, mild climates, or naturally warm sleepers wanting some fall coziness without heaviness
The linen blanket layer:
What makes it different from a linen sheet:
- A woven linen throw blanket, slightly heavier than a sheet but much lighter than wool
- Provides texture and a small amount of warmth without bulk
- Breathable in the way only linen can be, even when layered
The cotton quilt layer:
A lighter alternative to the vintage quilt from idea 9:
- A simple, lightweight cotton quilt (sometimes called a coverlet, similar to idea 4 but in a lighter weight specifically)
- Muslin or voile quilting (lighter than traditional batting)
- Provides visual layering and slight warmth without the weight of a full duvet
The combination in practice:
Layering order for this lightweight system:
- Cotton percale sheets (fitted and flat)
- Linen throw blanket folded at the foot, available to pull up
- Lightweight cotton quilt as the primary top layer (replacing a heavier duvet entirely during this period)
- No additional throw needed; this system is already appropriately light
When to transition to heavier layering:
Reading the actual temperature, not the calendar:
- Move to the heavier systems (ideas 1-3) once nighttime temperatures consistently drop below 60 degrees
- Some climates remain in this lightweight zone through most of fall
- Others transition to heavier systems by mid-October
- The principle: match the layering weight to the actual measured temperature, not an assumed fall heaviness
Color palette for lightweight fall layering:
Keeping it seasonally appropriate despite the lighter weight:
- Warm cream and oat tones (versatile, transitional)
- Soft terracotta (introduces fall color without heavy texture)
- Sage green (a gentle nod to the season)
- This lighter system can still feel like fall through color even without heavy materials
Cost:
- Linen throw blanket: $40-90
- Lightweight cotton quilt: $50-110
- Total: $90-200
My lightweight linen and cotton result: Realizing that my early fall overheating problem was caused by jumping straight to wool and down before the temperature actually called for it, switching to this lighter combination for September and early October finally matched the bedding to the actual weather rather than the assumed seasonal heaviness.
Lightweight Layering Tips
Track actual nighttime temperature:
The practical approach:
- Check a weather app’s overnight low, not just the daytime high
- Bedrooms with the window cracked or without strong heating closely follow outdoor overnight temperatures
- Use this number, not the calendar date, to decide when to transition between lightweight and heavyweight systems
- This data-driven approach prevents both overheating in early fall and being under-prepared as it turns colder
Storing the heavier system until needed:
Avoiding clutter:
- Keep the wool blankets and down duvets stored until the temperature genuinely calls for them
- This also extends the life of heavier materials by reducing unnecessary wear
- A simple labeled bin system (light fall, heavy fall) keeps the transition organized and quick when the time comes
13. The Mixed-Era Bedding Layer System (Combining New Performance Fabrics With Traditional Materials)
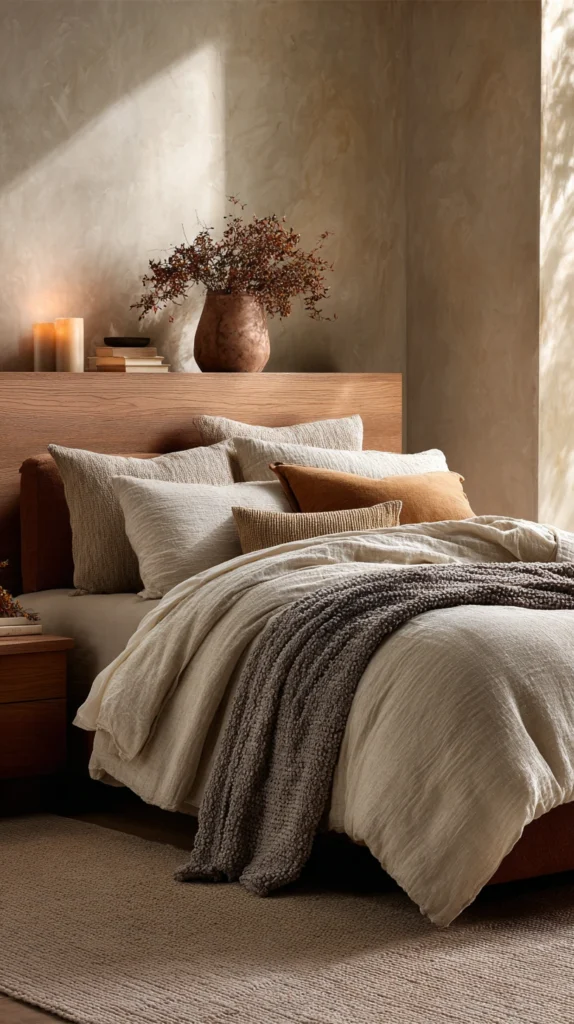
Modern moisture-wicking or temperature-regulating fabric for the base, traditional natural materials for the visible layers — the best of both technical performance and classic coziness.
My all-traditional-or-all-technical dilemma:
The choice I thought I had to make:
- Either fully traditional natural fiber bedding (beautiful but no technical performance features)
- Or fully modern performance fabric bedding (functional but visually and texturally less appealing)
- Discovered that combining both, in the right places, eliminates the need to choose
The logic of mixing eras of textile technology:
Where modern performance fabric excels:
- Moisture-wicking base layers (closest to skin)
- Temperature-regulating phase-change materials
- Engineered for a specific technical function, often less concerned with traditional texture or appearance
Where traditional materials excel:
- Visual warmth and richness (wool, velvet, linen, down)
- The tactile and psychological comfort associated with natural materials
- Aesthetic versatility across design styles
The mixed system:
Base layer (performance fabric):
- A moisture-wicking or temperature-regulating fitted sheet or mattress protector
- This is the layer doing the most active temperature and moisture management work
- Brands: Coolmax, Slumber Cloud, or similar technical textile companies
Middle and top layers (traditional materials):
- Cotton or linen flat sheet
- Wool or down blanket layer
- Velvet, wool, or quilted throw as the visible top layer
- All chosen for warmth, texture, and visual appeal rather than technical performance specs
Why this specific division works:
The principle:
- The layer closest to skin benefits most from technical performance (it directly manages sweat and skin-level temperature)
- The layers further from skin contribute more to overall warmth perception and aesthetic experience
- Asking a single fabric to do both jobs (technical performance and visual luxury) compromises one or both
- Dividing the responsibility lets each layer excel at its specific job
For specific sleep challenges:
Night sweats or hot flashes:
- The technical base layer is particularly valuable here
- Combined with breathable traditional materials above (linen, cotton) rather than less breathable options (heavy synthetic blankets)
- This combination is frequently recommended by sleep specialists for managing temperature-related sleep disruptions
For those who prioritize sustainability:
Material sourcing considerations:
- Choose technical fabrics with recycled content where available
- Traditional materials (organic cotton, responsibly sourced down or wool) for the visible layers
- This combination allows for both functional performance and a more sustainable overall system compared to fully synthetic alternatives
Cost:
- Technical performance base sheet or protector: $60-150
- Traditional materials for remaining layers: as detailed in previous ideas
- Total additional cost beyond a standard system: $60-150
My mixed-era system result: The technical moisture-wicking sheet beneath everything else solved a recurring night-sweat issue that no amount of natural fiber alone had resolved, while the wool blanket and velvet throw on top kept the bed feeling and looking exactly as cozy and fall-appropriate as I wanted, this combination proved that solving function and achieving beauty did not require the same material doing both jobs.
Mixed-Era System Tips
Do not over-rely on marketing claims:
Evaluating performance fabric:
- Look for specific, measurable claims (moisture-wicking rate, temperature range) rather than vague terms like “cooling technology”
- Read reviews from people with similar sleep concerns
- A genuinely effective technical fabric is worth the investment; a marketing-driven one with no substantive difference is not
The cost-benefit threshold:
When this combination is worth the investment:
- Specific, persistent sleep temperature issues (night sweats, hot flashes, chronic overheating)
- A general preference for natural materials but a need for additional technical support
- For those without specific issues, the simpler traditional-only systems from earlier ideas are often entirely sufficient without this additional layer of technical investment
Choosing Your Layering System
By temperature need:
Naturally cold sleepers:
- Flannel and wool combination (idea 2)
- Heated mattress pad foundation (idea 5)
- Vintage quilt as supplementary warmth (idea 9)
Naturally hot sleepers:
- Cooling base layer with warm top layers (idea 6)
- Down and linen for breathable warmth (idea 3)
- Mixed-era system with technical base layer (idea 13)
Variable or mild climate:
- Linen blanket and cotton quilt for lightweight fall (idea 12)
- The five-layer classic stack, adjusted seasonally (idea 1)
By aesthetic priority:
Maximum coziness signal:
- Faux fur throw over linen duvet (idea 7)
- Channel-quilted velvet over crisp cotton (idea 11)
Authentic and characterful:
- Vintage quilt layer (idea 9)
- Striped wool blanket with pattern restraint (idea 8)
Structured and polished:
- Channel-quilted velvet (idea 11)
- European pillow layering (idea 10)
By effort and budget:
Quick and affordable additions:
- Pillow layering reorganization (idea 10): mostly rearranging what is owned
- Wool blanket addition to existing system (idea 2)
Moderate investment, high impact:
- Down and linen duvet system (idea 3)
- Faux fur throw addition (idea 7)
- Quilted coverlet (idea 4)
Larger investment pieces:
- Heated mattress pad (idea 5)
- Genuine vintage quilt (idea 9)
- Quality channel-quilted velvet throw (idea 11)
Maintenance Through the Season
Weekly:
- Shake out and fluff down duvets and pillows
- Straighten and refold visible throw and quilt layers
- Wash sheets (fitted and flat) on the regular schedule
Monthly:
- Wash duvet covers and pillowcases
- Spot check wool and velvet pieces for any needed care
- Reassess whether current layering matches current actual temperature
Seasonal transition:
- As temperatures drop further into late fall, layer in additional weight (heavier wool, higher fill power duvet)
- As temperatures eventually warm in spring, reverse the process, storing heavier pieces
- Photograph the bed at its best each season for reference next year
My Complete Layering Journey
What I built across two falls:
Fall one, early ($110):
- Cotton percale sheets, lightweight wool blanket
- Basic five-layer system established
- Learned the foundational order and logic
Fall one, mid-season ($240):
- Switched to flannel sheets as temperatures dropped
- Added a down alternative duvet at fall weight
- Folded a thrifted quilt at the foot for visual texture
Fall two ($310):
- Heated mattress pad added
- Quality faux fur throw as the new top layer
- European pillows added behind sleeping pillows
- Vintage log cabin quilt found at an estate sale
Total investment: $660 across two falls Sleep improvement: Eliminated the 3am temperature-adjustment waking entirely Aesthetic result: A bed that finally looks as intentionally layered as it functions
Getting Started This Weekend
Build the foundation before adding character.
This weekend:
Step 1 — Establish the five-layer order:
- Fitted sheet, flat sheet, lightweight blanket, duvet, throw
- Even with materials you currently own
- Confirm each layer can be adjusted independently
Step 2 — Identify your specific temperature pattern:
- Cold sleeper, hot sleeper, or variable
- This determines which specific combination from ideas 2, 3, or 6 to prioritize next
Step 3 — Add one character piece:
- A single thrifted quilt, a striped wool blanket, or a faux fur throw
- One piece, chosen deliberately, rather than several pieces chosen randomly
My recommendation:
Start with the five-layer order using what you own, then make one targeted purchase based on whether you run hot or cold at night. The system matters more than any individual product, and getting the order right costs nothing.
Now go build the layered bed that finally matches what autumn nights actually need.
Quick Summary
The 13 layering combinations:
Foundational:
- The five-layer classic stack (idea 1): the system everything else builds from
Temperature-specific:
- Flannel and wool (idea 2): maximum warmth for cold sleepers
- Down and linen (idea 3): breathable warmth that does not trap heat
- Heated mattress pad (idea 5): warming the bed itself before entry
- Cooling base with warm top layers (idea 6): for hot sleepers who still want cozy aesthetics
- Linen blanket and cotton quilt (idea 12): lightweight layering for mild fall
- Mixed-era system (idea 13): technical performance fabric plus traditional materials
Texture and character:
- Quilted coverlet plus duvet (idea 4): textural depth and an easy-grab extra layer
- Faux fur over linen (idea 7): maximum coziness signal, minimum complexity
- Striped wool blanket and solid duvet (idea 8): one deliberate pattern, restraint elsewhere
- Vintage quilt layer (idea 9): handmade warmth and genuine history
Structure and polish:
- European pillow and body pillow layering (idea 10): comfort architecture beyond blankets
- Channel-quilted velvet over crisp cotton (idea 11): luxury hotel styling
The non-negotiable rules:
Always:
- Lightest, most breathable materials closest to the skin
- Heaviest, most insulating materials furthest from the skin
- Natural fibers over synthetic wherever possible (cotton, linen, wool, down)
- Match the layering weight to actual measured temperature, not the calendar
Never:
- Pile layers randomly without considering the breathability sequence
- Jump straight to winter-weight layering in early fall
- Use a single shared duvet for partners with very different temperature needs
- Assume more layers always means warmer; the order and material matter as much as quantity
The layering formula:
Breathable base (sheets) + adjustable mid-weight layer (lightweight blanket) + primary insulation (duvet) + visible character layer (throw, quilt, or coverlet) = a bed that adjusts to the actual night instead of fighting it.
Common mistakes:
- Treating layering as simply adding more blankets without considering material order
- Choosing all-synthetic materials, which trap heat unevenly and disrupt temperature regulation
- Ignoring individual temperature differences between partners sharing a bed
- Over-patterning every layer instead of choosing one deliberate pattern and keeping the rest solid
- Skipping the pillow layering system while focusing only on blankets
- Using heavy winter-weight materials in early fall before temperatures actually require it
- Forgetting that quality matters disproportionately for statement pieces like faux fur or velvet throws
Remember: The order of materials matters as much as the materials themselves, breathability closest to skin and insulation furthest away is the rule that makes every combination on this list function correctly, one excellent character piece (a vintage quilt, a quality faux fur throw, a striped wool blanket) often does more than several mediocre additional layers, matching the system to actual measured temperature rather than the assumed heaviness of the season prevents both overheating and being underprepared, and a properly layered bed should never require fully waking up to adjust for comfort in the middle of the night.