14 Hobbitcore Bedroom Ideas for Cottage-Core Lovers
My bedroom looked like a hotel room for four years. White walls, a platform bed with sharp metal legs, one overhead light, nothing handmade or curved anywhere.
Tried adding one knit throw. It sat on a stiff modern duvet against bright white walls looking exactly as out of place as it sounds. Did nothing for the room.
Then I rebuilt the entire space around the values that make a hobbit hole feel like a hobbit hole — low warm light, curved and aged furniture, abundant soft texture, and walls that feel like earth rather than drywall. The transformation went beyond decoration into an entirely different sleeping experience.
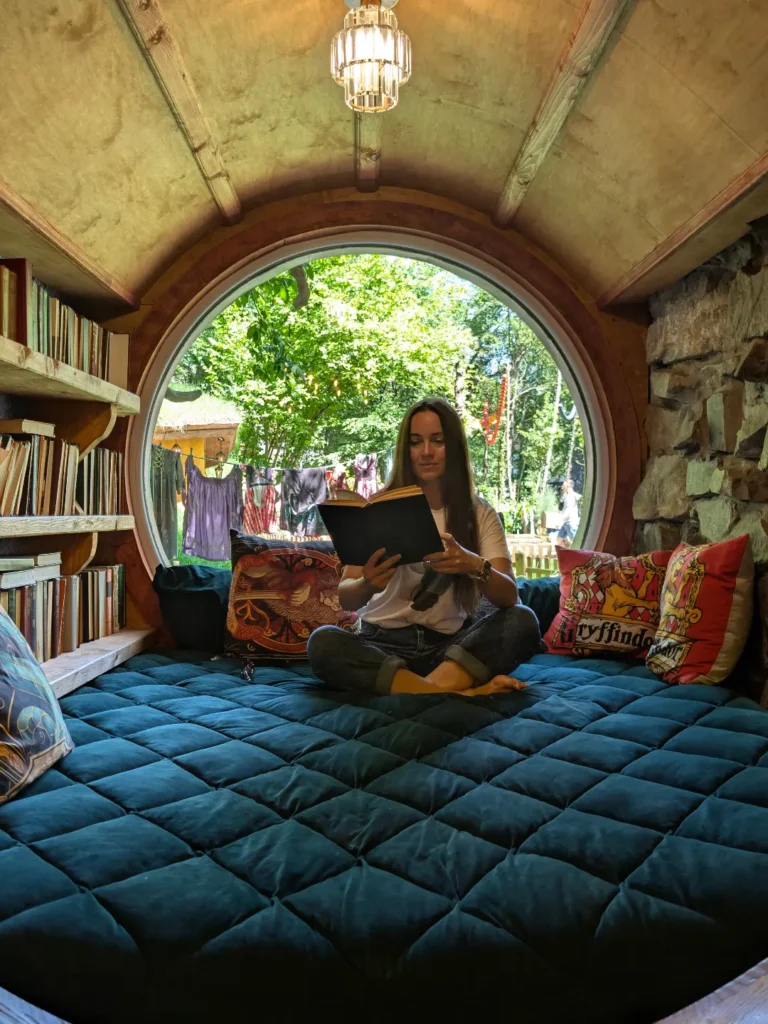
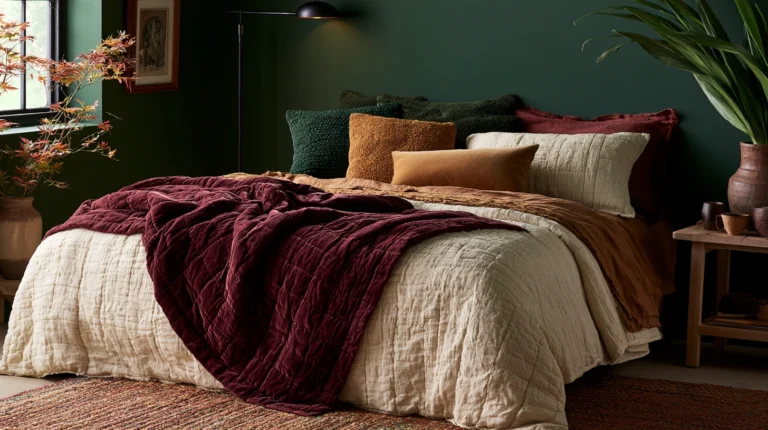
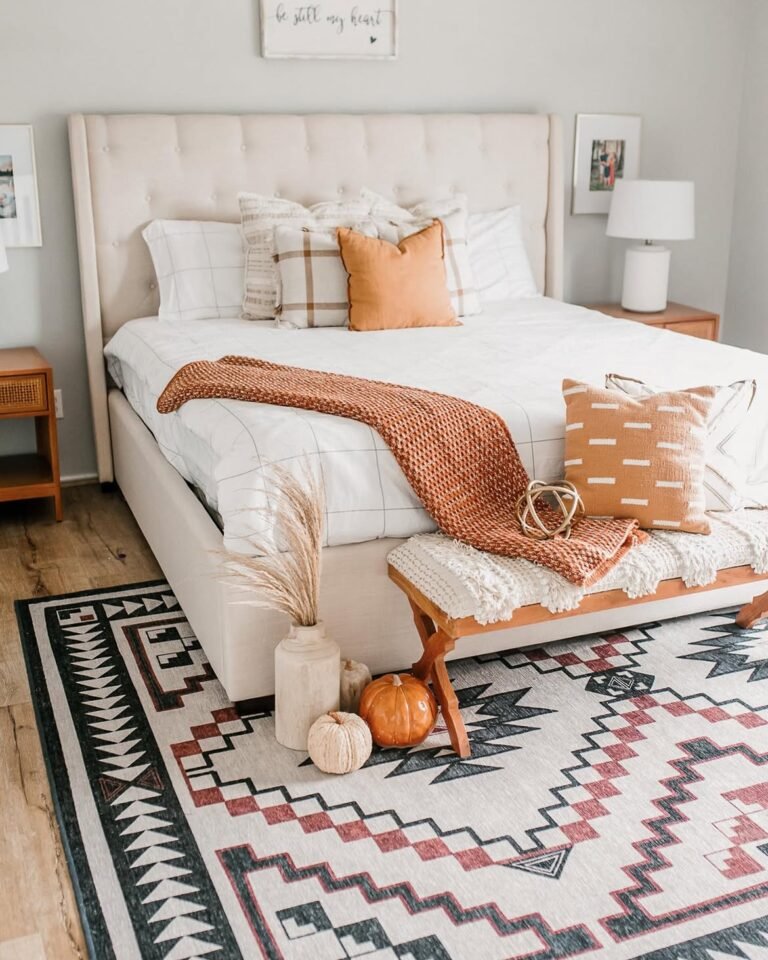
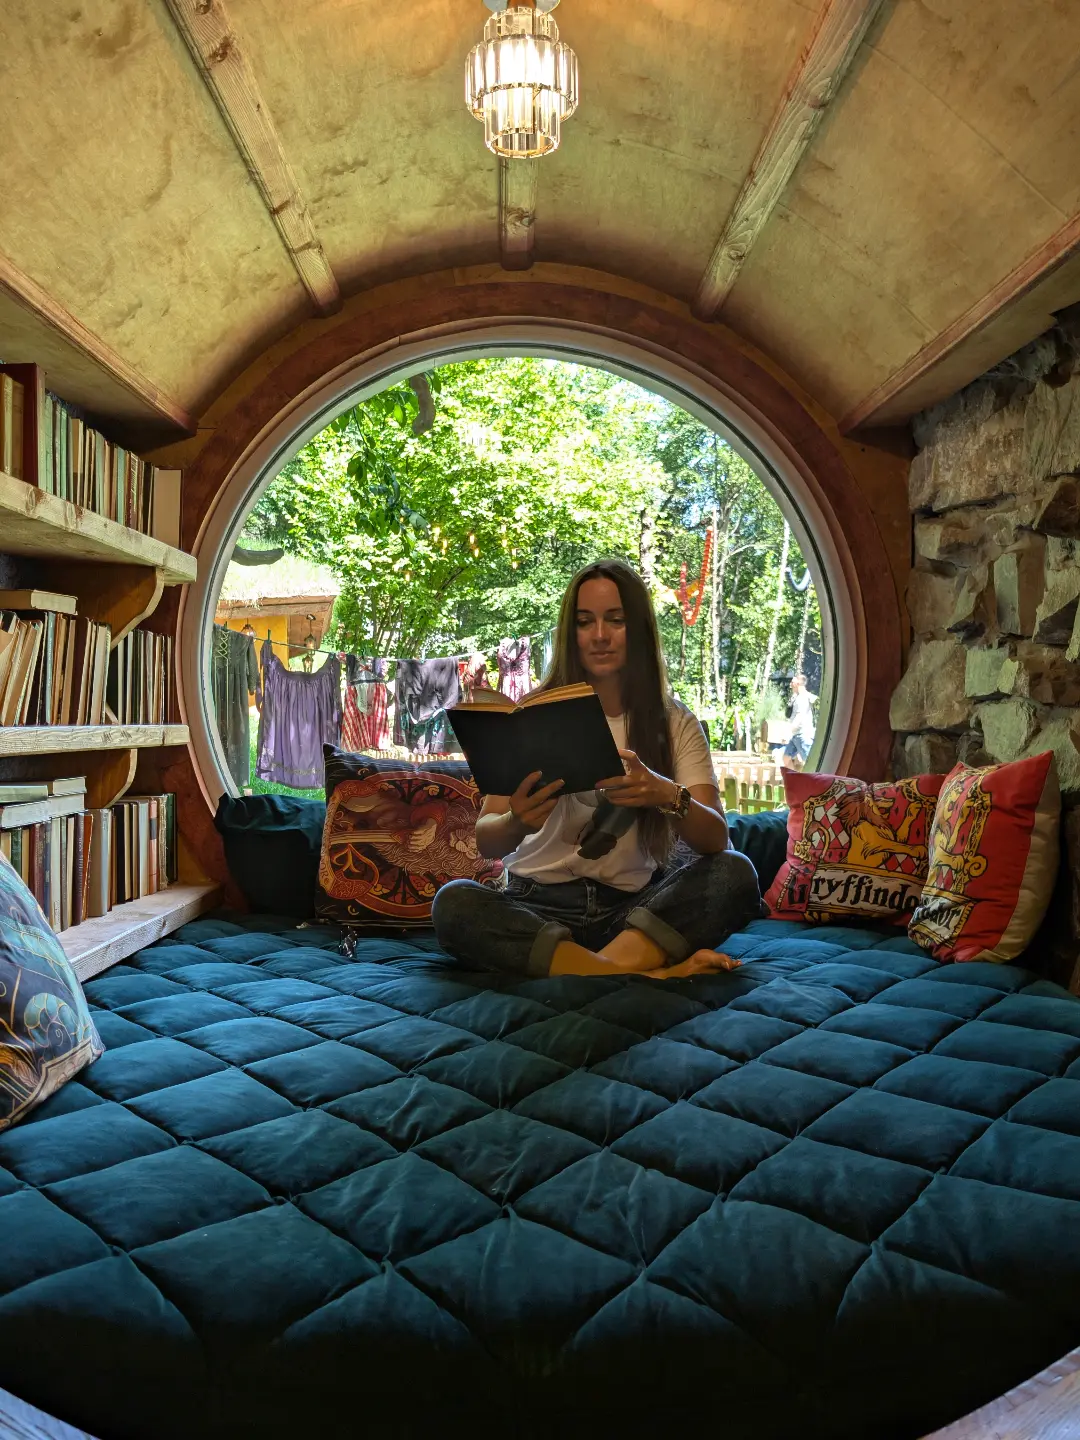
Now climbing into bed feels like climbing into a den. Same room dimensions, same window, completely different world.
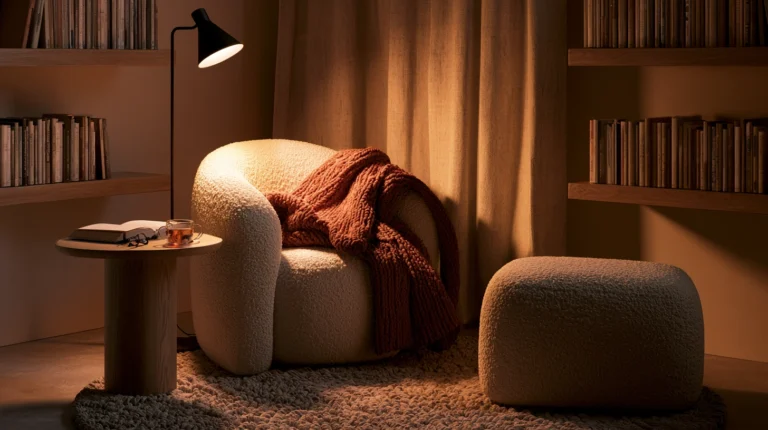
Let me show you 14 ideas that turn a flat, modern bedroom into a warm, round, cottage-core burrow built specifically for sleep.
Why Bedrooms Need a Different Hobbitcore Approach Than Living Rooms
The function difference:
What a living room hobbitcore space prioritizes:
- Abundant lighting layers for evening gathering
- Seating for conversation and reading
- Maximum collected object density
What a bedroom hobbitcore space must prioritize differently:
- Lighting warm enough for atmosphere but dim enough for actual sleep
- A bed that functions as the room’s curved, enclosed centerpiece
- Slightly more restraint in object density (a bedroom should calm, not stimulate)
The sleep consideration:
Why this matters specifically:
- A bedroom is not just a smaller living room; it has a singular primary function (rest)
- Hobbitcore principles (curves, warmth, abundance, low light) happen to align remarkably well with good sleep environment design
- This overlap means a well-executed hobbitcore bedroom can be both aesthetically transformative and genuinely better for sleep than a stark modern one
My revelation: A hobbitcore bedroom is where this aesthetic’s values and the biological needs of good sleep meet almost perfectly — low warm light, enclosure, natural materials, and softness are exactly what both the genre and a tired body are asking for.
1. The Curved or Canopied Bed Frame (The Room’s Central Architecture)
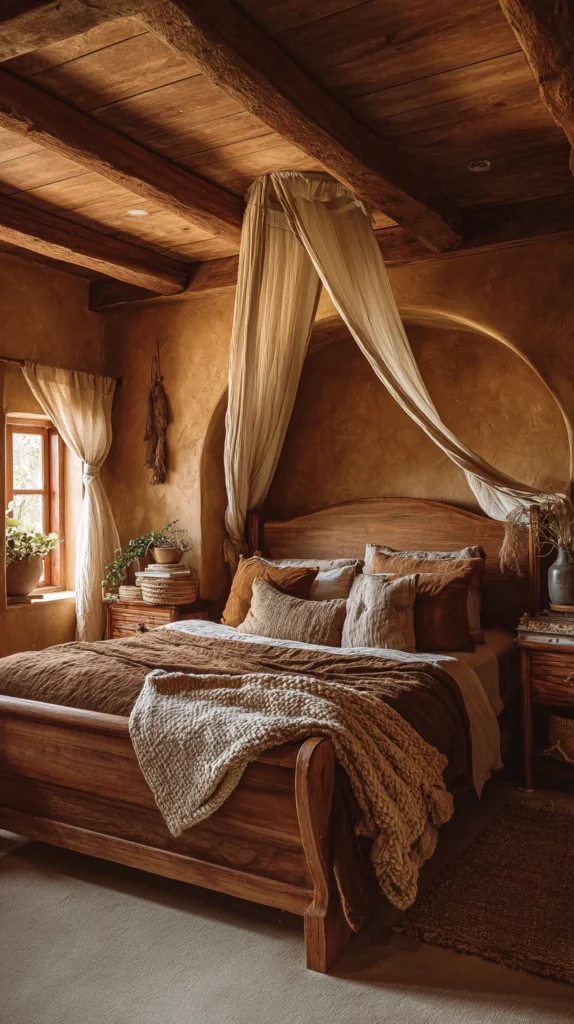
A bed frame with rounded, organic lines or a soft fabric canopy — replacing the sharp rectangular platform bed with something that feels grown rather than manufactured.
My platform bed problem:
What I had:
- A minimalist platform bed with thin metal legs
- Sharp 90-degree corners at every joint
- The most modern, least hobbit-like object in the entire room
- Fighting against every other change I tried to make
Why the bed frame matters more than any other single piece:
The visual hierarchy:
- The bed occupies the largest single footprint in the room
- Its shape and material set the tone for everything else
- A sharp, modern bed frame undermines curved doorways, warm walls, and soft textiles all at once
- This is the piece worth prioritizing above almost anything else on this list
Curved bed frame options:
Rounded wood frames:
- A frame with a curved or arched headboard (echoing the arched doorway principle from living room hobbitcore)
- Solid wood construction with visible grain (oak, walnut, or pine)
- Often sourced secondhand from estate sales or antique shops
Sleigh bed style:
- A traditional sleigh bed has curved head and foot boards
- An older furniture style that fits naturally into the cottage aesthetic
- Frequently available secondhand at lower cost than new curved frames
Canopy bed frame:
- Four posts with a frame at the top for draping fabric
- The posts themselves can be turned or carved wood (organic detail) rather than straight modern dowels
- Creates the enclosed feeling central to this entire bedroom approach
The fabric canopy alternative (no frame replacement needed):
For those keeping an existing bed:
- Hang fabric from the ceiling above the bed, regardless of the frame beneath
- Heavy linen or muslin in earthy tones
- This achieves much of the enclosure effect without replacing furniture entirely
- The most budget-accessible version of this idea
Wood tone and finish:
What fits the aesthetic:
- Dark walnut or aged oak (most authentic, most grounding)
- Avoid: glossy lacquered finishes, pale Scandinavian blonde wood, anything with a high-shine modern finish
- Slight wear, visible grain, and natural imperfection are all desirable here
Sourcing curved bed frames:
Best sources:
- Estate sales (genuinely aged pieces, $100-400 for a full frame)
- Facebook Marketplace (search “sleigh bed,” “antique bed frame,” “carved bed”)
- Antique shops (curated but pricier, $300-900)
- Etsy makers building custom curved or live-edge frames ($500-2,000)
Cost:
- Secondhand sleigh or curved frame: $100-400
- Fabric canopy addition to existing frame: $40-100
- New curved frame (investment): $500-2,000
- Total range: $40-2,000
My sleigh bed result: Finding a worn oak sleigh bed at an estate sale for $180 single-handedly changed the entire room’s personality before I touched the walls or lighting, the curved head and footboard finally gave the room the organic anchor every other change had been missing.
Curved Bed Frame Tips
Sit with the frame before committing to a full replacement:
The staged approach:
- If budget or timing does not allow an immediate frame swap, start with the fabric canopy over the existing frame
- This tests how much the enclosed, curved feeling changes your experience of the room before a larger furniture investment
- Many people find the canopy alone satisfies enough of the visual need that the frame replacement becomes optional rather than essential
Matching the headboard wall behind it:
Coordinating with idea 3 below:
- A curved wood headboard against a flat painted wall looks slightly disconnected
- Pairing the curved frame with the textured or arched headboard wall treatment (covered later in this list) creates a unified, complete composition
- The bed and the wall behind it should feel like they belong to the same world
2. Low, Warm, Layered Bedroom Lighting (Sleep-Compatible Hobbit Lighting)
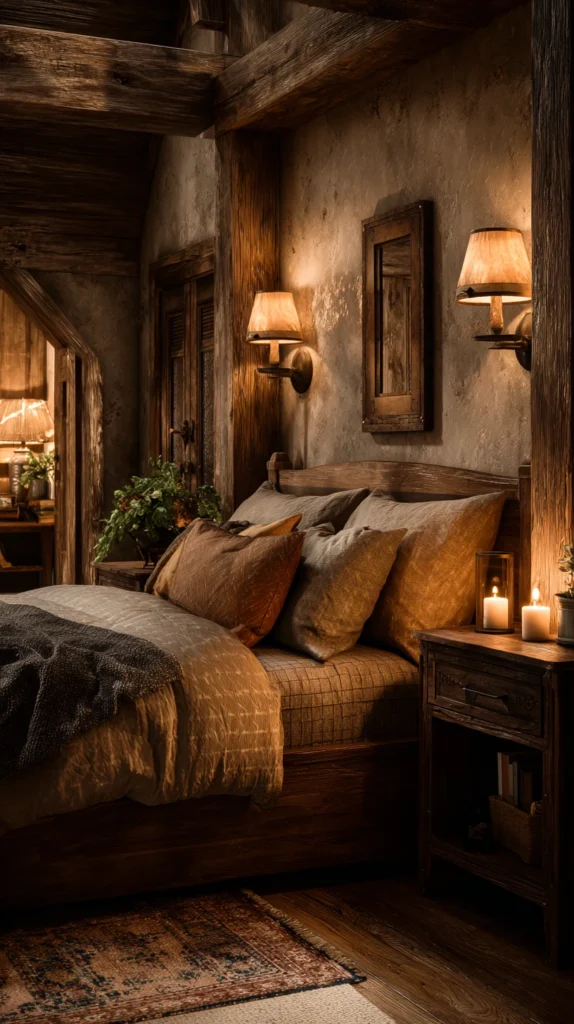
Multiple small amber light sources at low heights, calibrated specifically for actual sleep — adapting the hobbitcore lighting philosophy for a room that needs to get genuinely dark at night.
My overhead light problem:
What I had been doing:
- One bright overhead fixture, the only light source in the room
- Cool white bulbs
- On until the exact moment of getting into bed, then off completely
- No transition, no warmth, no atmosphere
Why bedroom lighting needs an extra layer of thought:
The dual requirement:
- Hobbitcore wants low, warm, scattered light (per the living room principles)
- Sleep science wants very low or no light once actually sleeping
- A hobbitcore bedroom must satisfy both: atmospheric warm light while awake, genuine darkness while asleep
The lighting layers for a hobbitcore bedroom specifically:
Evening atmosphere layer (used while getting ready for bed):
- Mushroom lamps on the nightstands (literal mushroom shape, on-theme and currently widely available)
- Small lanterns or LED candles grouped on the dresser
- A warm floor lamp in a reading corner if the room has space for one
- All bulbs at 2200-2700K (the warmest commercially common range)
Sleep layer (used during actual sleep):
- All atmosphere lights off
- A single very dim nightlight or salt lamp if total darkness feels uncomfortable
- Blackout curtains (discussed in idea 6) ensuring no outside light disrupts the room once everything is off
The transition ritual:
Bridging the two layers:
- Atmosphere lights on while changing into sleepwear and reading
- A smart plug or simple manual switch turning everything off at the moment of actually lying down to sleep
- This deliberate transition mirrors the same wind-down sequence recommended in general fall bedroom sleep guidance, now styled specifically with hobbitcore’s warm, low-light aesthetic
Mushroom lamps specifically for the bedroom:
Why they fit so naturally:
- Small enough for a nightstand without overwhelming the surface
- The literal mushroom shape reinforces the woodland, cottage-core visual language
- Often made from ceramic or glass with a particularly soft, diffused glow appropriate for bedside use
- Cost: $20-50 each
Candlelight in the bedroom:
The safety-adjusted approach:
- LED candles only (real flame near bedding is a genuine fire risk, never worth it)
- Luminara or similarly realistic battery candles, grouped on the dresser
- Timer function set to turn off automatically well before sleep, removing any need to remember to extinguish them
Wall-mounted reading sconces:
Beyond table lamps:
- Plug-in wall sconces flanking the headboard
- Frees up nightstand surface space
- Creates a softer, more architectural light source than a lamp alone
- Particularly effective paired with the curved bed frame from idea 1
Cost:
- Two mushroom or low bedside lamps: $50-120
- Plug-in wall sconces (pair): $60-120
- LED candles for the dresser: $20-40
- Warm bulbs throughout: $15-25
- Total: $145-305
My layered bedroom lighting result: The room now has a genuine evening atmosphere before bed and genuine darkness once actually sleeping, the mushroom lamps on each nightstand became the most-used objects in the entire room, and sleep quality improved alongside the aesthetic transformation.
Hobbitcore Bedroom Lighting Tips
Dimmer on the overhead, used minimally:
Practical compromise:
- If removing the overhead fixture entirely is not feasible, install a simple dimmer switch
- Use only at the lowest setting for navigation, never at full brightness once the atmosphere layer has taken over
- This single $25 change does enormous work toward the overall feeling
Blackout consideration is not optional:
Why this matters more here than in a living room:
- A truly dark, cave-like sleep environment is part of good sleep hygiene generally
- It also happens to align with the “underground burrow” feeling central to the hobbitcore aesthetic
- Blackout curtains (covered further in idea 6) complete what the warm lamps alone cannot achieve: total darkness for actual sleep
3. A Textured or Arched Headboard Wall (Bringing the Earth Behind the Bed)
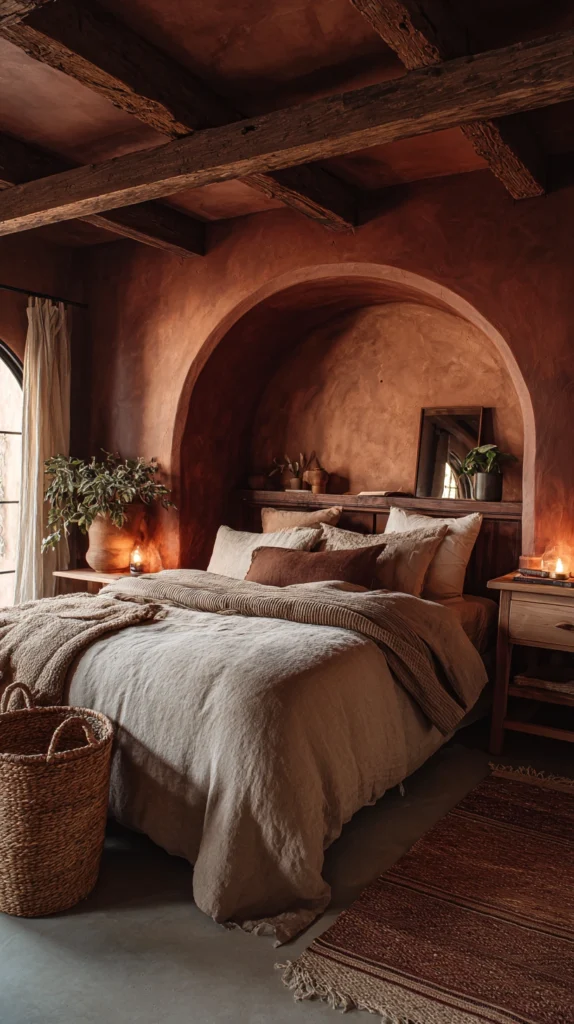
The wall directly behind the bed treated with texture, an arch, or rich color — the single most visible surface in the entire room, given the architectural attention it deserves.
My bare headboard wall:
What was there:
- Flat painted drywall, completely smooth
- Nothing behind or around the bed at all
- The most visually prominent wall in the room, entirely undecorated
Why this wall specifically matters in a hobbitcore bedroom:
The visual centrality:
- It is the backdrop for the bed, the room’s largest object
- It is the last surface seen before sleep and the first upon waking
- Smooth drywall here undercuts every curved and textured element introduced elsewhere in the room
Limewash texture (the most accessible option):
Why limewash specifically:
- Creates an aged, plaster-like, mottled texture without any structural renovation
- Can be applied directly over existing smooth drywall
- The mottled, slightly imperfect texture is precisely the earthen, handmade quality this aesthetic is built around
How to apply:
- Apply with a natural bristle brush in a cross-hatch pattern
- Work in small sections, wiping back while still wet for variation
- Build up two to three thin coats for the most convincing aged texture
- Earthy tones (warm terracotta, soft moss, muted ochre) suit a bedroom particularly well
Faux arch treatment behind the bed:
Echoing the living room’s signature element:
- Paint an arch shape on the wall directly behind and slightly above the headboard
- Creates the illusion of the bed being nestled into an alcove
- A contrasting or deeper color within the arch (compared to the rest of the wall) enhances the dimensional illusion
Wood paneling or beam detail:
An alternative texture approach:
- Vertical wood slats installed on the headboard wall only
- Painted tone-on-tone with the rest of the room for subtlety, or left natural wood for warmth
- A single horizontal beam mounted above the headboard (decorative, not necessarily structural) for an additional architectural detail
Deep, saturated color as the primary treatment:
If texture feels like too much for now:
- A single deep, earthy color (forest green, terracotta, deep brown) on this one wall alone
- Even without texture, a saturated color shift on just this wall dramatically changes the room’s relationship to the bed
- The most accessible entry point if limewash or paneling feel too involved as a first project
Cost:
- Limewash (one wall): $40-80
- Faux painted arch: $20-40
- Wood paneling (one wall, DIY): $80-200
- Deep color paint only: $25-45
- Total range: $20-200
My limewash headboard wall: Applying a warm terracotta limewash to just the wall behind my bed for under $60 in materials created more depth and warmth than any furniture or textile change that followed, the mottled texture catches the warm lamp light from idea 2 beautifully every evening.
Headboard Wall Tips
Test the limewash technique on cardboard first:
Practice before the real wall:
- The wipe-back technique that creates the characteristic mottled look takes a few attempts to feel natural
- Practicing on a scrap piece of cardboard or an old drywall offcut prevents costly mistakes on the actual wall
- Once comfortable, the real wall takes less time than expected
Coordinate with the curved bed frame:
The complete composition:
- A curved or sleigh bed frame against a textured, arched, or deeply colored headboard wall creates a unified visual statement
- These two elements (idea 1 and idea 3) are the foundation the rest of the room builds from
- Prioritize these two changes before smaller decorative additions
4. Abundant Soft Layering on the Bed (Quilts, Knits, and Natural Fiber Textiles)
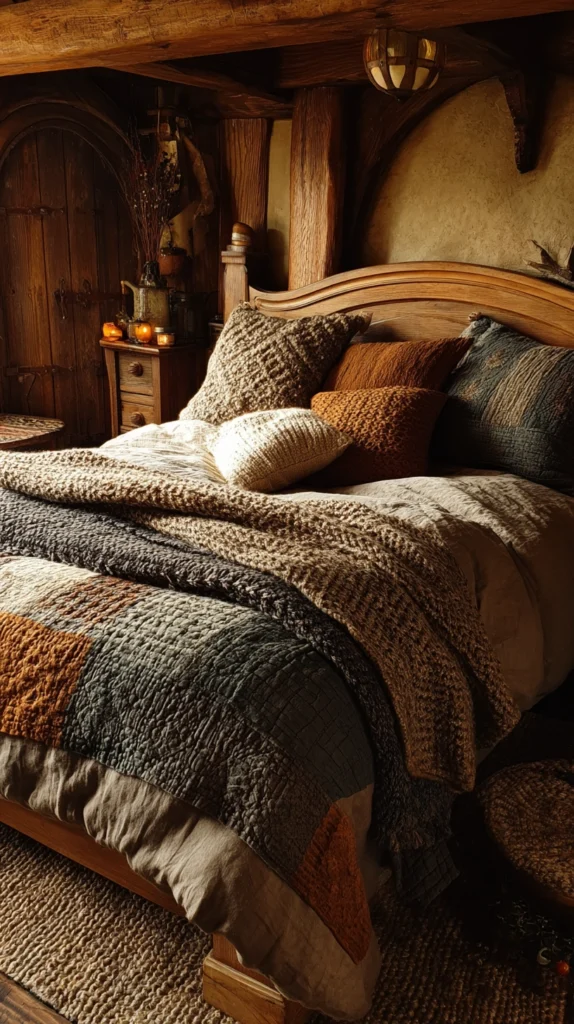
The bed itself piled with handmade-looking textiles in deep, earthy tones — adapting general bedding layering specifically toward the hobbitcore aesthetic’s love of visible craft and abundance.
My flat bedding problem:
What I had:
- A single smooth modern duvet, one matching pillow
- No texture, no visible craft, no sense of accumulation over time
- The opposite of the layered, collected quality central to this style
Why bedding abundance fits hobbitcore specifically:
The handmade reference:
- Quilts, knitted throws, and woven textiles all suggest handcraft and tradition
- A hobbit’s bed, by the genre’s own visual reference, would be piled with exactly this kind of textile abundance
- This is one of the most direct and accessible ways to bring the aesthetic onto the bed itself
The layering sequence for a hobbitcore bed:
Base layer:
- Natural fiber sheets (linen or cotton, in warm earthy tones rather than white)
- Oat, warm cream, or a deep terracotta sheet set
Quilt layer:
- A genuine or vintage-style patchwork quilt, folded at the foot or used as the primary top layer
- Earthy color patchwork (browns, mosses, rust) most appropriate to this specific aesthetic
- Sourced from estate sales or antique shops for the most authentic result
Knit and woven throws:
- A chunky knit blanket layered over or beside the quilt
- Woven textiles (a wool blanket with visible weave texture) add another layer of handcraft reference
- Multiple throws, slightly mismatched in exact tone, create the collected-over-time feeling
Pillow abundance:
More pillows than a minimalist bedroom would use:
- Large Euro pillows behind, in a woven or knit texture
- Standard sleeping pillows in natural fiber covers
- A small, irregularly shaped pillow (handmade-looking) as a final decorative layer
Color palette for hobbitcore bedding:
The earthy, saturated range:
- Deep moss and forest green
- Rust, terracotta, and burnt umber
- Mustard and harvest gold
- Deep brown and chestnut
- Avoid: bright white, pastels, anything with a glossy synthetic sheen
Sourcing handcraft-style bedding:
Best sources:
- Estate sales and antique shops for genuine vintage quilts ($40-150)
- Etsy independent quilters and weavers for new handmade pieces ($80-300)
- Secondhand wool blankets from thrift stores ($15-40)
- Natural fiber sheet sets from retailers specializing in linen (Cultiver, Bed Threads, Quince)
Cost:
- Natural fiber sheet set: $50-150
- Vintage or handmade quilt: $40-300
- Chunky knit throw: $35-70
- Pillow additions: $30-80
- Total: $155-600
My layered hobbitcore bed result: A vintage patchwork quilt found at an estate sale, layered beneath a chunky moss-green knit throw, with mismatched natural linen pillowcases, made the bed look like it had been assembled over decades rather than purchased in one trip, exactly the effect this aesthetic depends on.
Bedding Abundance Tips
Buy textiles across multiple trips, not one:
Avoiding the matched-set look:
- Purchasing every textile from the same source in a single visit risks the bed looking coordinated rather than genuinely collected
- Spreading purchases across thrift stores, estate sales, and handmade sources over weeks or months produces the slight variation that makes the abundance feel authentic
- This patience mirrors the same principle applied to mismatched furniture in the broader hobbitcore approach
Washing vintage quilts gently:
Preservation practice:
- Hand wash or very gentle cycle in cold water
- Air dry flat to protect the stitching
- These pieces are meant to improve with age and careful use, not be treated as disposable seasonal decor
5. A Reading Nook Within the Bedroom (A Second Cozy Destination)
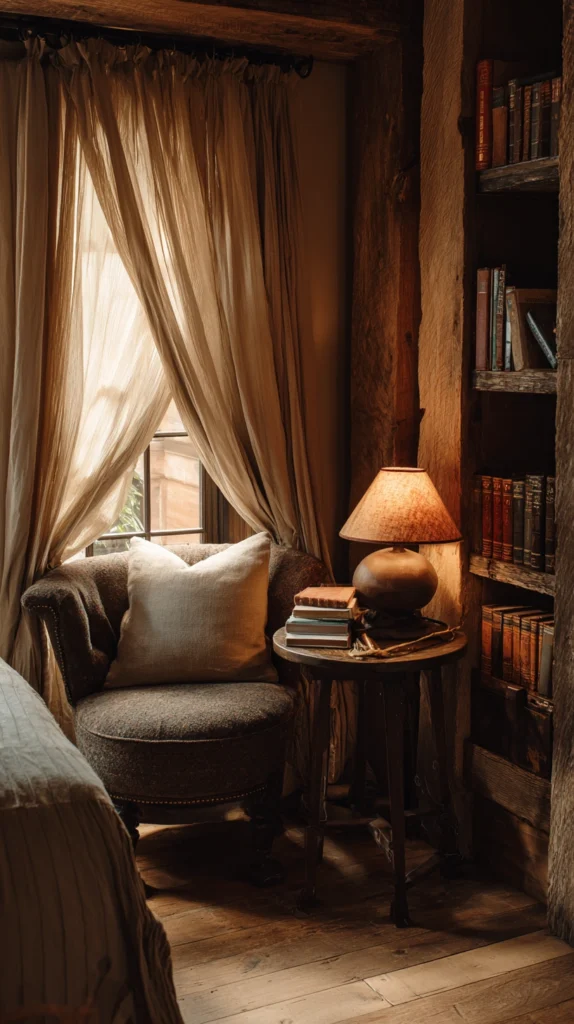
A small chair and warm light corner separate from the bed itself — extending the room’s coziness beyond just the sleeping surface.
My one-purpose bedroom:
What was missing:
- The bed was the only place to be in the entire room
- No reason to spend time in the bedroom beyond actually sleeping
- A reading nook added a second destination and a second mood within the same space
Why a bedroom-specific reading nook differs slightly from a living room one:
The scale and purpose adjustment:
- A bedroom reading nook can be smaller and more intimate than a living room version
- Its specific purpose is the wind-down transition before sleep, not general daytime lounging
- This makes the chair, light, and surrounding objects slightly more focused on calm and quiet than a living room nook might be
Building the bedroom nook:
Chair selection:
- A smaller armchair or a curved barrel chair (echoing the curved bed frame’s organic shape)
- Worn or secondhand upholstery preferred (authenticity over pristine newness)
- Positioned in a corner, ideally near a window for daytime use as well
The lamp:
- One of the mushroom lamps from idea 2, positioned at shoulder height when seated
- Warm and dim enough for relaxed reading, not bright task lighting
Surrounding textiles:
- A small throw draped over the chair arm
- One or two pillows on the seat
- Coordinating with the bed’s textile palette from idea 4, but not identically matched
A small side table:
- For a cup of tea, a candle, or the current book
- Wood, ideally with some age or character rather than a sleek modern side table
The book stack:
Completing the nook:
- A small stack of current reading material beside the chair
- Worn-looking books (secondhand sourcing) fit the aesthetic better than pristine new hardcovers
- This stack does double duty as both function and decor
Why this nook supports better sleep:
The behavioral benefit:
- Using the nook for the final twenty to thirty minutes before bed, rather than reading in bed itself, supports a stronger bed-sleep association
- Moving to the bed only once genuinely sleepy improves sleep onset
- This is the same principle applied in general sleep hygiene guidance, now styled specifically within the hobbitcore aesthetic
Cost:
- Secondhand armchair: $50-200
- Small side table: $25-80
- Throw and pillow: $40-70
- Total: $115-350
My bedroom reading nook result: A small worn velvet barrel chair in the corner near the window, with a mushroom lamp and a stack of secondhand books, became the genuine transition space between the rest of the day and actual sleep, the bed itself now feels reserved specifically for rest because the nook absorbed all the pre-sleep reading and wind-down activity.
Bedroom Reading Nook Tips
Keep the nook visually distinct from the bed:
Maintaining the two-zone feeling:
- Different but related textile colors (not identical to the bedding) help the nook feel like its own destination
- This distinction reinforces the behavioral separation between “wind-down activity” and “sleep,” supporting both the aesthetic and the sleep benefit simultaneously
Resist adding a television or screen to this corner:
Protecting the function:
- The nook’s value depends on it being a screen-free zone
- A book, not a device, belongs in this specific space
- This restriction is what makes the corner function as a genuine transition into sleep rather than simply another spot for stimulation
6. Heavy Curtains or Blackout Drapery (Sealing Out Light Like an Underground Den)
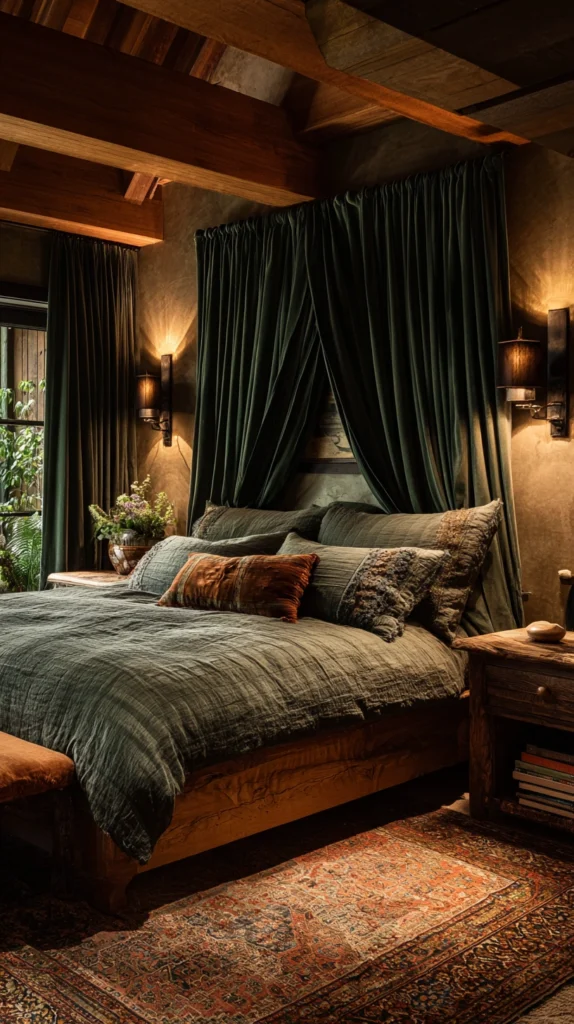
Substantial, textured curtains that block light completely — referencing both the literal darkness of an underground hobbit hole and the practical need for genuine sleep darkness.
My thin curtain problem:
What I had:
- Light, sheer curtains that let in significant outside light
- Streetlight and early morning sun disrupting sleep
- Curtains that did nothing for the room’s aesthetic warmth either
Why heavy curtains serve this aesthetic specifically:
The underground reference:
- A hobbit hole, dug into a hillside, would have minimal exterior light penetration
- Heavy curtains create a similar effect: a room that feels sealed away from the outside world
- This enclosed quality is central to the burrow feeling the entire aesthetic is built around
Material and texture:
Best curtain fabrics for this look:
- Heavy linen or linen-blend (textured, natural-feeling even at a substantial weight)
- Wool-blend drapery (very warm, very substantial, less common but distinctly cottage-appropriate)
- Velvet (most light-blocking, most luxurious texture, works particularly well in deeper colors)
Color selection:
Earthy and saturated, matching the room:
- Deep forest green
- Warm rust or terracotta
- Deep brown or chestnut
- Avoid: bright white, pale pastels, anything that reads as crisp or modern
Blackout lining:
Adding genuine light-blocking function:
- Clip-on blackout lining can be added to almost any existing curtain panel without sewing
- This combines the aesthetic curtain fabric (visible from the room) with full blackout function (hidden lining)
- A practical solution that does not require choosing between beauty and darkness
Curtain hanging height:
Maximizing the enclosed feeling:
- Mount the rod as close to the ceiling as possible, well above the window frame itself
- Let curtains fall fully to the floor, with a slight puddle if desired for an even more substantial, abundant look
- This height and length combination makes the window feel larger while also maximizing the enclosing, heavy fabric presence in the room
Layering with a sheer:
For daytime flexibility:
- A sheer linen panel behind the heavy curtain allows for soft daytime light when desired
- The heavy curtain closes fully for sleep and for the evening atmosphere
- This two-layer approach offers flexibility without compromising the heavy, enclosed nighttime feeling
Cost:
- Heavy linen curtain panels (pair): $60-150
- Velvet curtain panels (pair): $80-200
- Blackout clip-on lining: $20-40
- Total: $80-240
My heavy curtain result: Replacing thin sheers with deep forest green heavy linen curtains, lined for blackout, transformed both the room’s daytime appearance and its nighttime sleep quality, the room now feels genuinely sealed away and restful once those curtains close.
Heavy Curtain Tips
Measure for full floor-length before buying:
Avoiding the common mistake:
- Curtains that stop short of the floor undercut the substantial, abundant feeling this aesthetic depends on
- Always measure from the mounted rod height to the floor, and choose panels rated for that full length or slightly longer
- A panel that puddles slightly on the floor reads as more luxurious and intentional than one that hovers an inch above it
Combining with the headboard wall color:
Visual cohesion:
- Curtains in a color that relates to (though does not necessarily match exactly) the headboard wall treatment from idea 3 creates a more unified room
- This does not require identical colors, simply a shared earthy, warm family
7. Abundant Trailing Plants and Dried Botanicals (Greenery for a Room That Sleeps)
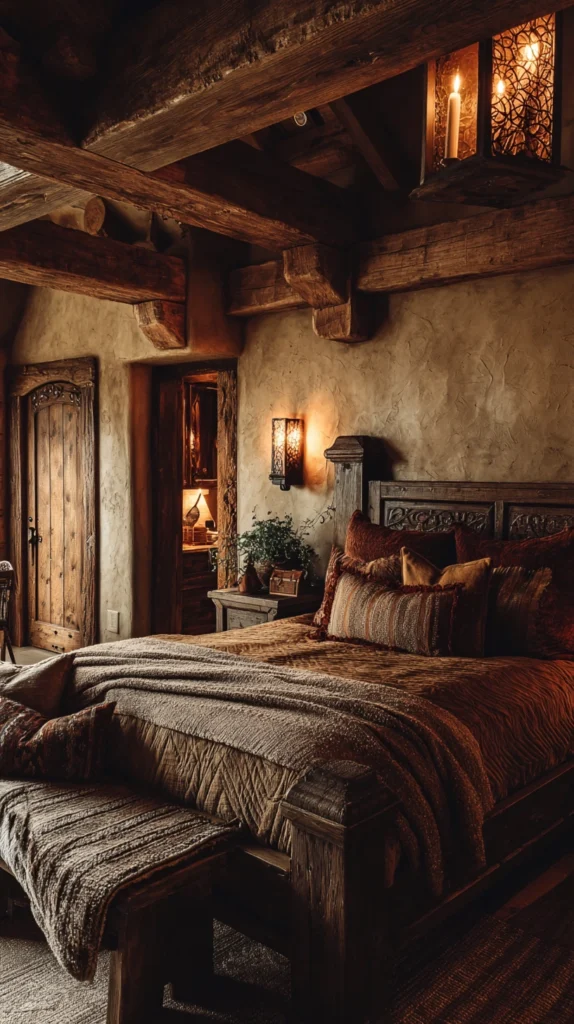
Plants and dried elements chosen specifically for low-light tolerance and calming presence — adapting the living room’s plant abundance for a room with different light and activity needs.
My plant-free bedroom:
What was missing:
- No greenery anywhere in the room
- A space that felt built rather than grown, exactly the problem hobbitcore aims to solve
- Concerns about plant maintenance in a room with limited light (heavy curtains from idea 6 reduce available daylight)
Why bedroom plant selection differs from living room selection:
The light and function consideration:
- Heavy curtains (idea 6) mean less daylight reaches bedroom plants than a typical living room
- Bedroom plants should also support rather than disrupt sleep, ruling out high-maintenance varieties that demand frequent attention
- The right selection threads this needle: low light tolerant, low maintenance, and visually abundant
Best low-light bedroom plants:
Top choices:
- Snake plant (extremely low light tolerant, also a known nighttime oxygen releaser)
- ZZ plant (thrives in low light, nearly indestructible)
- Pothos (tolerates low light better than most trailing plants, easy to train along a shelf or headboard)
- Cast iron plant (true to its name, tolerates genuine neglect and low light)
Where bedroom plants go:
Placement strategy:
- On the dresser or nightstand (small to medium plants)
- Trailing from a high shelf above the headboard wall (echoing the trailing plant principle from living room hobbitcore)
- In the reading nook corner from idea 5, where it benefits from whatever window light remains uncurtained during the day
Hanging plants specifically:
The macrame approach:
- A macrame plant hanger with a trailing pothos, positioned where it can cascade without obstructing the bed or walking paths
- Adds vertical greenery without requiring floor space
- The handmade quality of macrame itself reinforces the broader aesthetic’s love of visible craft
Dried botanicals as the lower-maintenance alternative:
Where dried elements work especially well in a bedroom:
- A small bundle of dried lavender on the nightstand (also functioning as a sleep-supporting scent element)
- Dried eucalyptus tucked behind a lamp or mirror
- A single dried pampas grass stem in a small vase on the dresser
- These require zero ongoing care, making them ideal for a room where low-maintenance matters more than in a living room
Mushroom and woodland decor:
Completing the theme:
- Small ceramic mushroom figurines among the plants
- Reinforces the same woodland-floor visual reference used throughout hobbitcore decor generally
Cost:
- Three to four low-light plants: $30-70
- Pots (terracotta or ceramic): $20-50
- Macrame hanger: $15-30
- Dried botanicals (lavender, eucalyptus): $15-30
- Total: $80-180
My bedroom plant result: The snake plant on the dresser and the trailing pothos in a macrame hanger above the reading nook brought the same alive, grown feeling from my living room into the bedroom, while the dried lavender bundle on the nightstand does double duty as both decor and a gentle sleep-supporting scent.
Bedroom Plant Tips
Confirm low-light tolerance before purchasing:
Avoiding disappointment:
- A plant that needs bright light will struggle and decline in a heavily curtained bedroom regardless of good intentions
- Always check the specific light requirement before bringing a new plant into this particular room
- The four recommended varieties above are genuinely reliable in low-light bedroom conditions
Watering reminder system:
Maintaining the minimal but necessary care:
- Even low-maintenance plants need occasional water
- A simple phone reminder every two to three weeks prevents the rare oversight that leads to plant decline
- This small habit ensures the greenery remains a calming presence rather than becoming another source of guilt or neglect
8. A Vanity or Small Dressing Corner With an Aged Mirror (A Personal Ritual Space)
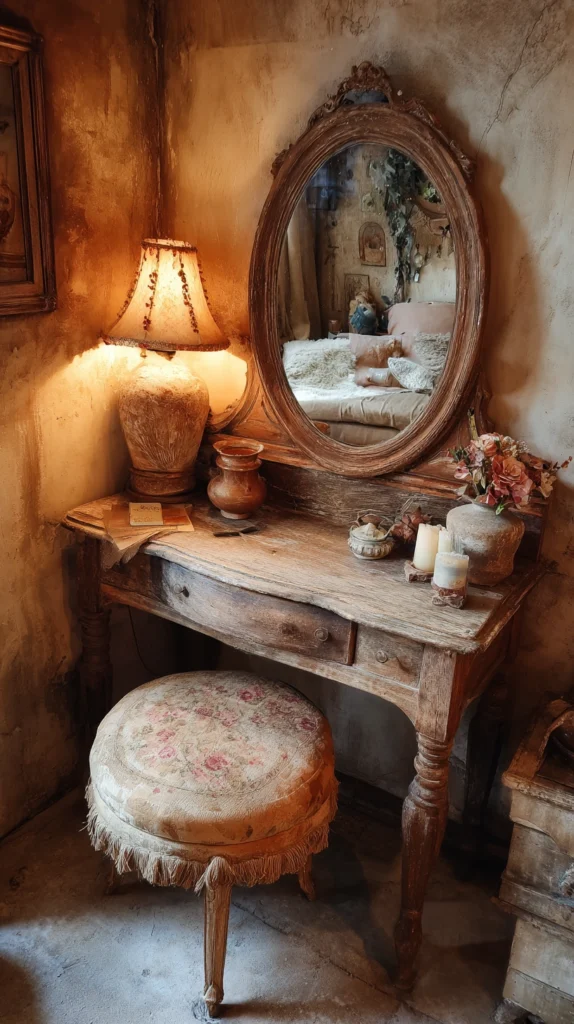
A small dedicated spot for dressing and personal care, styled with an aged or vintage mirror — adding function and personality to a corner most bedrooms leave purely utilitarian.
My utilitarian dresser situation:
What I had:
- A plain modern dresser with a small mirror propped on top
- No sense of ritual or personal space
- Getting dressed happened in a corner that felt like an afterthought
Why a styled vanity corner fits hobbitcore:
The personal ritual reference:
- Cottage and hobbit-hole life, as depicted in the source material, centers on small personal rituals and comfort
- A dedicated, beautifully styled corner for dressing and grooming extends this sense of intentional daily ritual into a part of the room often left purely functional
- This is one of the more personal, lived-in additions on this entire list
The aged mirror:
Sourcing the right mirror:
- An arched or oval mirror with an aged or distressed frame
- Real vintage mercury glass mirrors (slightly clouded, beautifully aged) are especially appropriate if available
- Estate sales and antique shops are the best sources; new mirrors styled to look aged are a more accessible alternative
The vanity surface:
What to use:
- A small antique or secondhand desk or dressing table
- A simple wooden table with character (visible grain, slight wear) rather than a sleek modern vanity
- Repurposed furniture (an old writing desk used as a vanity) fits the collected, multi-purpose quality of cottage living particularly well
Styling the vanity top:
What belongs there:
- A small ceramic dish for jewelry
- A vintage perfume bottle or two
- A small candle (LED for safety, per bedroom lighting rules)
- A hairbrush with a wooden handle rather than plastic
The stool or chair:
Completing the corner:
- A small upholstered stool or a vintage wooden chair
- Curved or turned legs preferred over straight, modern lines
- A small cushion in a fall-appropriate texture (velvet, woven wool)
Lighting the vanity specifically:
Task light for this corner:
- A small lamp on either side of the mirror, or one centered above it
- Warm bulb temperature, consistent with the rest of the room’s lighting philosophy
- Bright enough for actual grooming tasks while still feeling warm rather than clinical
Cost:
- Secondhand vanity or small desk: $40-150
- Aged or vintage mirror: $30-120
- Small stool: $25-80
- Styling objects: $20-50
- Total: $115-400
My vanity corner result: Repurposing a small antique writing desk as a vanity, paired with a slightly clouded vintage mirror found at an estate sale, turned a previously purely functional corner into one of the most personal and beautiful spots in the entire bedroom, getting ready each morning now feels like a small ritual rather than a rushed task.
Vanity Corner Tips
Embrace an imperfect mirror:
The aesthetic value of age:
- A perfectly clear, flawless mirror reads as new and modern
- Slight clouding, foxing, or an aged frame edge all contribute to the authentic, collected-over-time quality this aesthetic depends on
- Do not seek out or pay extra for a “flawless” vintage mirror; the imperfections are part of the appeal
Lighting compromise:
Balancing warmth and function:
- Vanity lighting needs to be slightly brighter than ambient bedroom lighting elsewhere in the room for grooming tasks to be practical
- Choose the warmest bulb option that still provides sufficient brightness (look for 2700K bulbs with adequate lumen output rather than going dimmer than the task requires)
9. Wood Beam or Paneling Detail Above the Bed (Bringing the Ceiling Down to Meet the Room)
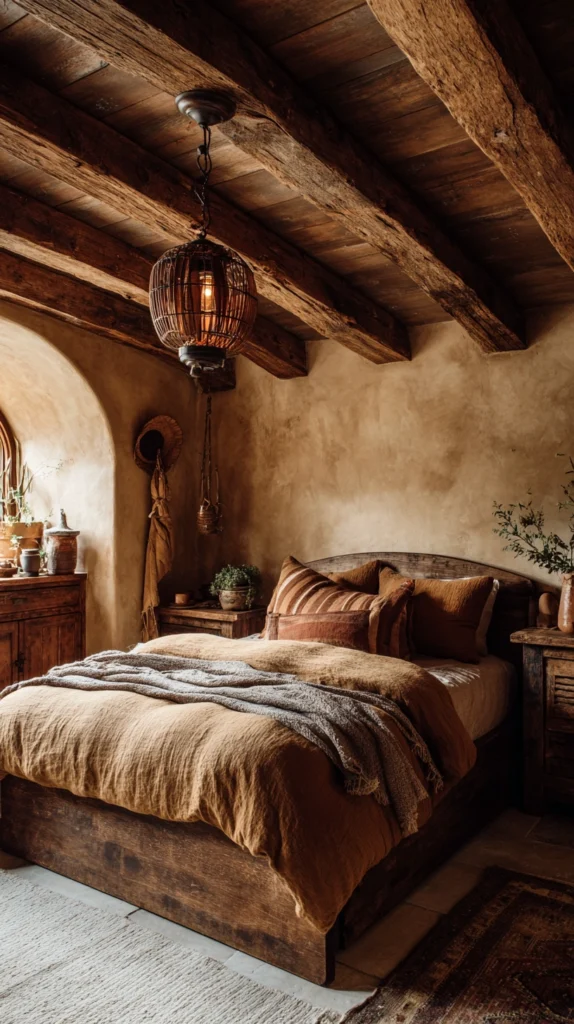
A structural or decorative wood element on the ceiling specifically above the bed area — extending the timber-construction reference into the most intimate part of the room.
My flat ceiling above the bed:
What was there:
- A completely flat, featureless ceiling throughout the bedroom
- No structural detail anywhere, particularly noticeable looking straight up from the pillow
- The most overlooked surface in the room, especially given how much time is spent looking directly at it from bed
Why this specific ceiling area matters:
The vantage point consideration:
- Lying in bed, the ceiling directly overhead is one of the most-viewed surfaces in the entire room
- A flat, featureless ceiling here misses an opportunity that a living room beam treatment addresses for the whole room at once
- Even a smaller, targeted beam treatment just above the bed creates significant visual impact relative to its size
Faux beam installation above the bed specifically:
A more focused version of the living room treatment:
- One or two lightweight faux wood beams installed only in the section of ceiling directly above the bed
- Smaller in scope and cost than a full-room beam installation
- Still delivers the structural, timber-construction reference in the most visually relevant spot
How to install:
- Measure the ceiling area directly above the bed frame
- Locate ceiling joists for secure mounting
- Cut faux polyurethane beams to the appropriate length
- Mount with construction adhesive and screws
- Stain or paint to the desired wood tone (dark walnut for drama, natural for warmth)
Wood paneling on the ceiling instead of beams:
An alternative treatment:
- Tongue-and-groove wood paneling installed on just the ceiling section above the bed
- Creates a canopy-like effect even without an actual fabric canopy
- Particularly effective paired with the curved bed frame and headboard wall, completing a fully enclosed, architectural nook around the sleeping area
A painted faux beam (the budget alternative):
For those not ready for the physical installation:
- A trompe l’oeil painted beam effect directly on the existing flat ceiling
- Using shadow and highlight painting techniques to create the illusion of a beam from below
- Significantly more affordable, though less three-dimensionally convincing than the actual installed version
Pairing with the lighting:
Completing the look:
- A small pendant or lantern light hung from the beam directly above the bed
- This combines the structural detail with another low, warm light source consistent with the room’s overall lighting philosophy
Cost:
- Faux beams (above bed only, smaller scope than full room): $80-200
- Wood ceiling paneling (above bed only): $100-250
- Painted faux beam effect: $30-60
- Total range: $30-250
My beam-above-the-bed result: Installing two dark walnut faux beams directly above the bed, with a small lantern hung from the center beam, gave the sleeping area its own distinct architectural identity within the larger room, looking up at night now reveals genuine structural interest rather than blank ceiling.
Bed Ceiling Tips
Scale appropriately to the bed, not the full room:
Avoiding mismatched proportion:
- Beams sized for a full living room ceiling may look oversized when concentrated only above a bed
- Choose a slightly narrower beam profile for this more targeted application
- The goal is a detail that feels proportional to the bed below it, not an imposing structural statement
Combine with the canopy idea if using fabric:
Layering architectural and textile elements:
- A wood beam treatment can incorporate hooks or hardware for hanging the fabric canopy from idea 1
- This combination achieves both the structural timber reference and the soft, enclosed fabric feeling in one coordinated installation
10. A Collected, Slightly Cluttered Nightstand (Personal Objects Over Minimalist Surfaces)
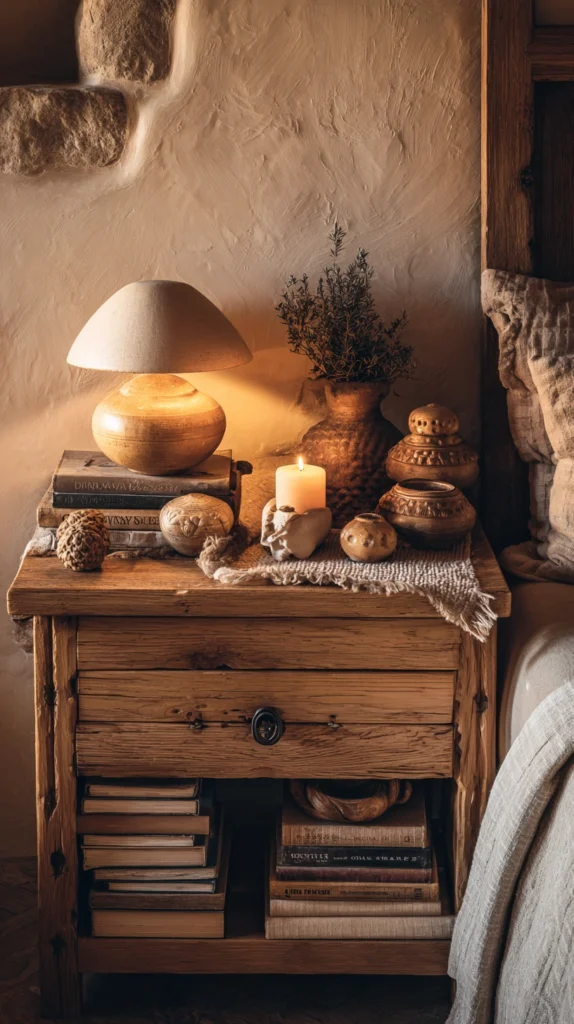
The nightstand styled with genuine collected objects rather than the bare, minimalist surface typical of modern bedrooms — extending the hobbitcore value of abundance to the bed’s most intimate surface.
My sparse nightstand:
What was there:
- A phone charger, a glass of water, and nothing else
- Following typical minimalist styling advice that emphasizes a clear, uncluttered nightstand surface
- A surface that told no story about the person sleeping beside it
Why this specific surface deserves the opposite of minimalism here:
The intimacy principle:
- Unlike a living room shelf seen by guests, the nightstand is an intensely personal surface
- A slightly cluttered, collected nightstand suggests a rich, lived daily ritual (reading, tea, small treasured objects)
- This is one of the more personal expressions of the hobbitcore abundance principle, made appropriate to the bedroom’s private nature
What belongs on a hobbitcore nightstand:
Functional essentials:
- A small lamp (the mushroom lamp from idea 2)
- A water glass or small carafe
- Current reading material
The collected additions:
- A small dish holding a ring or other jewelry removed at night
- A few interesting small objects: a smooth stone, a small carved wooden figure, a vintage button tin
- A small candle (LED, per safety guidance)
- A sprig of dried lavender or a tiny vase with one dried stem
Arrangement principle:
Avoiding true chaos:
- “Collected” does not mean genuinely messy or dirty
- Objects should be placed with some care, even if the overall density is higher than minimalist styling would suggest
- A small tray can corral the smaller objects, providing structure within the abundance
Personal meaning over purchased decor:
What makes this nightstand authentic:
- Wherever possible, objects with actual personal history or meaning (a stone from a meaningful walk, a small gift from someone close) outperform purely decorative purchased items
- This personal layer is what separates a genuinely lived-in nightstand from one merely styled to look that way
The book stack specifically:
A core hobbitcore nightstand element:
- More than one book, slightly stacked rather than perfectly aligned
- A bookmark visibly poking out, suggesting an actual current read
- This small detail of visible, ongoing use reinforces the lived-in quality central to the entire aesthetic
Cost:
- Small tray: $10-20
- Collected small objects (over time, often free or very low cost): $0-30
- Small candle and dried botanical: $10-20
- Total: $20-70
My collected nightstand result: Allowing the nightstand to hold a small stack of books, a found stone from a hiking trip, a tiny vintage tin, and a dried lavender sprig made it feel like the nightstand of someone who actually lives in and uses this room daily, rather than a styled surface emptied for a photograph.
Collected Nightstand Tips
The one-in, one-out balance for true clutter prevention:
Maintaining intentional abundance versus genuine mess:
- Even an intentionally collected surface benefits from occasional editing
- If a new small object is added, consider whether something else has lost its meaning or interest and could be relocated
- This keeps the surface feeling curated and personal rather than simply accumulating without any editing at all
Charging cords as the one concession to function:
Hiding the modern necessity:
- A phone charger is hard to avoid entirely in a modern bedroom
- A small woven basket or wooden box can hide the charging cord and adapter, keeping the visible surface focused on the more aesthetic, collected objects
- This small concealment prevents the one genuinely modern object from undermining the otherwise carefully built atmosphere
11. Round or Organic Window Treatments and Frames (Softening the Window’s Hard Edges)
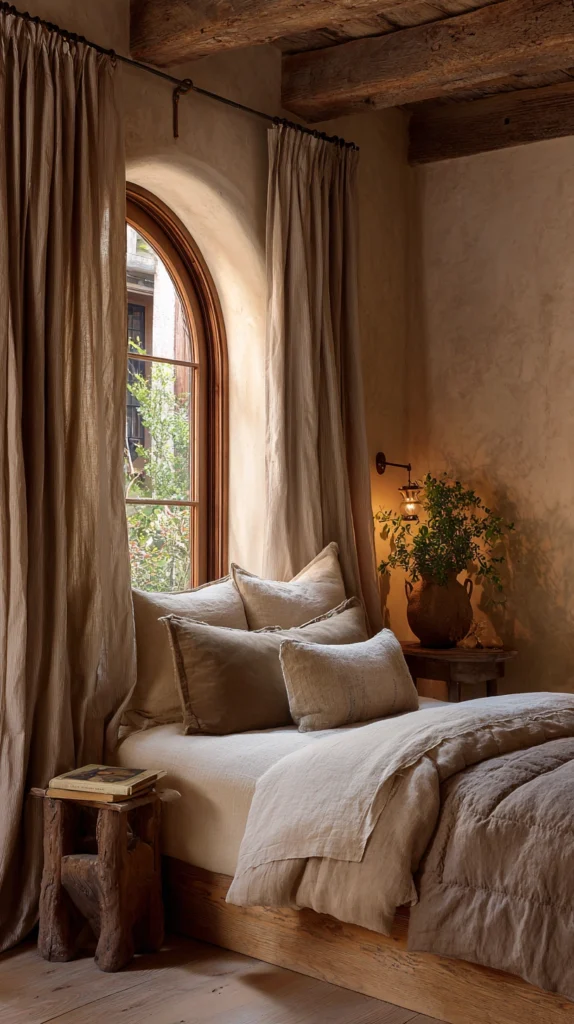
Curved curtain rods, round window shapes (real or illusioned), and organic-shaped frames around the window — extending the curve-over-corner principle to the room’s window.
My rectangular window problem:
What was there:
- A standard rectangular window with a straight metal curtain rod
- Sharp corners at every edge
- One more hard-edged element fighting against the curved bed frame and arched headboard wall
Why the window deserves this same curved attention:
The consistency principle:
- Every hard-edged element left untouched in the room slightly undermines the curved elements introduced elsewhere
- The window, often a significant visual feature, is worth bringing into the same organic visual language as the bed and headboard wall
Curved curtain rods:
A simple, lower-cost change:
- A curtain rod with a gentle curve or an ornate, rounded finial at each end
- Available at most home goods retailers, a much smaller investment than a full window reshaping project
- Immediately softens the window’s overall visual frame
A painted faux arch around the window:
Borrowing the doorway technique:
- Similar to the faux arch technique used on doorways and the headboard wall, an arch shape can be painted around the top of an existing rectangular window
- Creates the illusion of an arched window opening
- A trompe l’oeil approach requiring only paint and a careful eye, no structural changes
A round window addition (major renovation, optional):
For those undertaking larger changes:
- A genuine round or oval window, if a full renovation is already underway
- The most authentic and dramatic option, though significantly more involved than any other idea on this list
- Most realistically considered only alongside other major structural work already planned for the home
Window seat curve:
An organic-shaped built-in:
- If the window has a deep enough sill or a renovation adds a window seat, curving the edges of the seat itself (rather than sharp rectangular corners) continues the theme
- A cushioned, curved-edge window seat becomes another small reading nook option within the room
Curtain fabric softness:
Beyond the hardware:
- Heavy, soft fabric (per idea 6’s heavy curtain guidance) inherently softens a window’s appearance regardless of the rod or frame shape
- The combination of a curved rod and substantial, draping fabric does significant work even without any structural window changes
Cost:
- Curved curtain rod with ornate finials: $25-60
- Faux painted arch around window: $20-40
- Window seat cushion (if a seat already exists): $40-100
- Total: $20-100 (excluding major structural window changes)
My curved curtain rod result: Replacing a straight black metal curtain rod with one featuring gently curved, aged-brass finials cost under $40 and immediately softened the window’s appearance, a small change that nonetheless contributed to the overall sense that every hard edge in the room had been deliberately reconsidered.
Window Treatment Tips
Prioritize the curtain rod swap first:
The lowest-effort entry point:
- Of all the window-related options here, the curved rod replacement is the fastest and most affordable
- Start here before considering the more involved faux arch painting or any structural changes
- Often this single swap provides sufficient softening without further intervention needed
Brass or aged metal finials specifically:
Coordinating with the room’s metal language:
- If brass appears elsewhere in the room (mushroom lamp accents, mirror frame), choose curtain rod finials in a matching or complementary warm metal tone
- This consistency in metal finish throughout the room, even in small details like curtain hardware, contributes to the cohesive, considered feeling central to executing this aesthetic well
12. A Small Hearth-Adjacent Feeling Through Candlelight or a Faux Fireplace Element (Warmth Without an Actual Fireplace)
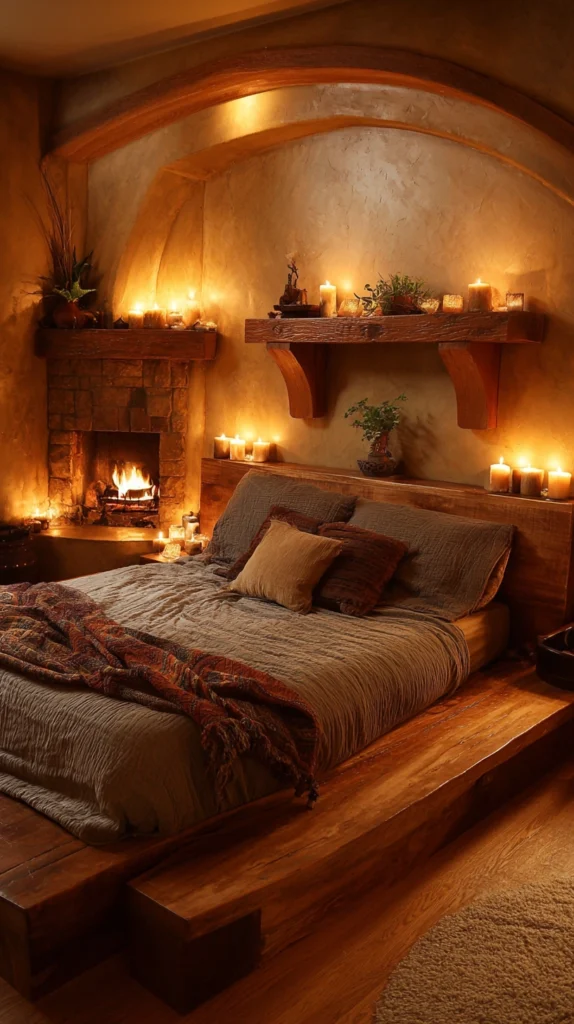
Recreating the warmth and focal glow of a hearth in a bedroom that almost never has an actual fireplace — bringing fire-adjacent atmosphere into the room through safe, practical means.
My fireless bedroom:
What was missing:
- No fireplace, obviously, in a typical bedroom
- But also no substitute for the warm, flickering, gathering-point quality a hearth provides in hobbitcore’s broader visual world
- The room had warmth from lamps but lacked that specific flickering, focal quality
Why this matters even without an actual fireplace:
The atmospheric reference:
- Fire and hearth are deeply central to the cottage and hobbit-hole visual world
- A bedroom, lacking a literal fireplace in almost every case, can still reference this warmth through careful use of candlelight and warm focal lighting
- This is about recreating a feeling, not literally requiring fire in a room where it would be impractical or unsafe
LED candle clusters as the primary method:
The safe hearth-adjacent solution:
- A grouping of LED pillar candles of varying heights, placed on the dresser or a low shelf
- Realistic flicker effect (Luminara brand specifically recommended for the most convincing flame movement)
- Positioned somewhere visible from the bed, mimicking the experience of watching a fire from a chair nearby
A small electric fireplace insert (where space allows):
For those with room for an additional furniture piece:
- A compact freestanding electric fireplace, positioned in the reading nook from idea 5 or against an open wall
- Provides genuine flickering flame visual effect, and often mild heat output as well
- More substantial investment than candles, but the most direct recreation of an actual hearth experience
A “faux hearth” decorative nook:
Creating the visual reference without the function:
- A small decorative alcove or shelf styled to resemble a miniature hearth: stone or brick-look material, a small mantle shelf, candles arranged where a fire would be
- Purely decorative, requiring no actual heat-producing element
- A creative solution for those wanting the visual reference without any functional fire element at all
Positioning relative to the bed:
Where this warmth should be visible from:
- Ideally positioned somewhere visible while lying in bed, recreating the experience of falling asleep within sight of a softly glowing fire
- This positioning consideration is part of what makes the addition feel genuinely atmospheric rather than simply another decorative object in the room
Safety considerations:
Why LED over real flame in this specific room:
- A bedroom, full of soft textiles and often unattended for hours during sleep, is one of the least appropriate rooms in the home for unattended real flame
- LED candles eliminate this risk entirely while still providing the visual warmth this idea is built around
- This is a firm rule, not simply a suggestion, given the specific risks involved
Cost:
- LED candle cluster (six to eight candles): $30-60
- Small electric fireplace insert: $100-300
- Faux hearth decorative nook materials: $40-100
- Total range: $30-300
My LED candle cluster result: A grouping of eight LED pillar candles of varying heights on a low shelf positioned where I can see them from bed recreated genuine hearth-adjacent atmosphere without any fire risk, falling asleep watching the gentle, realistic flicker became one of the most calming parts of the entire nightly routine.
Hearth-Adjacent Tips
Quality LED candles matter for the illusion:
Avoiding the unconvincing version:
- Cheap LED candles with a simple blinking light, rather than genuine flame-movement technology, undermine the entire effect
- Investing in quality flicker-technology candles (Luminara specifically, though several competitors now offer similarly convincing effects) makes a meaningful difference in how atmospheric this addition actually feels
Timer function as the practical necessity:
Making the ritual effortless:
- Quality LED candles include a timer function, automatically turning on each evening and off after a set duration
- This removes the need to remember to turn them on nightly, ensuring the atmosphere becomes a consistent, low-effort part of the room’s daily rhythm rather than an occasional, easily-forgotten extra step
13. Handcrafted and Vintage Personal Objects Throughout (The Final Layer of Authentic Detail)
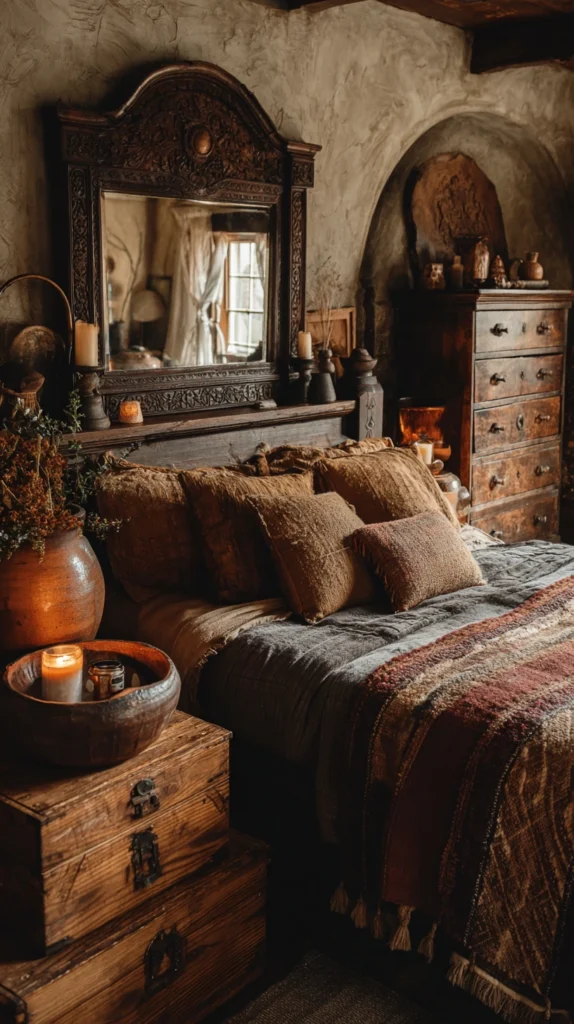
Replacing mass-produced decor objects with hand-thrown pottery, carved wood, and genuinely vintage finds — extending the same authenticity principle from the living room specifically into the bedroom’s more intimate object choices.
My manufactured decor problem:
What I had:
- Decorative objects from large retailers, identical to countless other homes
- Smooth, characterless, clearly mass-produced
- Working against the handmade quality the rest of the room had been building toward
Why this final layer matters so much in a bedroom specifically:
The intimacy of the objects chosen:
- A bedroom’s decorative objects are seen up close, daily, by the person who lives most intimately with the room
- Mass-produced pieces here feel especially at odds with a room meant to feel personal and gathered over time
- This is the detail-level layer that, more than in almost any other room, determines whether the space feels genuinely authentic or simply themed
Object categories for the bedroom specifically:
Pottery and small vessels:
- A small hand-thrown ceramic dish for jewelry on the nightstand or vanity
- An earthy-glazed small vase for the dried botanicals from idea 7
- Visible throwing lines or slight asymmetry as signals of genuine handcraft
Carved wood objects:
- A small carved wooden box for trinkets
- A hand-carved candle holder
- Visible tool marks or natural wood grain variation, never machine-perfect smoothness
Textile crafts beyond the bedding:
- A small embroidered sachet for the nightstand
- A hand-woven small basket for holding odds and ends
- These smaller textile crafts complement the larger bedding layer from idea 4 without duplicating it
Vintage personal items:
The most meaningful category:
- A small vintage hand mirror for the vanity
- An old tin or box repurposed for jewelry storage
- Items with actual age and history outperform new items styled to look old, wherever access to genuine vintage pieces is possible
Where to source these objects:
Best sources ranked by authenticity:
- Local craft fairs and maker markets (the most authentic, directly supporting actual makers)
- Etsy independent sellers (verify the seller genuinely makes the item, not simply resells mass-produced goods)
- Estate sales and antique shops (genuine vintage, often surprisingly affordable for smaller bedroom-scale objects)
- Avoid large home goods chains selling “vintage-style” or “rustic” mass-produced items that mimic handcraft without the substance
Placement throughout the bedroom:
Where these objects appear:
- The nightstand (per idea 10’s collected approach)
- The vanity surface (per idea 8)
- A small shelf, if the room has one, holding two or three carefully chosen pieces
- Never crowded; even in a room embracing abundance, this specific category benefits from careful, deliberate selection rather than maximum quantity
Cost:
- Hand-thrown pottery (two to three small pieces): $30-100
- Carved wood objects (one to two pieces): $20-70
- Vintage personal items: $15-60
- Total: $65-230
My handcrafted object collection: Slowly replacing the nightstand dish, the vanity’s hairbrush, and the small jewelry box with hand-thrown pottery, a carved wooden box, and a genuinely vintage hand mirror took several months of patient sourcing, but the bedroom now contains nothing that looks like it came from a big box store, every small object carries some texture, history, or maker’s hand behind it.
Handcrafted Object Tips
One meaningful object outperforms five generic ones, especially here:
Quality over quantity in this specific category:
- A single beautiful hand-thrown dish with genuine character does more for the room than a shelf of mass-produced “rustic style” trinkets
- This is among the areas where restraint and careful selection matter more than abundance, even within an aesthetic that otherwise celebrates abundance elsewhere
- Save the budget for fewer, better pieces specifically in this category
Patience as part of the process:
Building the collection slowly:
- This particular layer of the room should be expected to take the longest to complete, often many months or longer
- This patience is not a limitation but part of the authentic process the aesthetic itself represents: a home gathered slowly, not assembled in a single shopping trip
14. A Dedicated Tea Tray or Small Hospitality Corner (Hospitality Extended Into the Private Bedroom)
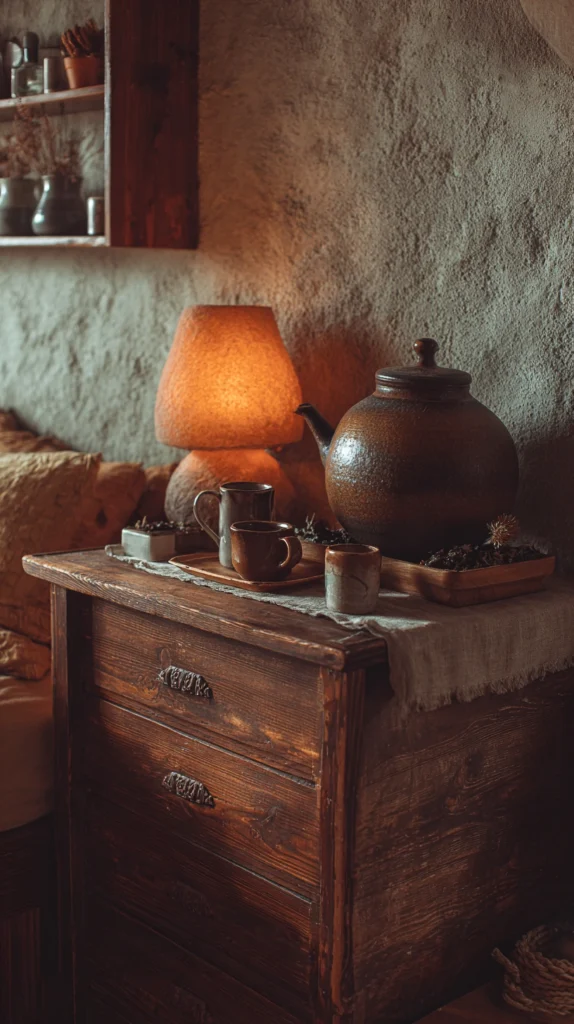
A small tea or beverage setup within the bedroom itself — bringing the hospitality and comfort culture central to the broader aesthetic into the most private room of the home.
My missing bedroom ritual:
What was absent:
- No connection to food, drink, or the small daily comfort rituals central to cottage life anywhere in the bedroom
- Tea and hospitality elements existed in the kitchen and living room but never extended into this more private space
Why this matters even in a private bedroom:
The personal ritual extension:
- The broader aesthetic celebrates small comforts and rituals throughout, not only in shared, guest-facing spaces
- A small private tea setup brings this same value into a space used only by the person who sleeps there, making the ritual entirely personal rather than performed for guests
- This is, in some ways, an even more authentic expression of the aesthetic’s values than a living room display meant partly for visitors
The bedroom tea tray:
What it includes:
- A small tray, kept on the dresser or vanity surface
- A teapot or single cup, ideally hand-thrown pottery (connecting to idea 13)
- A small tin of loose-leaf tea, chosen for evening or sleep-supporting blends (chamomile, valerian root blends)
- A small electric kettle if space allows, or simply pre-prepared tea brought up from the kitchen as part of the nightly routine
Connecting tea to the sleep ritual:
The behavioral sequence:
- Preparing tea becomes part of the same wind-down sequence as moving to the reading nook (idea 5) and dimming the lights (idea 2)
- This small ritual, repeated nightly, builds the same kind of behavioral sleep cue established through consistent routine more generally
- The tea itself, if a calming variety, also contributes a mild physiological relaxation benefit alongside the psychological ritual value
A small honey or sweetener jar:
A charming detail addition:
- A small glass jar of honey on the tray
- Warm amber tones that fit the room’s broader color palette
- A detail that feels genuinely cottage-appropriate without requiring much additional effort or cost
Dried herb sachets nearby:
Connecting to the scent and plant elements:
- A small dried herb bundle (lavender, chamomile) kept near the tea tray
- Reinforces both the visual and olfactory layers of the room’s overall atmosphere
- Connects this idea back to the dried botanicals introduced in idea 7
Making it genuinely used, not just decorative:
The authenticity test:
- A beautiful tea tray that never actually gets used eventually feels hollow, regardless of how well it photographs
- Committing to actually preparing and drinking tea most evenings, even simply, transforms this from decor into genuine practice
- This single habit does more for authentic atmosphere than any object placement alone could achieve
Cost:
- Small teapot and cup (hand-thrown or vintage): $30-90
- Tea tin and tea: $15-30
- Small tray: $10-25
- Honey jar and herb sachet: $10-20
- Total: $65-165
My bedroom tea tray result: A small hand-thrown teapot and cup on a wooden tray on my dresser, with a tin of chamomile and lavender tea kept beside it, became a genuine nightly habit rather than a styled object, preparing this small cup of tea each evening now signals the start of the sleep wind-down more reliably than any alarm or reminder ever could.
Bedroom Tea Tray Tips
Choose genuinely calming tea varieties:
Supporting the sleep function, not just the aesthetic:
- Chamomile, valerian root, and lavender-based blends carry mild relaxation properties beyond simply the ritual value
- Avoid caffeinated teas for this specific evening tray, even if a particular blend is otherwise appealing, since the goal here is supporting sleep rather than working against it
Electric kettle safety in the bedroom:
A practical consideration:
- If including an actual kettle rather than bringing prepared tea up from elsewhere in the home, choose an auto-shutoff model
- Keep it on a stable, heat-safe surface away from any fabric or curtains
- This small safety consideration allows the convenience of an in-room kettle without introducing unnecessary risk
Choosing Your Hobbitcore Bedroom Priorities
By foundational impact:
Start here (the foundation):
- Curved or canopied bed frame (idea 1): the room’s central architectural piece
- Low, warm, layered lighting (idea 2): the atmosphere and sleep-compatible foundation
- Textured or arched headboard wall (idea 3): the most visible surface, treated with intention
Then build outward:
- Abundant soft bedding layers (idea 4)
- Heavy curtains for enclosure (idea 6)
- Plants and dried botanicals (idea 7)
Finally, the personal layer:
- Collected nightstand (idea 10)
- Handcrafted objects throughout (idea 13)
- Tea tray ritual (idea 14)
By budget level:
Under $200:
- Lighting overhaul with mushroom lamps (idea 2)
- Dried botanicals and one or two low-light plants (idea 7)
- Curved curtain rod swap (idea 11)
- Tea tray setup (idea 14)
$200-600:
- All of the above, plus
- Limewash headboard wall (idea 3)
- Bedding layer building (idea 4)
- Heavy curtains (idea 6)
$600-1,500:
- All of the above, plus
- Secondhand curved or sleigh bed frame (idea 1)
- Reading nook chair and styling (idea 5)
- Vanity corner with vintage mirror (idea 8)
$1,500+:
- All of the above, plus
- New investment curved bed frame
- Beam treatment above the bed (idea 9)
- A larger collection of handcrafted and vintage objects built over time (idea 13)
By effort level:
Lowest effort, immediate impact:
- Warm bulb swap throughout the room
- Curved curtain rod replacement
- Tea tray setup
Moderate effort:
- Headboard wall limewash
- Bedding layer assembly
- Reading nook creation
Higher effort, ongoing:
- Sourcing the curved bed frame (often requires patience for the right secondhand find)
- Building the handcrafted object collection (deliberately gradual)
- Beam installation above the bed
Maintenance Reality
Keeping the bedroom feeling genuine over time:
Weekly:
- Water bedroom plants
- Reset the reading nook and collected nightstand if disturbed
- Refresh the tea tray supplies
Monthly:
- Dust handcrafted objects gently
- Check LED candle batteries and timer settings
- Launder bedding layers per their specific material care needs
Ongoing:
- Continue sourcing handcrafted and vintage pieces slowly, never rushing this particular layer
- Allow the room to keep evolving rather than considering it permanently finished
My Complete Hobbitcore Bedroom Transformation
What I built over ten months:
Month 1-2 ($220):
- Replaced all bulbs with warm 2200K lighting
- Added two mushroom lamps
- Applied limewash to the headboard wall
Month 3-5 ($340):
- Found a secondhand oak sleigh bed at an estate sale
- Built the layered bedding system with a vintage quilt
- Added heavy forest green curtains with blackout lining
Month 6-8 ($280):
- Created the reading nook with a secondhand barrel chair
- Set up the vanity corner with a vintage mirror
- Added the first low-light plants and dried botanicals
Month 9-10 ($190):
- Built the bedroom tea tray ritual
- Curated the collected nightstand
- Added the first handcrafted pottery pieces
Total investment: $1,030 over ten months Approach: Gradual and patient, allowing genuine collection to happen Result: A bedroom that finally feels like a den to retreat into rather than a room that simply contains a bed
Getting Started This Weekend
Begin with light and the wall behind the bed, not the furniture.
This weekend:
Step 1 — Replace the bulbs:
- Every bulb in the bedroom switched to warm 2200-2700K
- Add one mushroom or low lamp if none currently exists
- This single change affects every future decision in the room
Step 2 — Test the headboard wall treatment:
- Try a limewash sample or simply paint a deep earthy color sample on the wall behind the bed
- Live with it for a few days before committing to the full wall
Step 3 — Start the bedding layer:
- Add one chunky knit throw or one secondhand quilt to the existing bedding this weekend
- This single addition begins building the abundant, collected feeling without requiring a full bedding replacement yet
My recommendation:
Light and wall color first, always:
- Every other change in this list coordinates more easily once the room’s foundational warmth is established
- The bed frame, while important, can be sourced patiently over subsequent months without delaying the rest of the transformation
Live with these three changes for two weeks, then choose your next priority based on what the room still seems to be asking for.
Now go turn your bedroom into the warm, round, earthen den it was always meant to become.
Quick Summary
The 14 hobbitcore bedroom ideas:
Architectural foundation:
- Curved or canopied bed frame (idea 1): the room’s central organic anchor
- Textured or arched headboard wall (idea 3): the most visible surface, treated with intention
- Wood beam or paneling above the bed (idea 9): structural detail at the most-viewed vantage point
- Round or organic window treatments (idea 11): softening the window’s hard edges
Light and atmosphere:
- Low, warm, layered lighting (idea 2): sleep-compatible hobbit lighting
- Heavy curtains or blackout drapery (idea 6): sealing out light like an underground den
- Hearth-adjacent candlelight (idea 12): warmth without an actual fireplace
Texture and softness:
- Abundant soft bedding layers (idea 4): quilts, knits, and natural fiber abundance
Functional destinations:
- A bedroom reading nook (idea 5): a second cozy destination beyond the bed
- A vanity or dressing corner (idea 8): a personal ritual space
- A bedroom tea tray (idea 14): hospitality extended into private space
Living and growing:
- Plants and dried botanicals (idea 7): greenery calibrated for low light and calm
Personal authenticity:
- A collected, slightly cluttered nightstand (idea 10): personal objects over minimalist surfaces
- Handcrafted and vintage objects (idea 13): the final layer of authentic detail
The philosophical core, adapted for sleep:
Reject:
- Sharp corners and straight platform bed frames
- Bright overhead lighting used until the moment of sleep
- Bare, minimalist nightstands and surfaces
- Mass-produced, perfectly uniform decor objects
- Thin curtains that let in disruptive light
Embrace:
- Curves in the bed frame, mirror, and window treatment
- Low, warm, layered light that transitions into genuine darkness for sleep
- Collected, personal objects on every intimate surface
- Handcrafted, slightly imperfect, characterful pieces
- Heavy, enclosing curtains that create a true sense of a sealed, restful den
Budget guidance:
Under $200: Lighting, plants, curtain rod, tea tray $200-600: Add headboard wall treatment, bedding layers, heavy curtains $600-1,500: Add the curved bed frame, reading nook, vanity corner $1,500+: Beam treatment, investment furniture, a fully built handcrafted object collection
Essential rules:
Always:
- Prioritize warm light and genuine sleep darkness as equally important goals
- Choose curves over straight lines wherever the bed and its surrounding elements are concerned
- Build the handcrafted and personal object layers gradually, never all at once
- Let the bedding feel abundant and collected rather than matched and minimal
Never:
- Use cool-toned overhead lighting as the room’s primary light source
- Choose a platform bed with sharp modern lines as the room’s centerpiece
- Skip the blackout consideration in favor of aesthetics alone
- Rush the vintage and handcrafted object sourcing process
Common mistakes:
- Adding hobbitcore textiles to a room with an unchanged sharp modern bed frame (the frame undermines everything else)
- Choosing warm decor while keeping cool overhead lighting as the primary nightly light source
- Treating the headboard wall as an afterthought rather than the room’s most important surface
- Buying all handcrafted-style objects from one mass retailer trip instead of sourcing genuinely over time
- Forgetting that a bedroom, unlike a living room, must also function as a genuine sleep environment, not only an aesthetic one
Remember: The bed frame and the wall behind it are the foundation everything else in the room builds from, light needs to satisfy two different jobs in a bedroom (warm atmosphere while awake, genuine darkness while asleep) in a way no other room requires, the nightstand and small personal objects carry more intimate weight in a bedroom than equivalent objects do in a shared living space, heavy curtains serve both the aesthetic underground-den reference and the practical sleep-darkness need simultaneously, and the entire transformation succeeds when the room feels like a den built specifically for rest rather than a generically decorated space that happens to contain a bed.